HOW TO
Create polygons from points in ArcGIS Pro
Summary
Polygons can be created from points to determine the distribution pattern of point features. For example, creating soil maps based on irregular point samplings of soil types, simulating the cellular coverage network based on certain patterns and attributes, or studying the distribution and perimeter of chemical leaks.
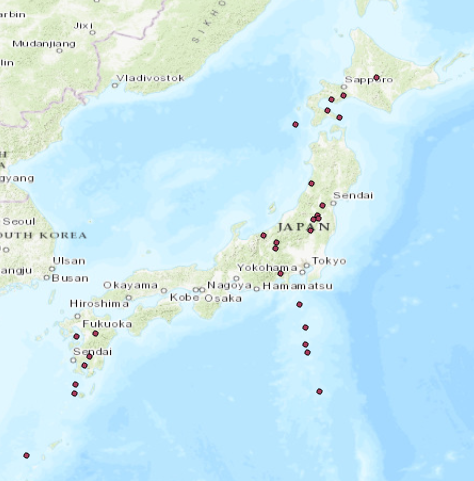
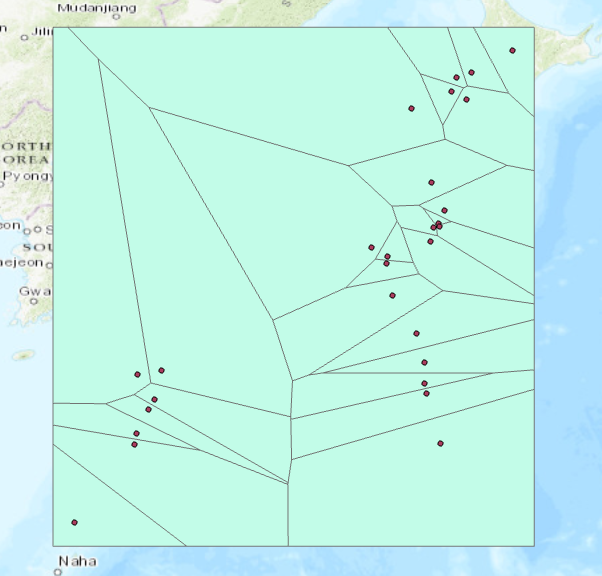
The image below shows volcano locations across Japan. In this article, the polygons are created from points to observe the distribution pattern of volcanoes.
Procedure
There are various methods to create polygons from points in ArcGIS Pro. Follow any of the methods below depending on the objective.
Use the Aggregate Points (Cartography) tool
Note:
This tool is only available with an ArcGIS Desktop Advanced license.
Use the Aggregate Points tool from the Cartography toolbox to create polygons around clustered points located within a specific aggregate distance.
- Click Analysis > Tools to open the Geoprocessing pane in ArcGIS Pro.
- Search for the Aggregate Points (Cartography) tool and click it.
- Configure the parameters in the Aggregate Points pane.
- Select the layer containing the points data for Input Features, that is, VolcanoJapan.
- Specify the value and unit for Aggregation Distance, that is, 250 Kilometers. This is the maximum distance in which points are aggregated into the same polygon. Points located beyond this distance are not aggregated.
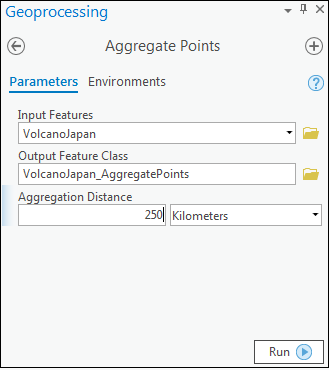
- Click Run.
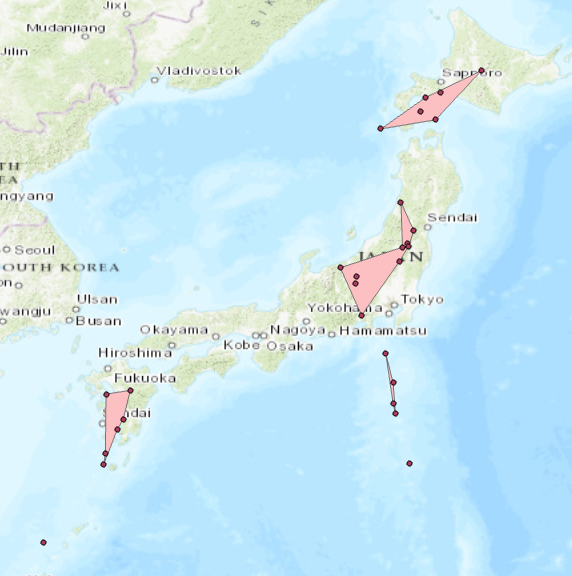
The image below shows four polygons created from points located within a maximum distance of 250 kilometers from one another. The two points (outliers) located beyond the aggregation distance are not included in any polygon.
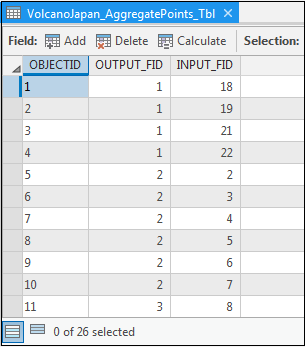
A stand-alone one-to-many relationship table is created to link the polygons created (OUTPUT_FID) to the source points (INPUT_FID, same as OBJECTID of point features). Only points aggregated into polygons are listed in this table; outliers are excluded.
Use the Minimum Bounding Geometry (Data Management) tool
Note:
This tool is available with all ArcGIS Desktop licenses. However, the function is limited with a Basic or Standard license.
Use the Minimum Bounding Geometry tool from the Data Management toolbox to create the smallest bounding polygon enclosing all input points based on the specified attribute and geometry.
- Click Analysis > Tools to open the Geoprocessing pane in ArcGIS Pro.
- Search for the Minimum Bounding Geometry (Data Management) tool and click it.
- Configure the parameters in the Minimum Bounding Geometry pane.
- Select the layer containing the points data for Input Features, that is, VolcanoJapan.
- Select Convex hull from the drop-down list for Geometry Type. This creates the smallest convex polygon enclosing all point features.
Note:
A convex polygon is a polygon with interior angles of less than 180 degrees.
- Select List for Group Option.
- Select the attribute(s) to draw the polygon(s) for Group Field(s), that is, LOCATION. Polygons are created based on the location attribute.
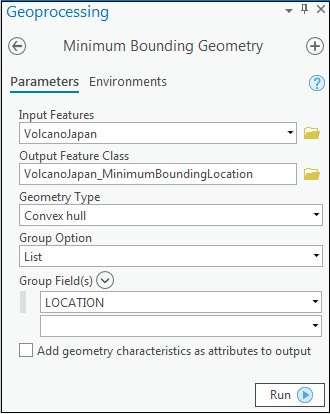
- Click Run.
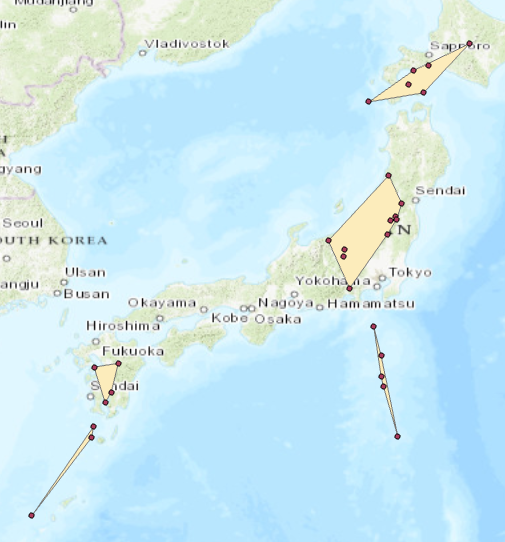
The image below shows five convex polygons created at five different locations, namely, Hokkaido, Honshu, Izu, Kyushu, and Ryukyu.
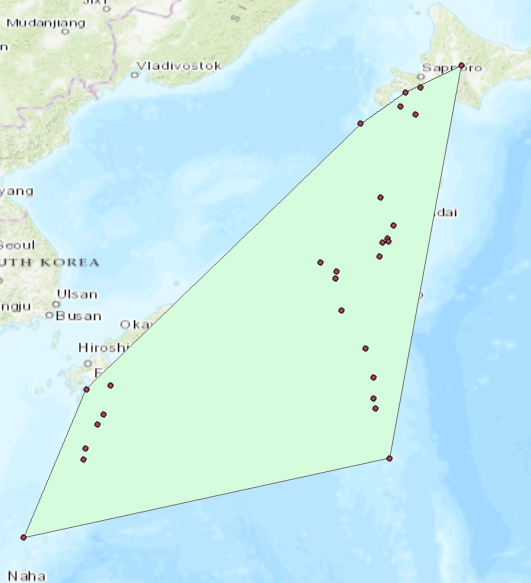
Note:
By default, Group Option is set to All. Running the Minimum Bounding Geometry tool on all points creates one large polygon that covers all the point features, as shown in the image below.
Use the Create Thiessen Polygons (Analysis) tool
Note:
This tool is available with an ArcGIS Desktop Advanced license.
Use the Create Thiessen Polygons tool from the Analysis toolbox to create Thiessen polygons (also known as Voronoi polygons) that enclose point features. Any location within a Thiessen polygon is closer to the associated point feature compared to any point feature in other Thiessen polygons.
- Click Analysis > Tools to open the Geoprocessing pane in ArcGIS Pro.
- Search for the Create Thiessen Polygons (Analysis) tool and click it.
- Configure the parameters in the Create Thiessen Polygons pane. Select the layer containing the points data for Input Features, that is, VolcanoJapan.
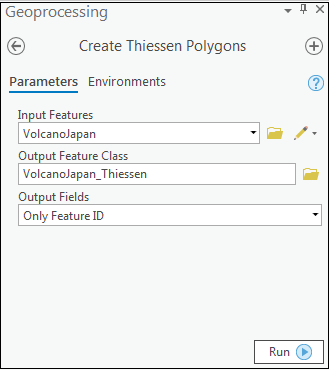
- Click Run.
The image below shows Thiessen polygons created around point features. One point feature is associated with one polygon. Any location within a Thiessen polygon is the nearest to its associated point compared to adjacent points in other Thiessen polygons.
Use the Points To Line (Data Management) and Feature To Polygon (Data Management) tools
Note:
The Points To Line tool is available with all ArcGIS Desktop licenses, while the Feature To Polygon tool is only available with an Advanced license.
Use the Points To Line tool to create lines from points, followed by the Feature To Polygon tool to create polygons within line feature boundaries.
- Click Analysis > Tools to open the Geoprocessing pane in ArcGIS Pro.
- Search for the Points To Line (Data Management) tool and click it.
- Configure the parameters in the Points To Line pane.
- Select the layer containing the points data for Input Features, that is, VolcanoJapan.
- Select an attribute to draw the line for Line Field, that is, LOCATION. Line features are drawn separately at different locations, and are based on the OBJECTID sequence.
- Check the Close Line check box to create closed line features.
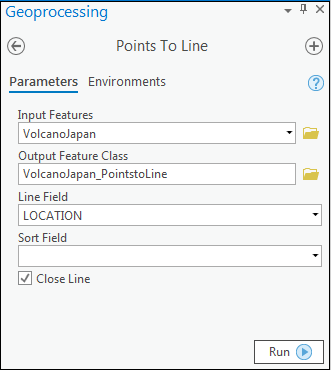
- Click Run.
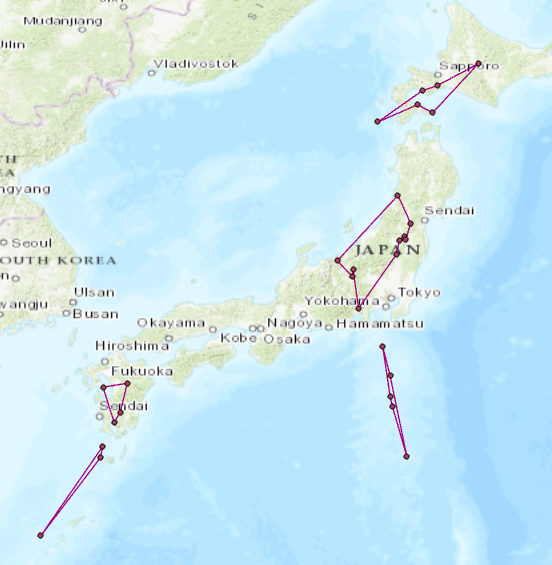
The image below shows closed line features drawn according to the OBJECTID sequence at five different locations.
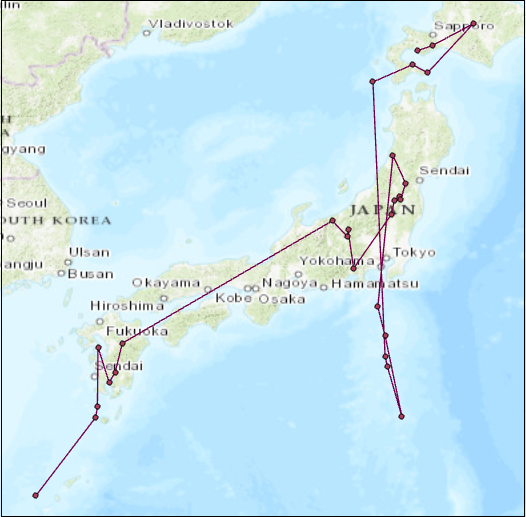
Note:
An unspecified Line Field and randomly located points (based on the OBJECTID sequence) return line features with irregular shapes or patterns, as shown in the image below. This creates a disorganized representation.
- Search for Feature To Polygon (Data Management) tool in the Geoprocessing pane and click it.
- Configure the parameters in the Feature To Polygon pane. Select the output from Step 3 for Input Features, that is, VolcanoJapan_PointstoLine.
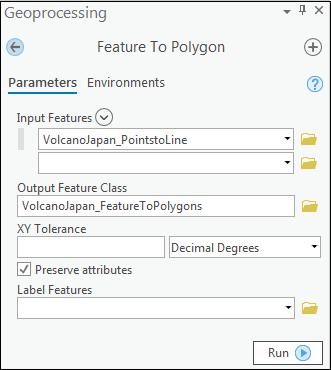
- Click Run.
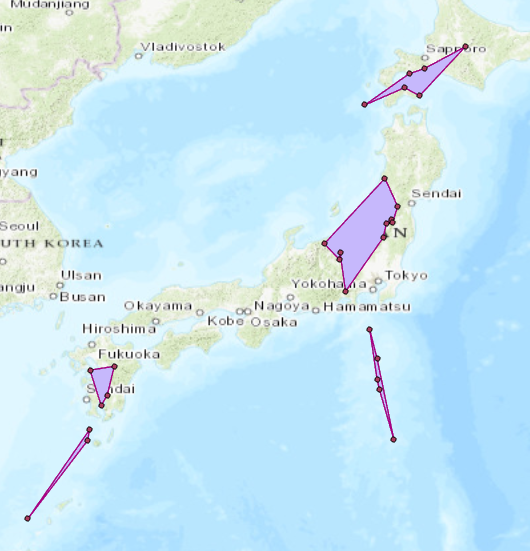
The image below shows polygons created within the line feature boundaries.
Use the Points To Line (Data Management) and Feature Envelope To Polygon (Data Management) tools
Note:
The Points To Line tool is available with all ArcGIS Desktop licenses, while the Feature Envelope to Polygon tool is only available with an Advanced license.
Use the Points To Line tool to create lines from points, followed by the Feature Envelope To Polygon tool to create polygons enveloping the lines. The steps below describe how to create polygons from points.
- Create lines from points using the Points To Line (Data Management) tool in ArcGIS Pro.
- Search for the Feature Envelope To Polygon (Data Management) tool in the Geoprocessing pane and click it.
Note:
The Feature Envelope To Polygon tool works with a multipoint feature class, but not with a point feature class. The tool also allows lines and polygons as input features.
- Configure the parameters in the Feature Envelope To Polygon pane. Select the output from Step 1 for Input Features, that is, VolcanoJapan_PointstoLine.
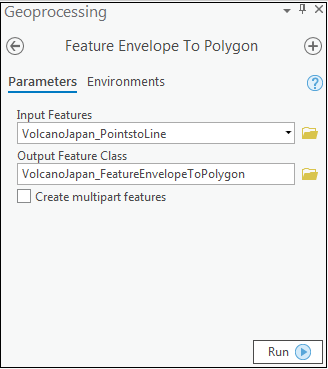
- Click Run.
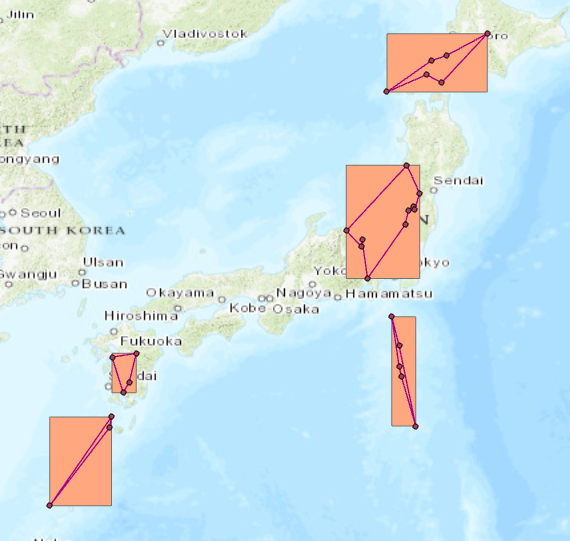
The image below shows five polygons enveloping the line features created at five different locations.
Article ID: 000021848
- ArcGIS Pro 2 x
Get support with AI
Resolve your issue quickly with the Esri Support AI Chatbot.


Related Information
Discover more on this topic
Search for related information
Find training related to this topic
Explore ideas and give feedback
Get help from ArcGIS experts
Start chatting now