HOW TO
Convert polygon features to point features with an ArcGIS Desktop Basic or Standard license
Summary
Converting polygon features to point features can be done using the Production Polygon to Point tool, which is available with a Production Mapping license, or the Feature To Point tool, which is available with an ArcGIS Desktop Advanced license. Conversion is also possible with a Basic or Standard license.
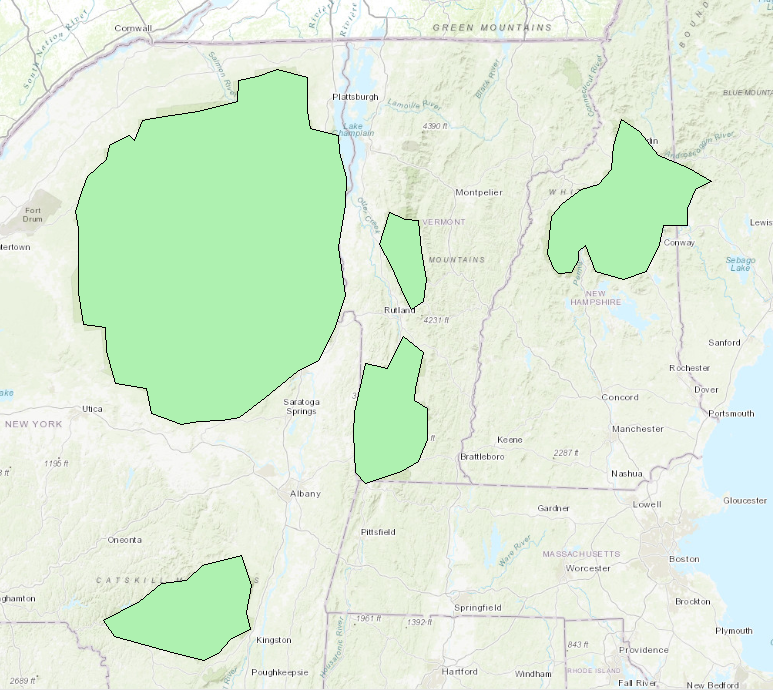
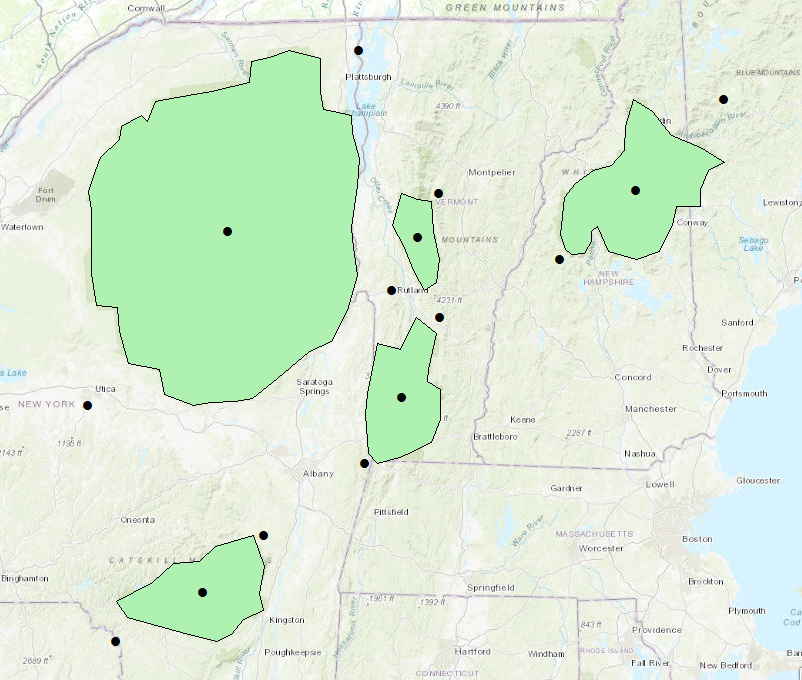
The image below shows polygons of forest reserve areas in the Northeast of U.S. Points representing the maximum extent, minimum extent, and inside centroid for each polygon are to be determined.
Procedure
The following are the steps to convert polygon features to point features with an ArcGIS Desktop Basic or Standard license:
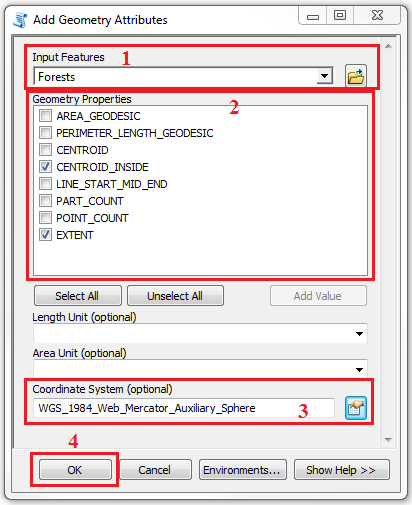
- In ArcMap, click the Search button, and search for the Add Geometry Attributes tool. Click the Add Geometry Attributes tool to open the Add Geometry Attributes dialog box.
- For Input Features, select the polygon layer from the drop-down menu.
- For Geometry Properties, check the desired properties from the given selection.
Note:
Options to create point features are CENTROID, CENTROID_INSIDE, and EXTENT (to create both minimum and maximum extents). More than one selection can be made. For alternative methods to find the centroid location, refer to How To: Calculate feature centroids or How To: Find the centroid of polygons using Calculate Geometry.
- Specify the Coordinate System (optional) if the default coordinate system does not match the coordinate system of the input feature.
- Click OK.
Information on the output point features based on the geometry properties selected is added in the attribute table.

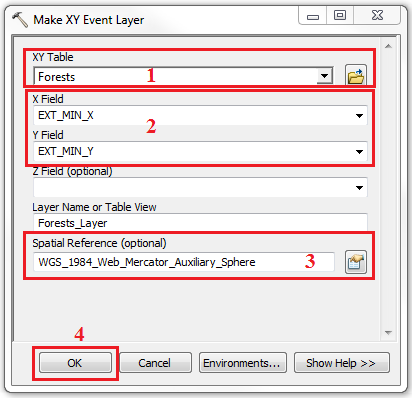
- Project point features on the map view by creating a point layer based on the output in Step 1. Click the Search button, and search for the Make XY Event Layer tool. Click the Make XY Event Layer tool to open the Make XY Event Layer dialog box.
- For XY Table, select the polygon layer.
- For X Field and Y Field, choose the X and Y fields of the Geometry Properties output specified in Step 1. Only one geometry property can be projected at a time.
- Specify the Spatial Reference (optional) if the default coordinate system does not match the coordinate system of the input field.
- Click OK. Repeat Step 2 to project other geometry properties on the map.
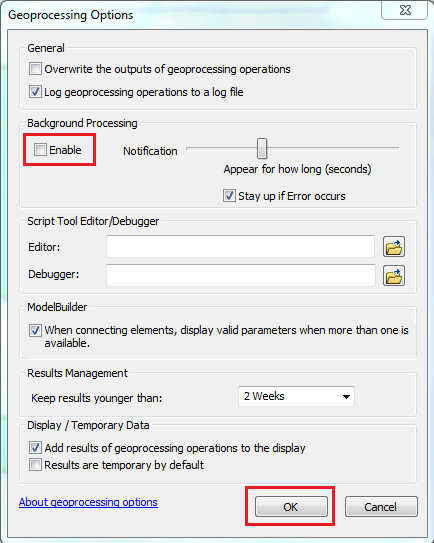
Note:
If point features do not appear on the map view, disable the background geoprocessing by navigating to Geoprocessing > Geoprocessing Options. In the Background Processing section, uncheck the Enable option, and click OK.
The image below shows the maximum extent, minimum extent, and inside centroid of each polygon. The Make XY Event Layer tool is run three times to project the three geometry properties.
Note:
The layer created by the Make XY Event Layer tool is temporary and limited to the current ArcMap session. The data must be exported to create a permanent layer.
- Use the Copy Features tool to create a feature class containing the point features created in Step 2. Click the Search button, and search for the Copy Features tool. Click the Copy Features tool to open the Copy Features dialog box. Refer to ArcMap: Copy Features for more information. A point feature class is created to store point features in a geodatabase.
Article ID: 000018657
- ArcMap
Get support with AI
Resolve your issue quickly with the Esri Support AI Chatbot.


Related Information
Discover more on this topic
Search for related information
Find training related to this topic
Explore ideas and give feedback
Get help from ArcGIS experts
Start chatting now