HOW TO
Automatically sign in to Survey123 via the app launcher in Portal for ArcGIS
Summary
ArcGIS Survey123 can be configured with Portal for ArcGIS to sign in automatically. The App Launcher is a convenient window from which organization members can open web apps available to them. Adding Survey123 to the App Launcher in Portal simplifies frequent user access to the application, eliminating the need to sign in when launching the app.
This article provides instructions to add Survey123 to the App Launcher, so automatic sign-in is allowed when accessed in Portal for ArcGIS.
Procedure
For this article, a URL is created to use Survey123 with Portal for ArcGIS, and Survey123 is added to the App Launcher in Portal.
- Create the URL to use Survey123 with Portal.
- Navigate to the Portal homepage and copy the portal URL.
- Browse to the following URL and paste the Portal URL in the designated section. The website opens in developer mode, with a message in the top bar showing Portal URL. In this example, the https://survey123.arcgis.com/?portalUrl=https://portal.domain.com/arcgis URL is used.
https://survey123.arcgis.com/?portalUrl=[THE PORTAL URL]
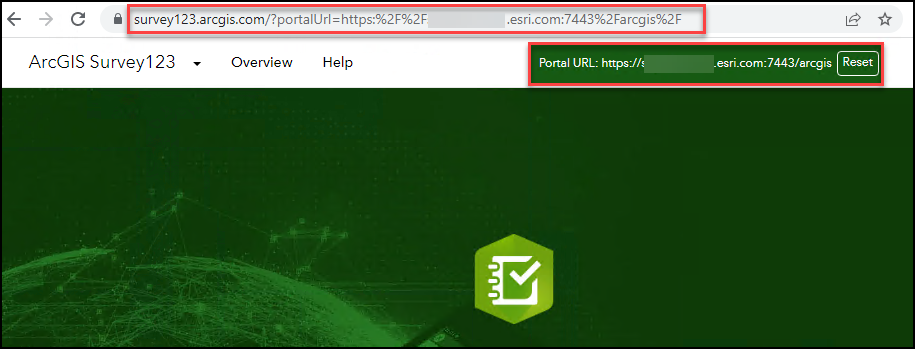
- Sign in to the website with Portal credentials.
- Copy the URL from the URL bar.
- Sign in to Portal for ArcGIS.
- Create a customized Survey123 application using the generated URL.
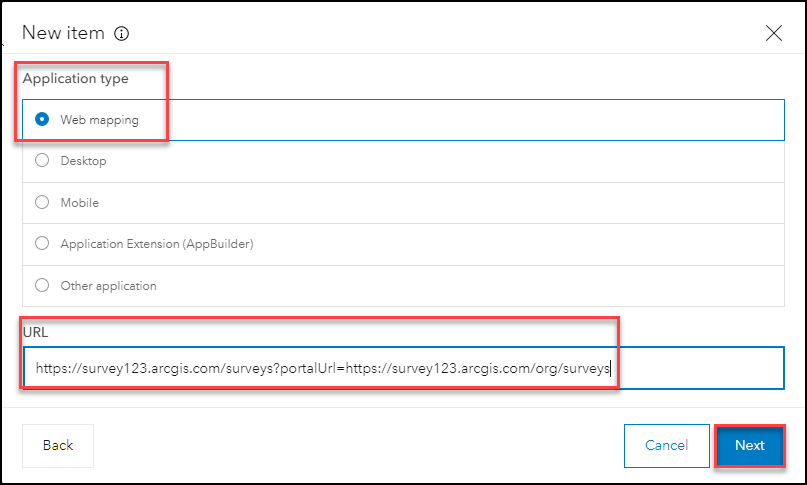
- Navigate to Content > New item and select Application.
- In the New item dialog box, select Web mapping for Application type.
- Fill in the URL field with the URL from Step 1(d). Click Next.
- Specify the Title, Tags, and Summary fields. Select the appropriate folder in the Folder field. Click Save.
Note:
Alternatively, select Other application for Application type, and click Next.

Update the data source for the application. Navigate to the application's item details page, and select Settings. Paste the edited URL from Step 1d to the Data Source URL field, and click Save.
Note:
Additional configuration is required for Portal for ArcGIS versions 10.4, 10.4.1, and 10.5. Refer to How To: Configure Portal for ArcGIS to work with Survey123 for more information. Additional configuration is not required for versions 10.5.1 and above as these versions are pre-configured to connect to ArcGIS Survey123.
- Navigate to Content > My Content. Open the item details page of the application and copy the URL from the URL bar.

Note:
For Portal for ArcGIS version 10.9.1 and prior, steps 5 to 7 differ. Refer to Portal for ArcGIS: Add web apps for more information.
- Navigate to Organization > Settings.
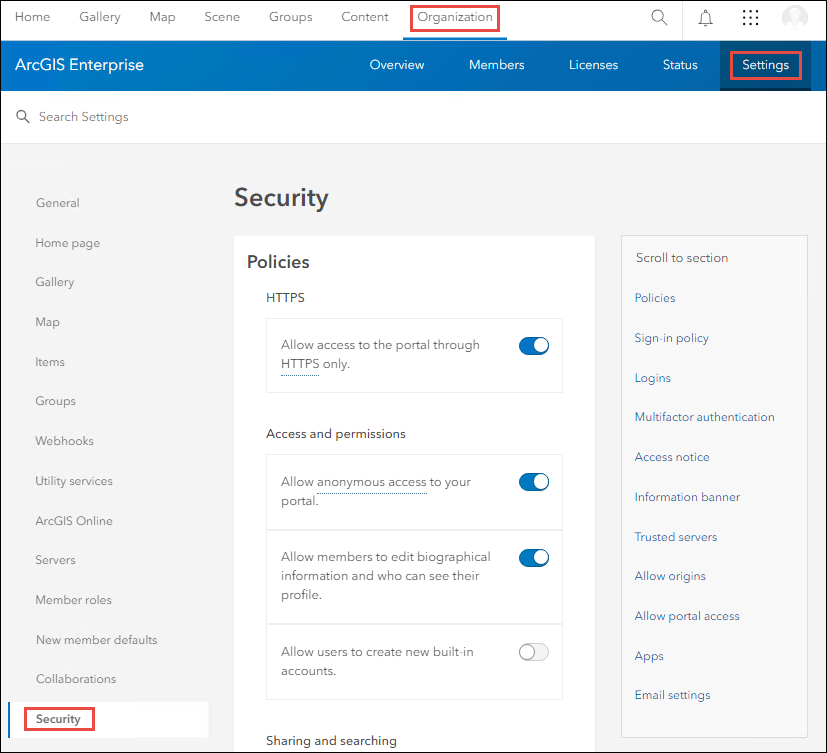
- Select the Security tab and scroll to the bottom.
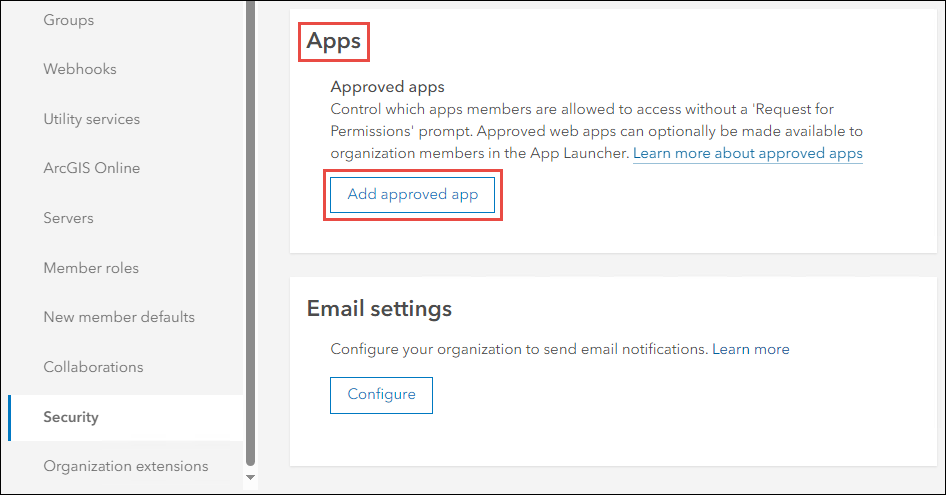
- Under the Apps heading, click Add approved app to add the customized Survey123 for ArcGIS application to the app launcher, and click Save. Refer to Portal for ArcGIS: Manage apps in the app launcher for more information.
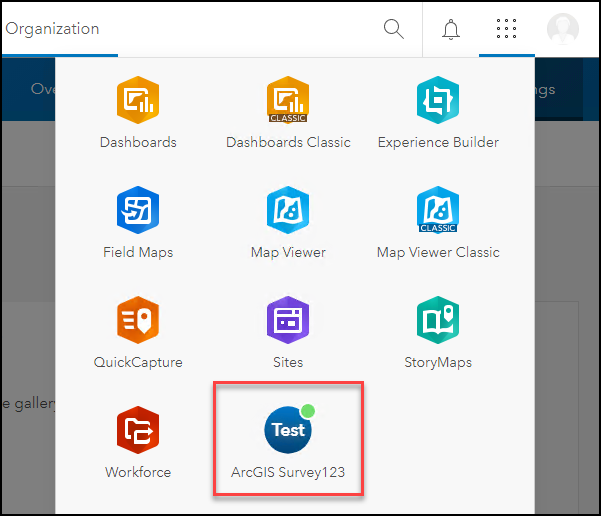
- Click Apps
 to access the app launcher, and click the newly added application to navigate to the ArcGIS Survey123 home page without needing to sign in.
Article ID: 000021099
- Portal for ArcGIS
- ArcGIS Survey123 Website
Get support with AI
Resolve your issue quickly with the Esri Support AI Chatbot.


Related Information
Discover more on this topic
Search for related information
Find training related to this topic
Explore ideas and give feedback
Get help from ArcGIS experts
Start chatting now