HOW TO
Add an image at the top of pop-up windows in ArcGIS Online
Summary
In the ArcGIS Online map viewer, images included in pop-ups are automatically placed at the bottom of the pop-up window. When viewing information about a feature in the pop-up, the default position of images at the bottom follows design convention, whereby supporting media, such as images, is displayed last, after the title of the pop-up and attribute information.
However, ArcGIS Online does provide the functionality to display images at any position in the pop-up window to allow users more flexibility when customizing pop-ups using the Custom Attribute Display.
The instructions provided describe how to add an image at the top of the pop-up window in ArcGIS Online.
Note:
Before proceeding, ensure that the layer contains a field to store the URL for the images.
Procedure
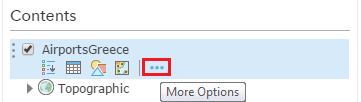
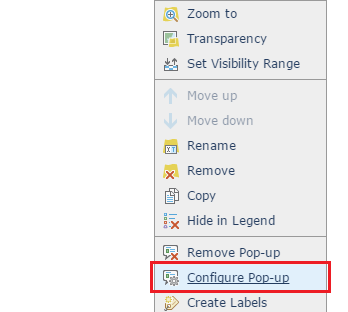
- In the Contents pane, click More Options under the layer name, and select Configure Pop-up.
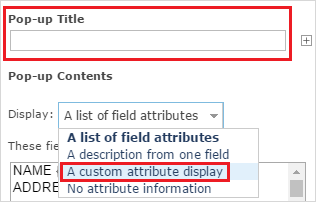
- When the Configure Pop-up pane opens, under the Pop-up Contents section, select A custom attribute display from the Display drop-down list. Optionally, to remove the title in the pop-up window, make the Pop-up Title field blank.
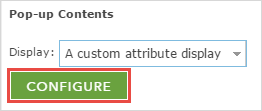
- Click CONFIGURE to open the Custom Attribute Display window. The Custom Attribute Display window allows the use of a combination of rich text, attributes, links, and supported HTML, providing control and flexibility over the display of pop-ups.
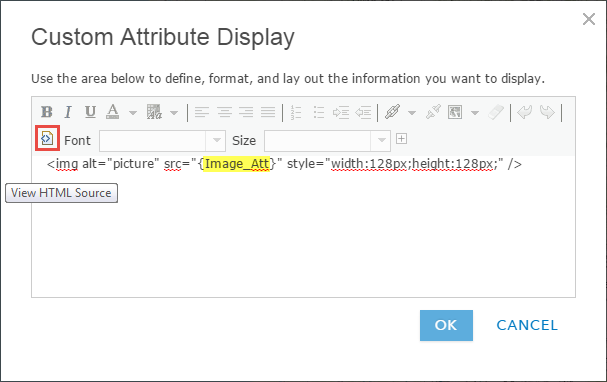
- Add the image in the pop-up window using HTML coding. To do so, click the View HTML Source button in the Custom Attribute Display window to switch to the HTML editor.
- Type in the following HTML code to insert the image:
<img alt="picture" src="{Image_Att}" style="width:128px;height:128px;" />
- After inserting the image, click the View HTML Source button again to switch back to the rich-text editor (WYSIWYG).
- Below the image, add more attribute information, and make further customization as desired. The field information can be added by clicking the Add Field Name button on the Custom Attribute Display toolbar.
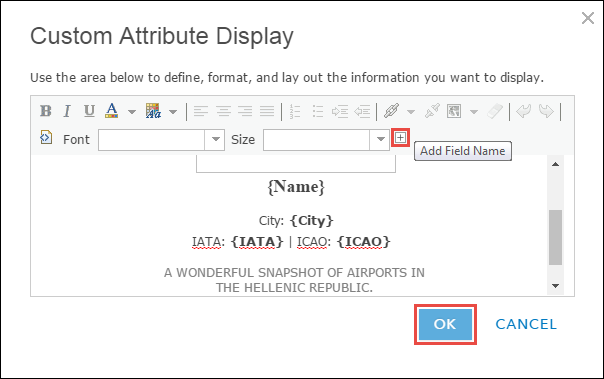
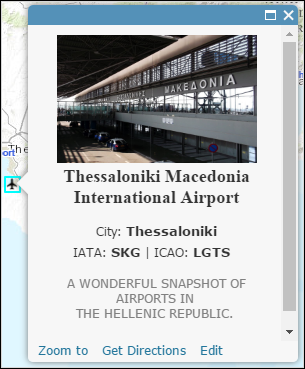
- Click OK to close the Custom Attribute Display window, and click OK in the Configure Pop-up pane to save the changes. When a feature on the web map is clicked, the image displays at the top of the pop-up window, followed by the attribute information.
Article ID: 000015368
- ArcGIS Online
Get support with AI
Resolve your issue quickly with the Esri Support AI Chatbot.


Related Information
Discover more on this topic
Search for related information
Find training related to this topic
Explore ideas and give feedback
Get help from ArcGIS experts
Start chatting now