HOW TO
Create contour lines from .xyz files
Summary
An XYZ file (*.xyz) is an ASCII file or a data file containing a set of vertices with floating point numbers representing the X, Y, and Z coordinates of a vertex.
AT3D_XYZ V01.00 Mesh A
Rows 6
Columns 4
Order By_Row
Data
-7.430273 -6.964596 8.349577
1.189729 13.366331 15.433069
25.109549 24.411971 16.577943
39.351235 49.752780 24.915375
-8.720664 -3.218530 -0.832028
-0.100661 17.112397 6.251463
It is not possible to open XYZ files in ArcMap directly; hence, the file must first be converted to point features and imported to ArcMap. With the elevation values in the XYZ file, the data can be used to create terrain for 3D modeling or contour lines.
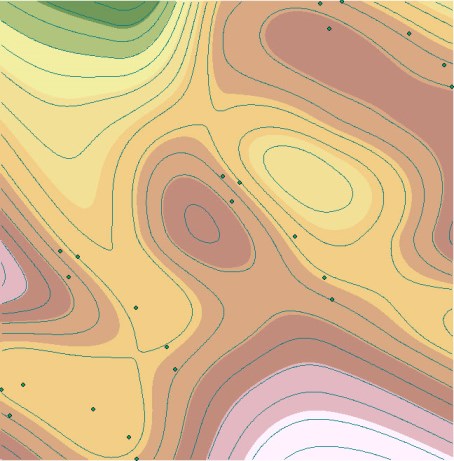
The instructions provided describe how to create contour lines from an .xyz file.
Procedure
Use 3D Analyst tools
- Use the ASCII 3D To Feature Class tool to convert the .xyz file to point features.
- In the Catalog window, navigate to System Toolboxes > 3D Analyst Tools > Conversion > From File > ASCII 3D to Feature Class.
- Select the file for the input.
- Specify the location of the output feature class.
- Select POINT as the output feature class type.
- Click OK. A new point feature is created.
For more information on how to use the ASCII 3D To Feature Class tool, refer to the following ArcGIS Web Help page: ASCII 3D to Feature Class.
- Use the Spline tool to create a DEM.
Note:
Use one of the surface interpolation methods such as IDW, Kriging, Natural Neighbor, and Spline to create a DEM. For more information on the available interpolation methods in ArcMap, refer to the following ArcGIS Web Help page: Comparing interpolation methods. The simplest method, using Spline is outlined below.
- Navigate to System Toolboxes > 3D Analyst Tools > Raster Interpolation > Spline.
- Select the point features for the input.
- Select the Shape field as the Z value field.
- Specify the location of the output raster.
- Click OK. A DEM is created.
For more information on how to use the Spline tool, refer to the following ArcGIS Web Help page: Spline.
- Use the Contour tool to create a contour from the DEM.
- Navigate to System Toolboxes < 3D Analyst Tools > Raster Surface > Surface.
- Specify the input raster.
- Specify the output of the polyline features.
- Type the appropriate value in the Contour interval text box.
- Click OK.
For more information on how to use the Contour tool, refer to the following ArcGIS Web Help page: Contour.
Use Spatial Analyst tools
The Spatial Analyst extension does not include the ASCII 3D To Feature Class tool. Therefore, to generate three points, the .xyz file must first be saved as a .csv file in Microsoft Excel.Open the .csv file in ArcMap and follow steps 2 and 3 above to create the DEM and contours. For a more detailed workflow, refer to the following Esri blog post: XYZ file into ArcMap.
Article ID: 000014519
- ArcMap
Get support with AI
Resolve your issue quickly with the Esri Support AI Chatbot.


Related Information
Discover more on this topic
Search for related information
Find training related to this topic
Explore ideas and give feedback
Get help from ArcGIS experts
Start chatting now