PROBLEM
Fill patterns partially displayed in legend patches in ArcGIS Pro layout
Description
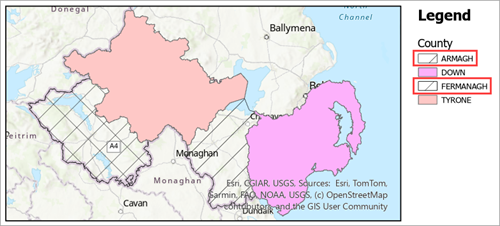
In ArcGIS Pro, when fill symbols with large separation are applied to features, the patterns are only partially displayed in the legend patches on the layout, reducing clarity in map interpretation.
The layout shows multiple features symbolized using widely spaced hatch fill patterns, which are not fully displayed in the legend patches.
Cause
The default patch sizes are automatically set in the layout regardless of the symbol layer separation values, thus causing the issue.
Solution or Workaround
Adjust the legend's patch sizes
In this workaround, the legend’s patch sizes are adjusted simultaneously.
- Open the ArcGIS Pro layout.
- Adjust the legend's patch sizes.
- In the Contents pane, right-click the legend and click Properties.
- In the Elements pane, under Options, under the Legend Items section, click Show properties....
- Under Sizing, specify the Patch width and Patch height values until the fill patterns are fully displayed in the patches.
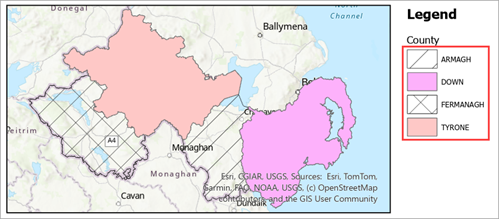
The layout shows the updated legend patches in ArcGIS Pro.
Adjust the legend patches as graphic elements
In this workaround, the legend’s patch sizes are adjusted individually.
- Open the ArcGIS Pro layout.
- Convert the legend to graphics.
Note:
Converting the legend to graphics removes all connections to the map. As a result, changes to the map will not be reflected in the legend.
- In the Contents pane, right-click the legend and click Convert to Graphics.
- In the Contents pane, right-click the converted legend and click Ungroup.
- On the layout, double-click the desired patch and adjust the size until the fill pattern is fully displayed in the legend patch.
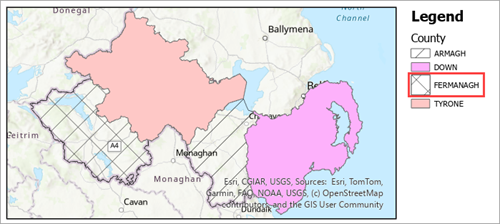
The layout shows the updated legend patch in ArcGIS Pro.
Use a different map frame for the legend reference
In this workflow, the legend's patch size is retained in the layout.
- Open the ArcGIS Pro layout.
- Set the map reference scale of the existing map frame. Refer to ArcGIS Pro: Map reference scales for more information.
- Right-click the map frame, click Activate and adjust the map to the desired extent.
- On the ribbon, click the Layout tab.
- On the Layout tab, under the Map group, click Close Activation.
- In the Contents pane, right-click the map and click Set Reference Scale.
- Add a new map frame. Refer to ArcGIS Pro: Insert a map frame for instructions.
- Change the legend reference map frame.
- In the Contents pane, right-click the legend and click Properties.
- In the Element pane, under Options, ensure the Legend section is expanded.
- Under the Legend section, click the Map frame drop-down and select the newly added map frame.
- Adjust the extent of the new map frame until the fill pattern is fully displayed in the existing legend patches.
- In the Contents pane, uncheck the new map frame to turn visibility off.
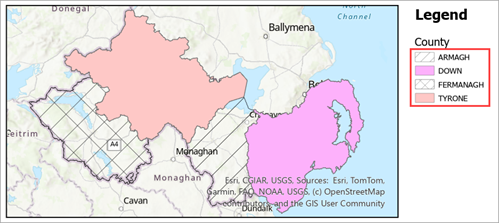
The layout below shows the updated legend patches, referenced to the new map frame in ArcGIS Pro.
Article ID: 000035351
- ArcGIS Pro
Get support with AI
Resolve your issue quickly with the Esri Support AI Chatbot.


Related Information
Discover more on this topic
Search for related information
Find training related to this topic
Explore ideas and give feedback
Get help from ArcGIS experts
Start chatting now