HOW TO
Fill the legend's background in an ArcGIS Pro layout
Summary
In ArcGIS Pro, once a legend is added to a layout, the appearance of the layout can be modified. However, changing the color of the legend's background does not automatically fill the entire background.
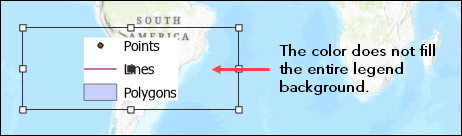
This article provides two workarounds to change the color of the entire background.
Procedure
Use one of the workflows below to modify the legend's background.
Fill the background by adjusting the X and Y gap values
- In ArcGIS Pro, on the Layout tab, right-click the legend, and select Properties.
- In the Element pane, click the Placement
 tab.
tab. - Navigate to Position and select the box in the center of the grid, as shown in the image below.

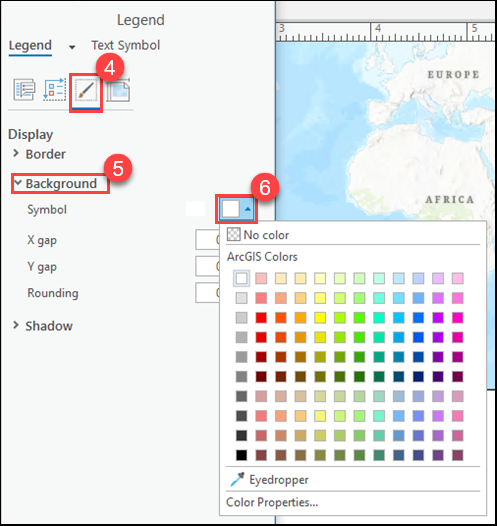
- Click the Display
 tab.
tab. - On the Display tab, navigate to Background.
- For Symbol, click the down arrow to open the color palette. Choose a color to change the legend's background.
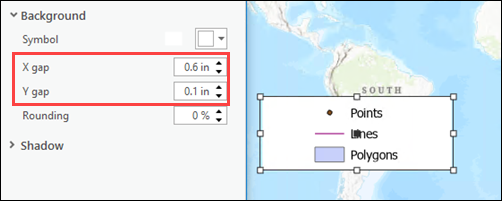
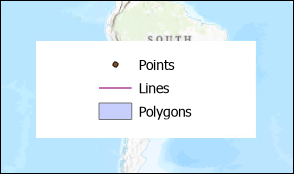
- To fill the background, adjust the X gap and Y gap values to the desired extent. In this example, the X gap value is '0.6 in' and the Y gap value is '0.1 in'. The legend's background is filled, as shown in the image below.
Use a graphic element as the legend's background
- Draw a rectangle element on the layout.
- On the Insert tab, in the Graphics and Text group, select Rectangle.

- On the Layout tab, draw a rectangle over the legend.
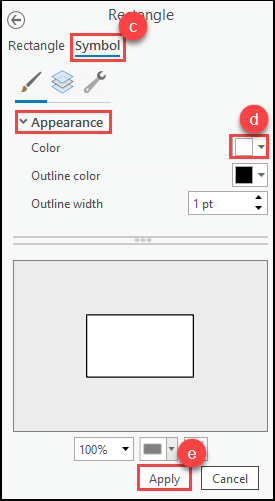
- In the Element pane, click the Symbol tab.
- Under Appearance, for Color, click the down arrow to open the color palette. Choose a color to change the color of the rectangle element.
- Click Apply.
- In the Contents pane, click to select and move the legend layer to position it above the rectangle element layer. The legend is now visible over the rectangle element.
- Adjust the alignment of the rectangle element and the legend.
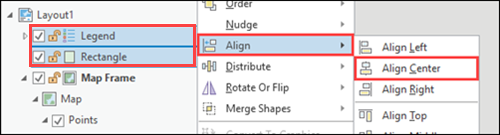
- Press and hold the Shift key on the keyboard, and click to select the legend layer and rectangle element layer in the Contents pane.
- Right-click the selected layers, click Align, and select the alignment for the elements. In this example, Align Center is selected.
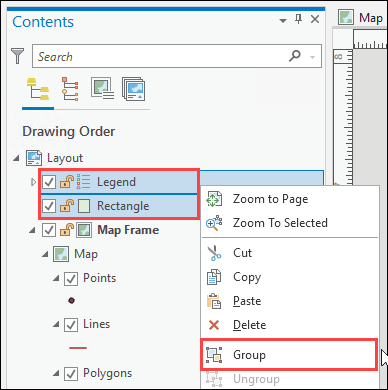
- In the Contents pane, right-click the selected layers and select Group to group the layers. This allows the rectangle element and the legend to be moved and resized simultaneously.
Article ID: 000026478
Software:
- ArcGIS Pro 2 8 x
- ArcGIS Pro 2 7 x
- ArcGIS Pro 2 x
Get support with AI
Resolve your issue quickly with the Esri Support AI Chatbot.


Related Information
Discover more on this topic
Search for related information
Find training related to this topic
Explore ideas and give feedback
Get help from ArcGIS experts
Start chatting now