HOW TO
Join CSV data into a polygon feature layer and export the dataset as a GML file in ArcGIS Pro
Summary
In ArcGIS Pro, multiple layers or tables can be joined into a single table. The joined dataset table can be exported into any format supported by the ArcGIS Data Interoperability extension. This article provides two workflows to first join data layers with data tables, then export the dataset as a GML file in ArcGIS Pro.
In this example, the user is joining the HK2016 Census CSV standalone table to the HKDistrict18 feature layer, then exporting the feature layer as a GML file.
Procedure
Use the Add Join (Data Management) tool to join the data layers to the data table
The Add Join (Data Management) tool joins a layer table to another layer table based on a similar field.
- Open the ArcGIS Pro project.
- In the Contents pane, right-click the feature layer and click Attribute Table to display the layer data.
- Right-click the CSV standalone table and click Open to display the census data.
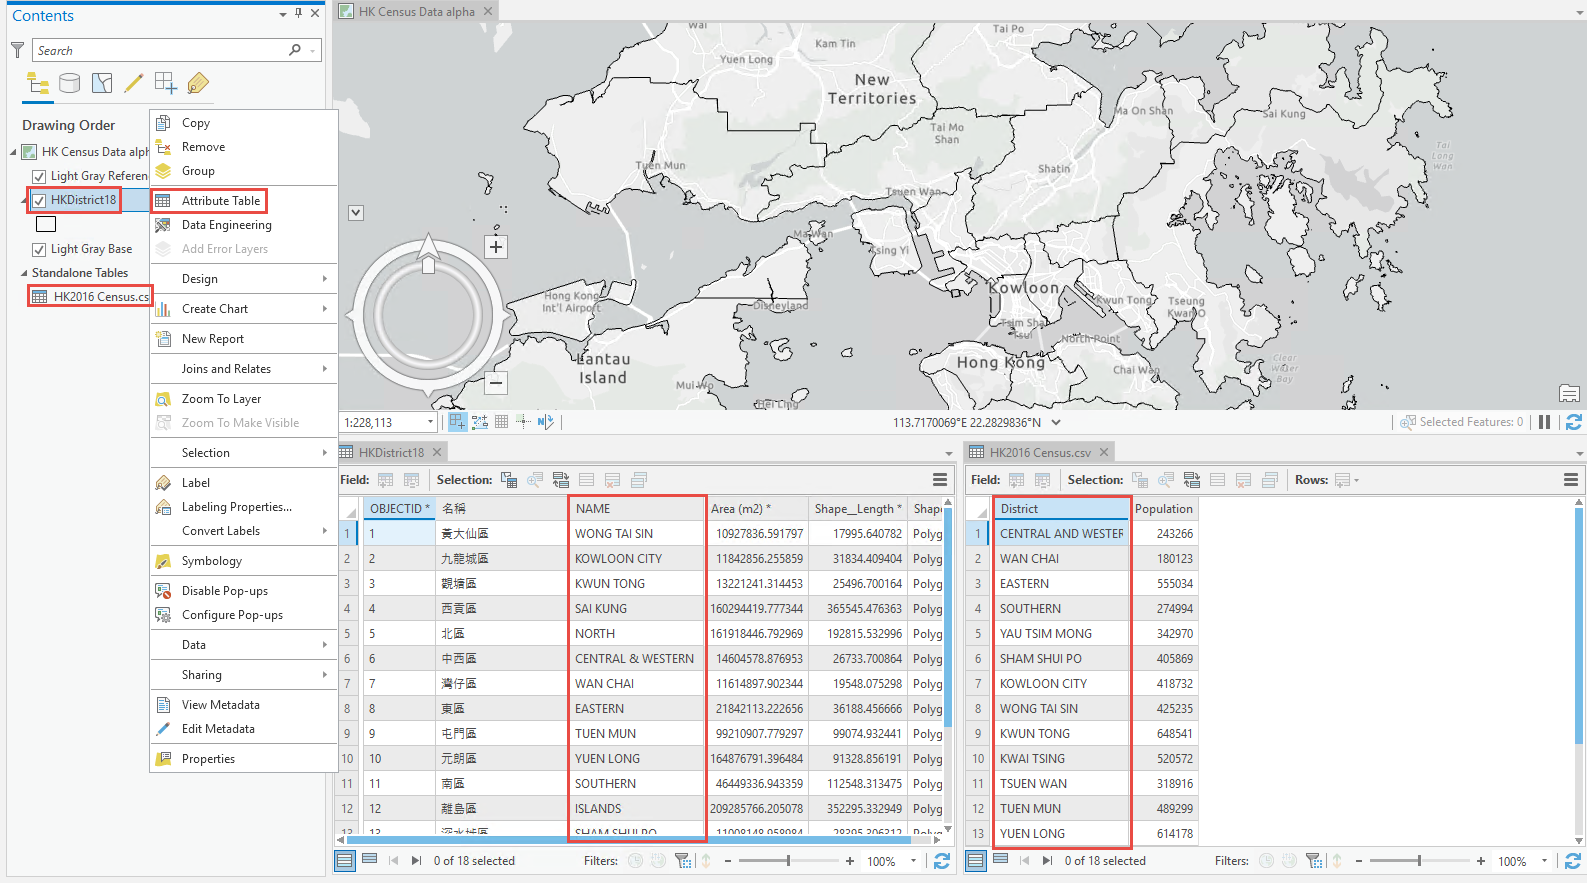
- Ensure there are similar field data among the two field tables to join.
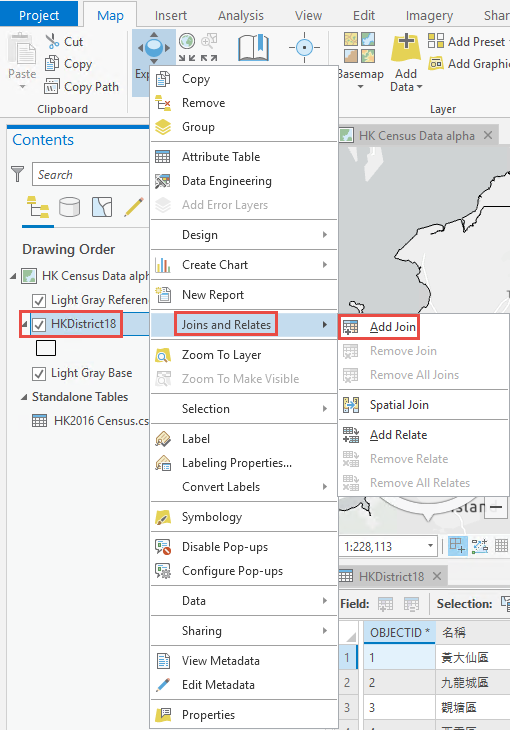
- In the Contents pane, right-click the feature layer and click Joins and Relates > Add Join.
- In the Add Join dialog box, configure the following parameters.
- For Input Table, select the feature layer.
- For Input Join Field, select the field with a similar field data to the standalone table.
- For Join Table, select the standalone table.
- For Join Table Field, select the field with a similar field data to the feature layer.
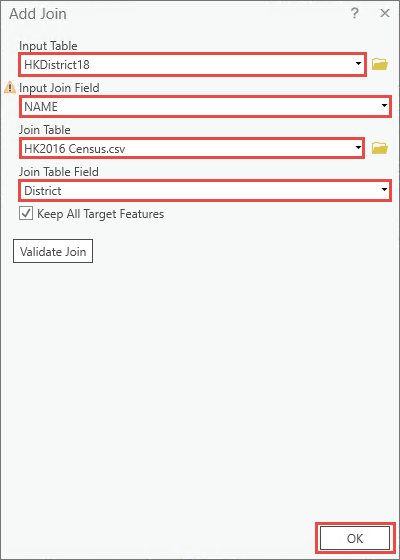
- Click OK.
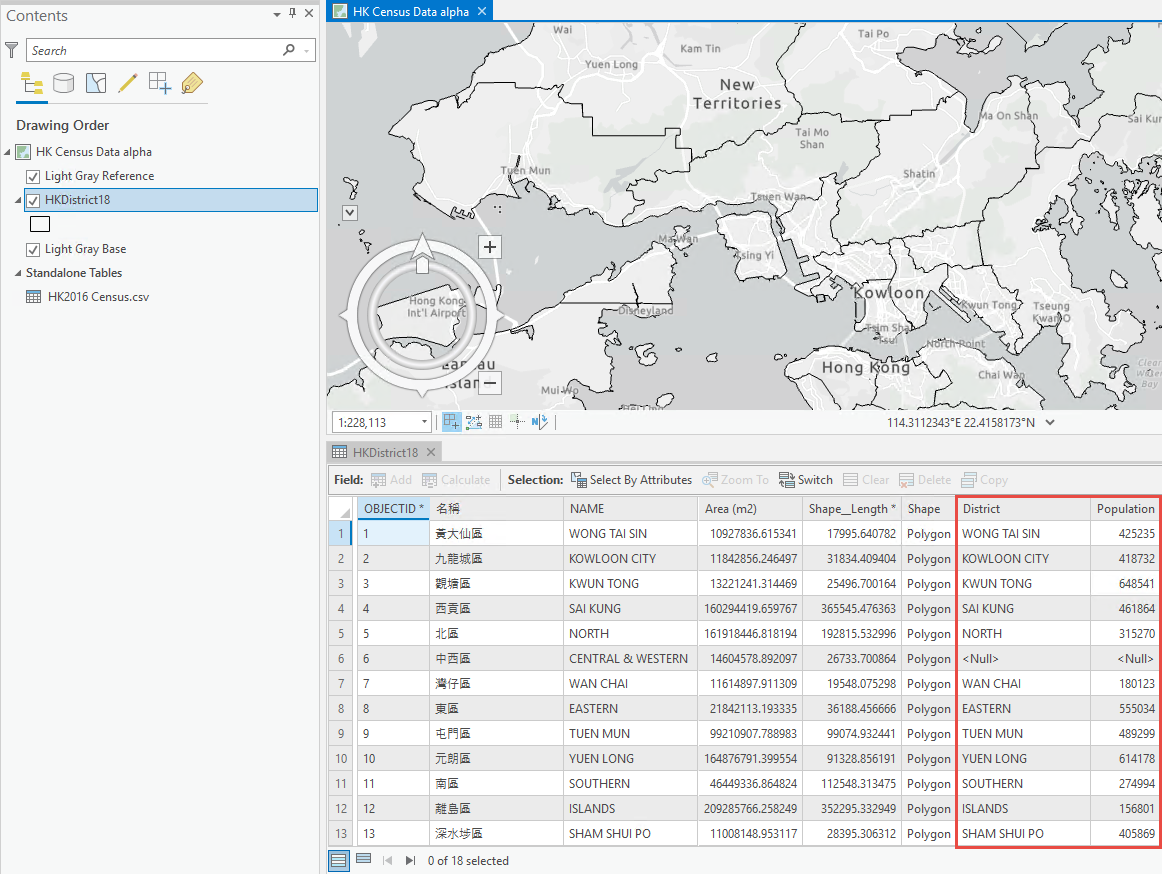
The census data is added to the feature layer table as shown in the image below.
Use the Quick Export (Data Interoperability) tool to export the dataset as a GML file
The Quick Export (Data Interoperability) tool converts the input feature layers into other formats supported by the ArcGIS Data Interoperability extension.
Note:
The Quick Export (Data Interoperability) tool has limited usage for Basic, Standard or Advanced licenses. The Data Interoperability license is required to install and run the extension tool.
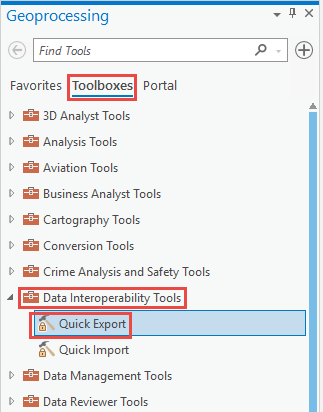
- In the ArcGIS Pro ribbon, click View > Geoprocessing to open the Geoprocessing pane.

- In the Geoprocessing pane, click Toolboxes > Data Interoperability Tools > Quick Export.
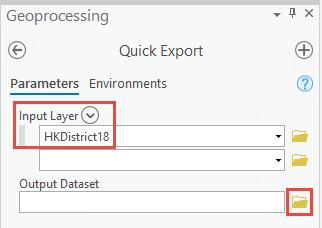
- In the Quick Export tool pane, for Input Layer, select the joined feature layer.
- Click the folder icon of the Output Dataset to open the Specify Data Destination dialog box.
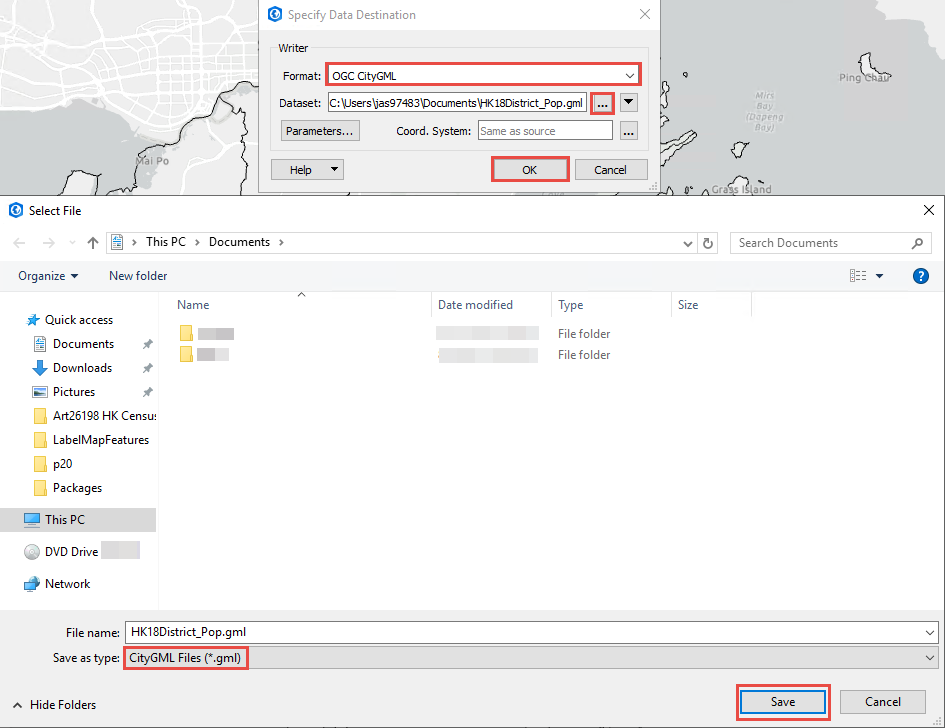
- In the Specify Data Destination dialog box, for Format, click the drop-down menu, and select OGC CityGML.
- For the Dataset: description, click the ellipsis icon and define the export location of the GML file. Ensure CityGML Files (*.gml) is selected for Save as type:.
- Click Save.
- Click OK.
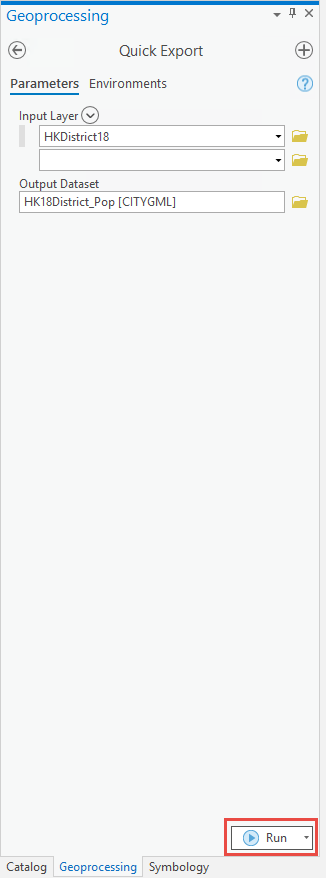
- At the bottom of the Quick Export tool pane, click Run.
Article ID: 000026198
- ArcGIS Pro 2 8 x
- ArcGIS Pro 2 7 x
- ArcGIS Pro 2 x
Get support with AI
Resolve your issue quickly with the Esri Support AI Chatbot.


Related Information
Discover more on this topic
Search for related information
Find training related to this topic
Explore ideas and give feedback
Get help from ArcGIS experts
Start chatting now