Frequently asked question
Is it possible to create a dashboard in ArcGIS Dashboards without displaying the geometry of a feature layer?
Yes, it is possible to create a dashboard in ArcGIS Dashboards without displaying the geometry of a feature layer. ArcGIS Dashboards can be used to display information or data for public users. However, in some instances, the geometry information is closed to public for security purposes. For example, point features representing locations of residential area to protect the privacy of the residents while displaying the attribute information such as maintenance and occupancy rate.
The steps to do this are as follows:
- In ArcGIS Online, navigate to the required hosted feature layer and the related table.
- Export the hosted feature layer and the related table as a file geodatabase to a folder and download both folders.
- In ArcMap or ArcGIS Pro, export the attribute table of the feature layer as a standalone table:
- Make a folder connection to the downloaded file, and drag the feature layer to Table of Contents.
- Export the table as a standalone table.
- Add the downloaded file to the project, and drag the feature layer to the Contents pane.
- Export the table as a standalone table.
- Use the Table To Table tool from Conversion Tools > To Geodatabase to export the related table.
- Drag the related table to Table of Contents.
- Use the Table To Table tool to export the related table.
- In the Table To Table dialog box, for Input Rows, select the related table from the drop-down list.
- Specify Output Location with the file geodatabase used to store the standalone table as in Step3.
- Specify a name for Output Table.
- Leave the other parameters at default, and click OK to execute the tool.

- Drag the related table to the Contents pane.
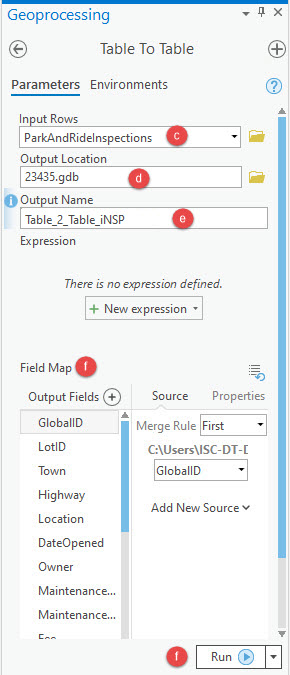
- Use the Table to Table (Conversion) tool to export the related table.
- In the Table To Table geoprocessing pane, for Input Rows, select the related table from the drop-down list.
- Specify Output Location with the file geodatabase used to store the standalone table as in Step3.
- Specify a name for Output Table.
- Select the desired output field for Field Map, and click Run to execute the tool.
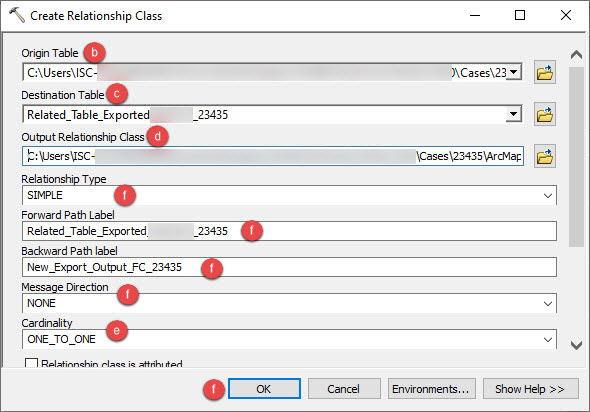
- Create a relationship class between the standalone table created in Step 3 and the exported related table in Step 4.
- Use the Create Relationship Class tool > Data Management Tools > Relationship Classes to create the relationship class.
- Select the standalone table created in Step 3 for Origin Table.
- Select the exported related table created in Step 4 for Destination Table.
- Specify a name for Output Relationship Class.
- Select the desired numerical relationship for Cardinality.
- Leave the other parameters at default, and click OK to execute the tool.
In ArcGIS Pro
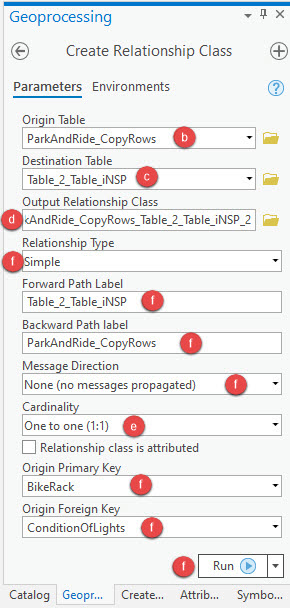
- Use the Create Relationship Class (Data Management) tool > Data Management Tools > Relationship Classes to create the relationship class.
- Select the standalone table created in Step 3 for Origin Table.
- Select the exported related table created in Step 4 for Destination Table.
- Specify a name for Output Relationship Class.
- Select the desired numerical relationship for Cardinality.
- Leave the other parameters at default, and click Run to execute the tool.
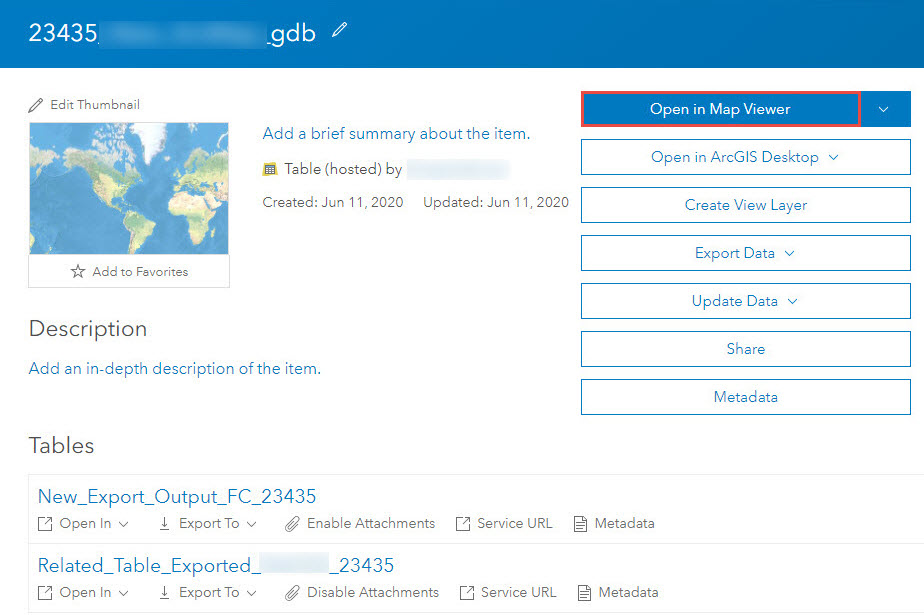
- Convert the file geodatabase folder containing the relationship class to a zipped folder.
- Log in to ArcGIS Online, add the zipped folder and create an ArcGIS Dashboard:
- Open the standalone table and related table in a Map Viewer once the zipped folder is uploaded to ArcGIS Online.
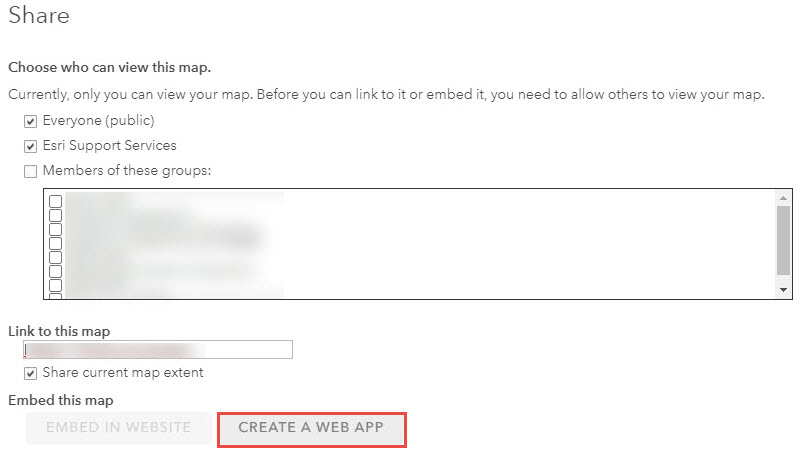
- Click Save > Save as, and fill in the required details to save the web map, and click Share.
- In the Share dialog box, check the check boxes of the groups to share the web map with, and click CREATE A WEB APP.
- In the Create a New Web App dialog box, select ArcGIS Dashboards.
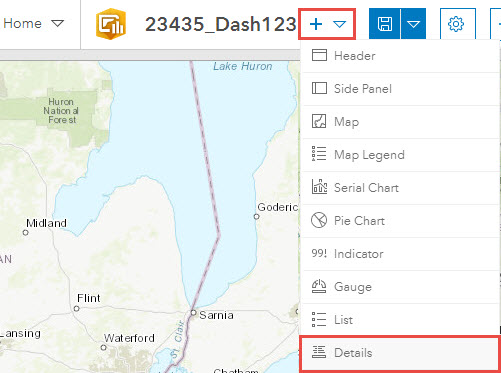
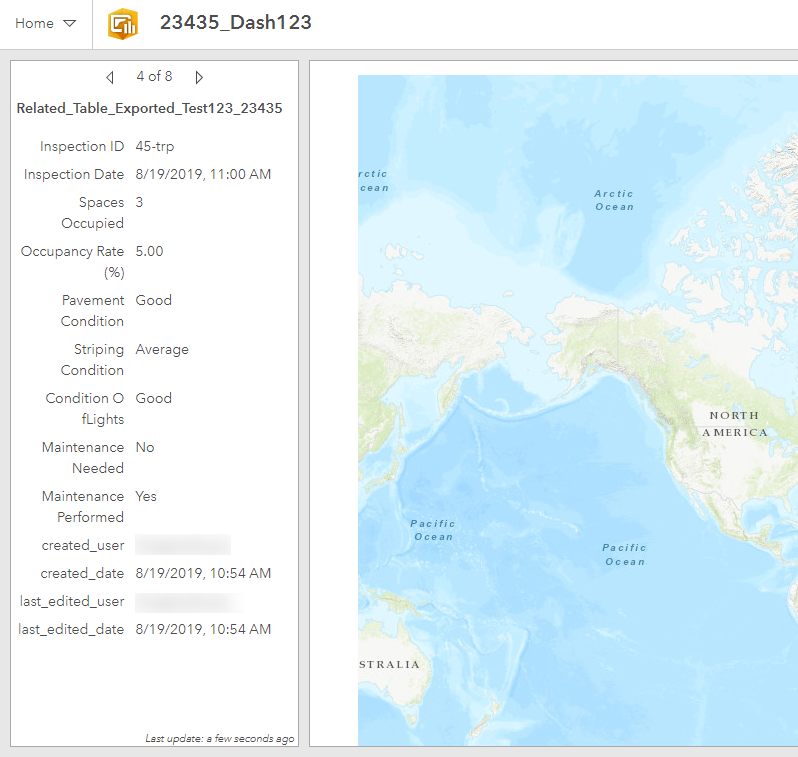
- In ArcGIS Dashboards, use the Details widget to display the attribute information from the relationship class created in Step 5.
- Click the Plus button drop-down list, and select Details when the dashboard is launched.
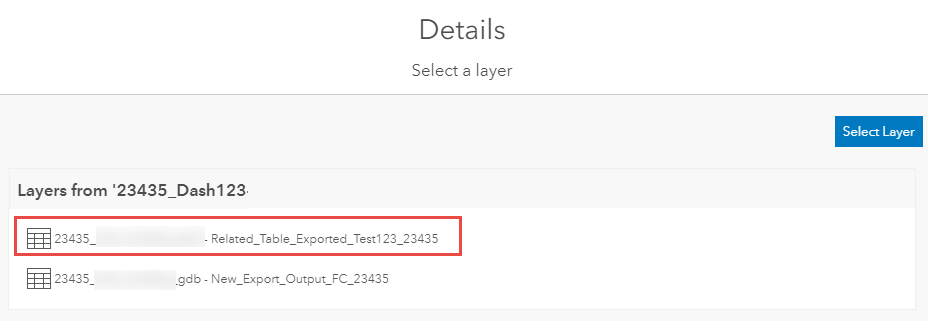
- In the Details tab, select the desired table to be displayed to public.
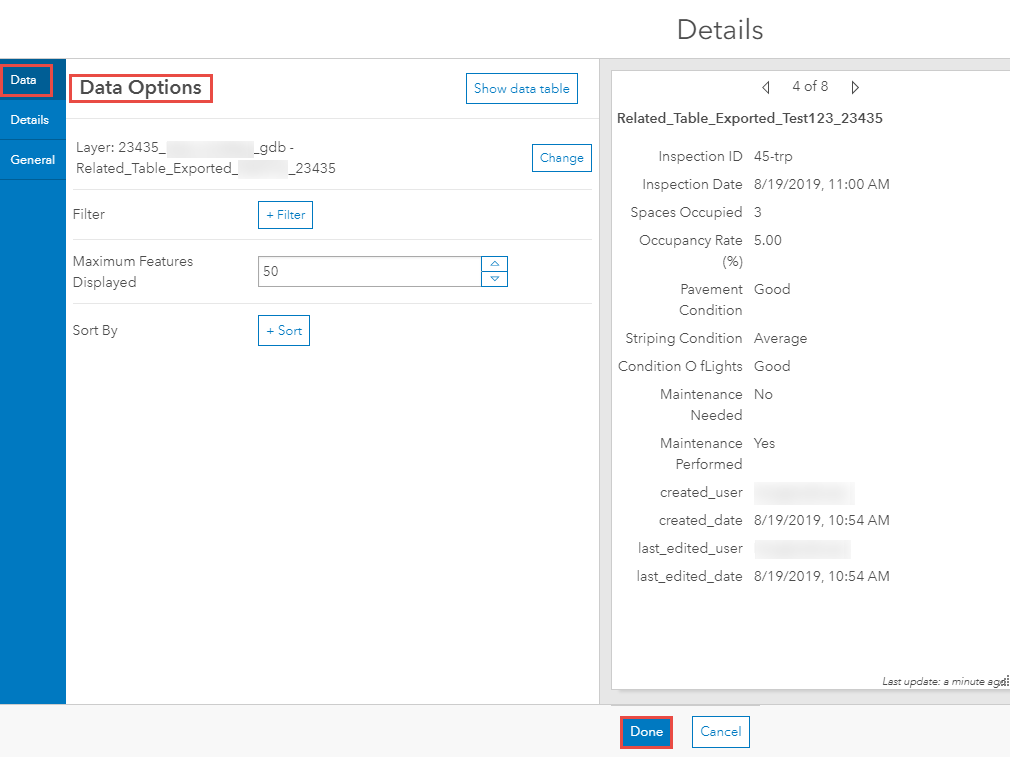
- In Data, go to Data Options, make the necessary changes, and click Done.
Article ID: 000023435
- ArcMap
- ArcGIS Online
- ArcGIS Pro 2 x
Get support with AI
Resolve your issue quickly with the Esri Support AI Chatbot.


Related Information
Discover more on this topic
Search for related information
Find training related to this topic
Explore ideas and give feedback
Get help from ArcGIS experts
Start chatting now