HOW TO
Determine the area of the overlap between multiple polygon layers in ArcGIS Pro
Summary
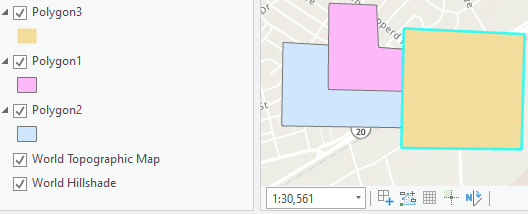
The area of a polygon created in ArcGIS Pro can be determined in the attribute table of the polygon in the Shape_Area field. The area of the overlap between two or more polygon layers can also be determined with the Count Overlapping Features tool or the Clip tool. The image below shows three polygon layers overlapping each other, and the area of the overlapping geometry is to be determined.
Procedure
Use the Count Overlapping Features tool
Use this method to determine the area of multiple polygon overlaps and multiple instances of overlaps.
- In ArcGIS Pro, on the Analysis tab, click Tools to open the Geoprocessing pane.
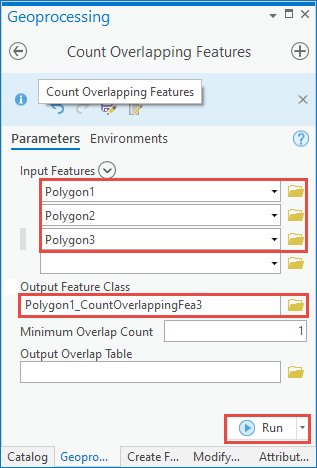
- Search for and open the Count Overlapping Features tool.
- In the Count Overlapping Features pane, for Input Features, select all the overlapping polygon layers.
- For Output Feature Class, specify a name and save location for the output feature class containing the overlap count.
- Click Run.
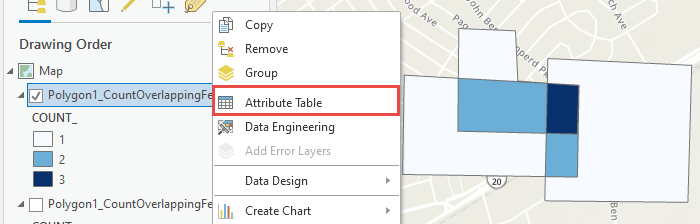
- In the Contents pane, right-click the output overlapping polygon feature layer and click Attribute Table to open the attribute table.
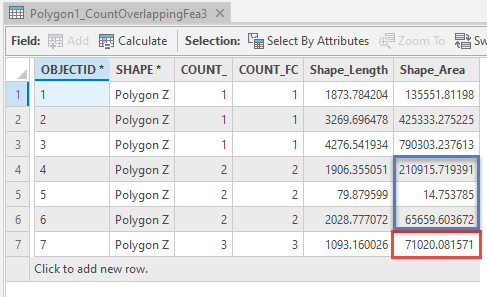
The image below demonstrates the attribute table of the output overlapping polygon feature displaying the area of all overlaps from three different polygon layers in the Shape_Area field. The field values highlighted in blue represent the area of two different polygon overlaps, and the field value highlighted in red represents the area of three different polygon overlaps.
Use the Clip tool
Alternatively, if only two polygon layers overlap, and an output feature class of the overlapping area is needed, use the Clip tool.
- In ArcGIS Pro, on the Analysis tab, click Tools to open the Geoprocessing pane.
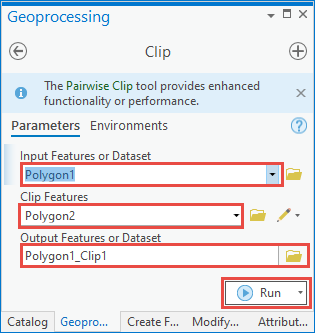
- Search for and open the Clip tool.
- In the Clip pane, for Input Features or Dataset, select the polygon layer to be clipped.
- For Clip Features, select the polygon layer used to clip the input polygon features.
- For Output Features or Dataset, specify a name and a save location for the output clip.
- Click Run.
- In the Contents pane, right-click the output clip polygon feature layer and click Attribute Table to open the attribute table.
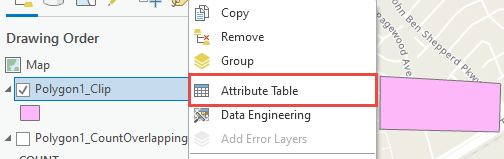
The image below demonstrates the attribute table of the output clip feature layer displaying the area of the overlap of two different polygon layers in the Shape_Area field.

Article ID: 000027751
- ArcGIS Pro 2 8 x
- ArcGIS Pro 2 7 x
- ArcGIS Pro 2 x
Get support with AI
Resolve your issue quickly with the Esri Support AI Chatbot.


Related Information
Discover more on this topic
Search for related information
Find training related to this topic
Explore ideas and give feedback
Get help from ArcGIS experts
Start chatting now