HOW TO
Import an image as a style in ArcGIS Pro
Summary
In ArcGIS Pro, features are symbolized using the default Esri symbol sets. If custom symbology is required, it is possible to import an image as a picture marker symbol under the Style option and use the image as a style in the map.
Note:
The image style symbology is only applicable to point feature layers.
Procedure
The following steps describe how to import an image to ArcGIS Pro as a style.
- In ArcGIS Pro, open a new blank project.
- Creating a personal style for custom symbols is recommended. To create a new style, refer to ArcGIS Pro: Create a style in the project.
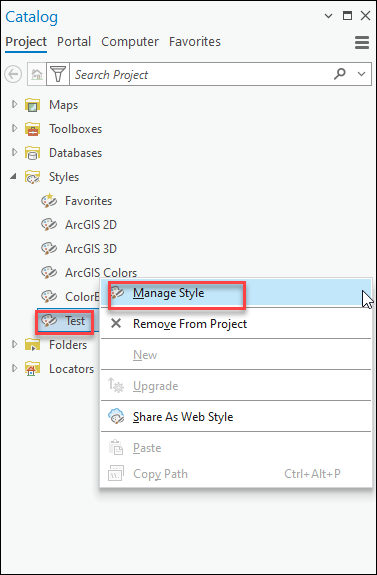
- In Catalog, click the Styles drop-down list and select the newly created style. Right-click the style and select Manage Style.
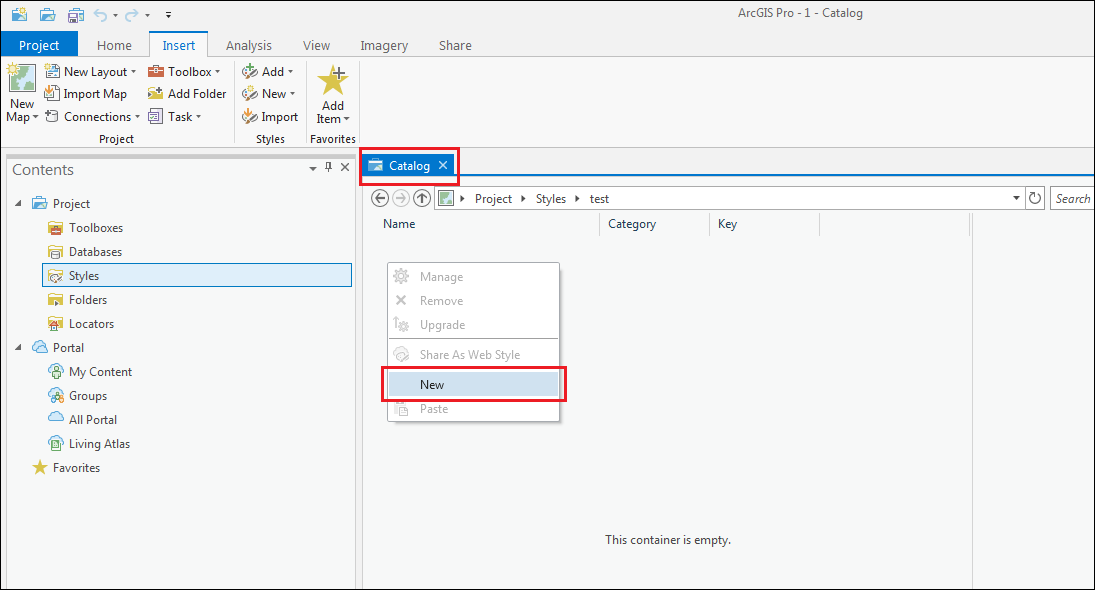
- In the Catalog View, double-click the newly created style.
- Right-click the empty space and select New.
- By default, the Point symbol pane is displayed. Click Point symbol to edit.
- In the Point symbol pane, set the desired Name and Key. Click Apply.
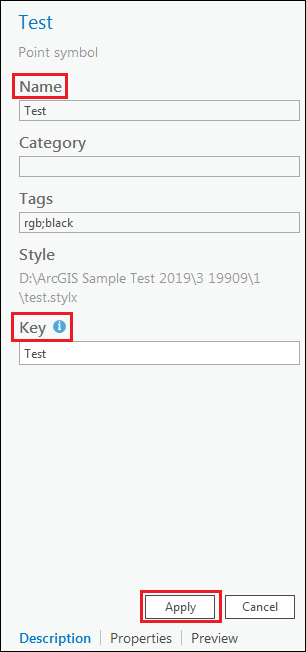
- Click Properties.
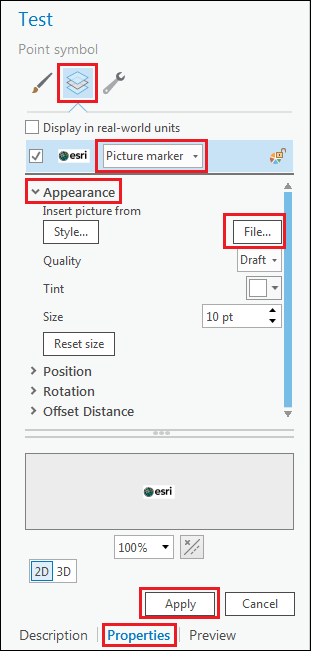
- Click the Layers icon and select Picture marker from the drop-down list.
- Under the Appearance drop-down list, click File to select the image. If necessary, adjust the Position, Rotation, and Offset Distance. Click Apply.
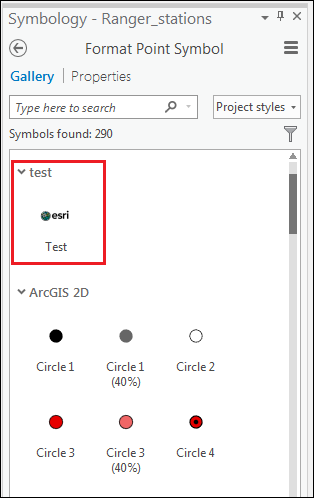
To apply the new symbol to a layer, in map view, click the layer symbology in the Contents pane to open the Symbology pane. The picture marker symbol created using the above steps is available under the newly created style section.
Article ID: 000019909
- ArcGIS Pro
Get support with AI
Resolve your issue quickly with the Esri Support AI Chatbot.


Related Information
Discover more on this topic
Search for related information
Find training related to this topic
Explore ideas and give feedback
Get help from ArcGIS experts
Start chatting now