HOW TO
Remove buffer portions overlapping neighboring parcels in ArcGIS Pro
Summary
In ArcGIS Pro, buffers are polygons created at a specified distance around input features. By default, buffers are generated independently and do not consider underlying boundaries such as land parcels and property lines. However, in analyses where the output must adhere to predefined constraints, it is necessary to modify the buffers to align with these boundaries.
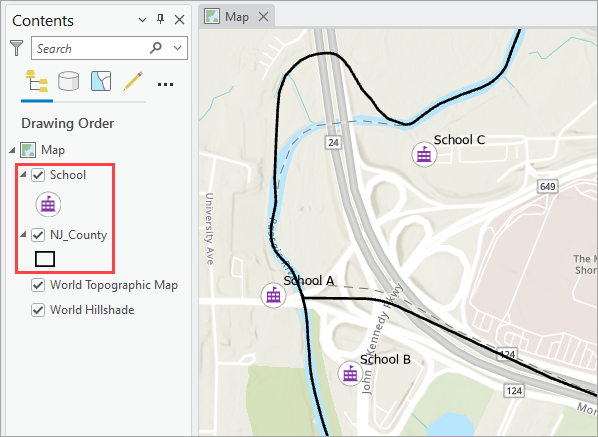
This article outlines the workflow to identify and remove buffer portions overlapping the neighboring parcels in ArcGIS Pro. The workflow is demonstrated using multiple point features (the School layer) within separate parcels (the NJ_County layer).
Procedure
- Open the project in ArcGIS Pro.
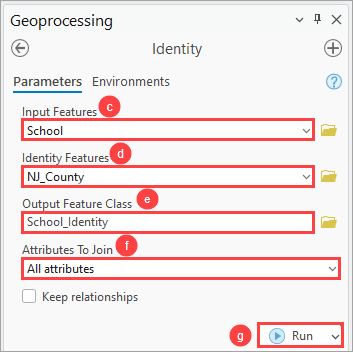
- Identify the parcels enclosing the point features using the Identity tool.
- On the Analysis ribbon tab, in the Geoprocessing group, click Tools.
- In the Geoprocessing pane, search for and click Identity (Analysis Tools).
- In the Identity pane, for Input Features, select the point feature layer from the drop-down list. In this example, the School layer is selected.
- For Identity Features, select the parcel feature layer from the drop-down list. In this example, the NJ_County layer is selected.
- For Output Feature Class, click Browse and specify a location and name of the output feature class.
- For Attributes To Join, select the preferred option to transfer the attributes to the output feature class from the drop-down list. Refer to ArcGIS Pro: Parameters for more information. In this example, the default All attributes option is selected.
- Click Run.
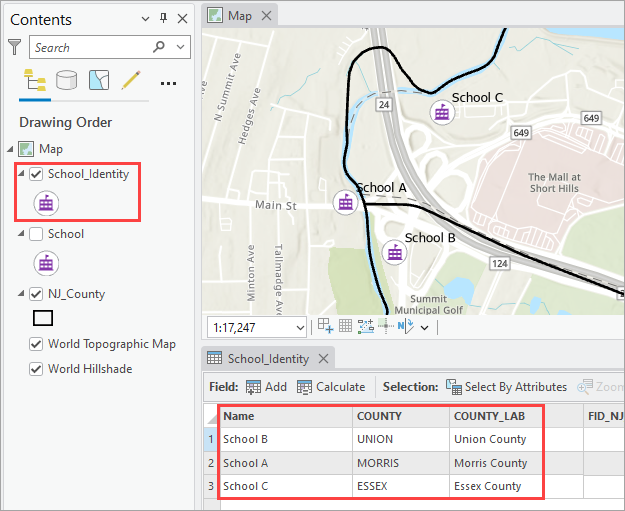
The attribute table below shows the output feature class, School_Identity, with the parcels identified for each school.
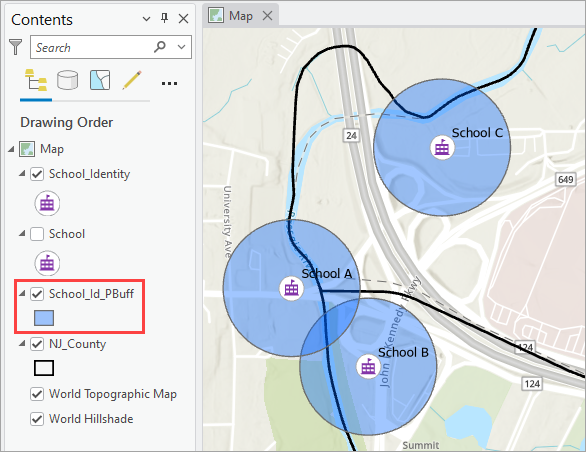
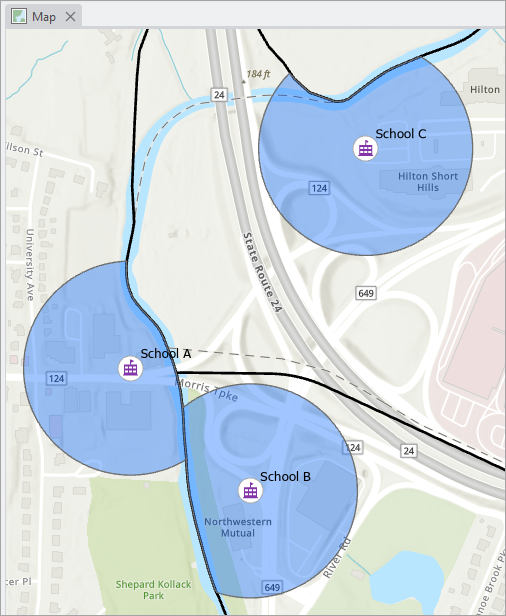
- Create buffer polygons with the Pairwise Buffer tool using the output feature class from Step 2 as the input. The map below shows the output buffers generated using the tool.
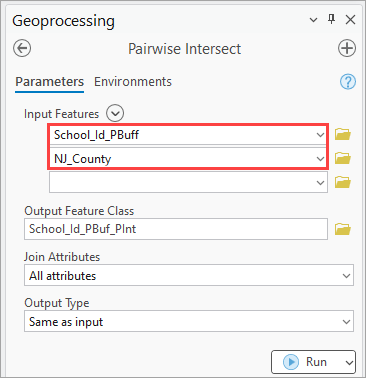
- Identify the overlapping buffer portions with the Pairwise Intersect tool using the output buffer layer from Step 3 and the parcel feature layer as inputs. In this example the inputs are School_Id_PBuff and NJ_County.
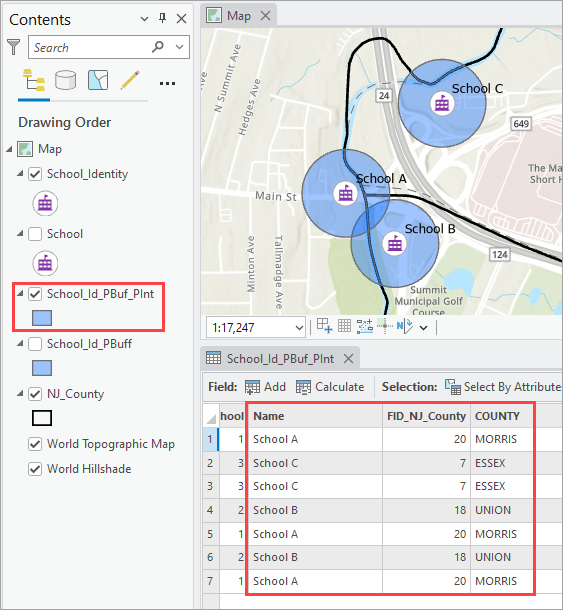
The attribute table below shows the Pairwise Intersect tool output, displaying the overlapping buffer portions with their corresponding parcels.
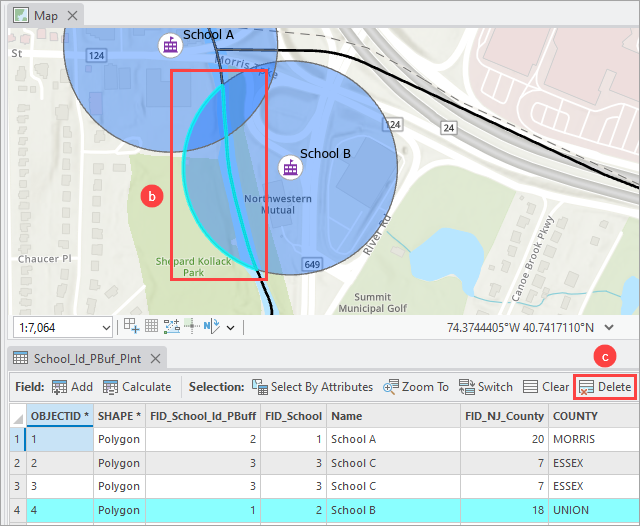
- Remove the overlapping buffer portions from the map.
- In the Contents pane, right-click the output feature layer in Step 4 and click Attribute Table.
- In the map view, right-click the map and click Select Features. Click the overlapping buffer portion to select the feature.
- In the table view, click Delete to remove the selected buffer portion from the map.
Note:
To select multiple buffer portions for deletion, press and hold the Shift key after clicking Select Features.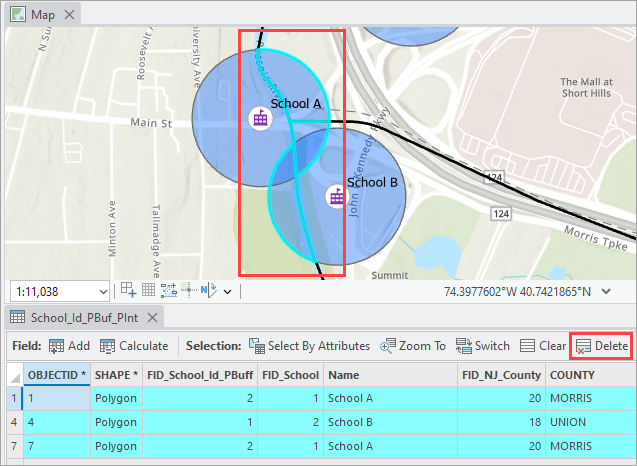
The map below displays the output buffer after removing the overlapping buffer portions.
Article ID: 000034424
- ArcGIS Pro 3 3
- ArcGIS Pro 3 2
- ArcGIS Pro 3 4
Get support with AI
Resolve your issue quickly with the Esri Support AI Chatbot.


Related Information
Discover more on this topic
Search for related information
Find training related to this topic
Explore ideas and give feedback
Get help from ArcGIS experts
Start chatting now