HOW TO
Identify and summarize the closest facilities based on incidents in ArcGIS Pro
Summary
In ArcGIS Pro, the closest facility solver generates an output layer where each route is listed individually in the output attribute table. In scenarios requiring rapid response, combining the closest facilities of each incident into a single, sorted field allows faster decision-making.
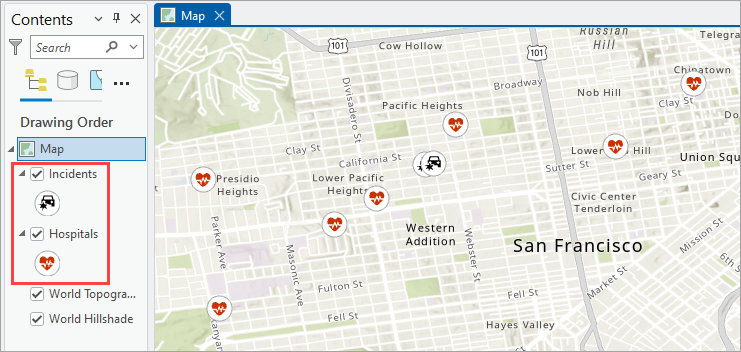
This article provides the workflow to identify and summarize the closest facilities into a single, sorted field for each incident in ArcGIS Pro. In this workflow, 22 hospitals and two incidents are used.
Procedure
Note:
The closest facility solver requires a Network Analyst license. Refer to ArcGIS Pro: Licensing and the ArcGIS Network Analyst extension for more information.
- Open the project in ArcGIS Pro.
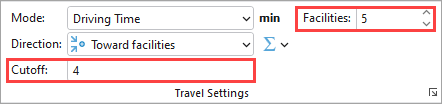
- Identify the closest facilities using the closest facility solver. Refer to ArcGIS Pro: Identify the closest facility for instructions. Ensure Toward facilities is selected from the Direction drop-down list to generate routes leading to the facilities. In this example, the Travel Settings is set to a four-minute Cutoff and five Facilities.
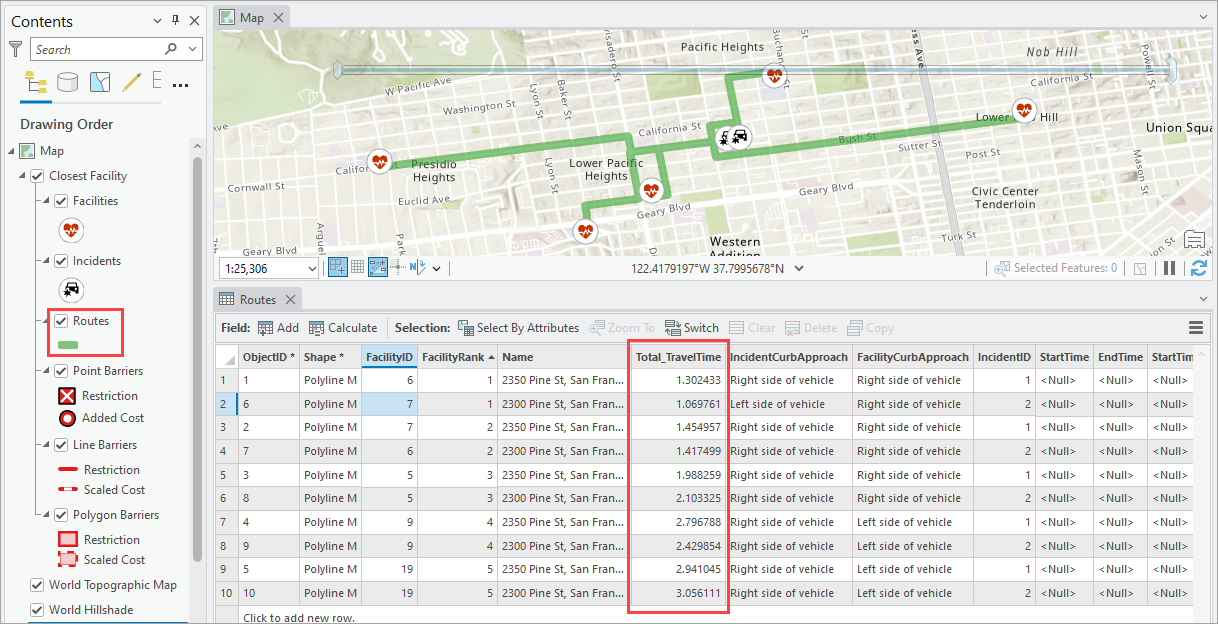
The table below shows the output routes from incidents to the five closest hospitals within a four-minute cutoff.
- Summarize the output layer of the closest facility analysis using the Summary Statistics tool.
- In the Contents pane, right-click the Routes sublayer of the Closest Facility group layer and click Attribute Table.
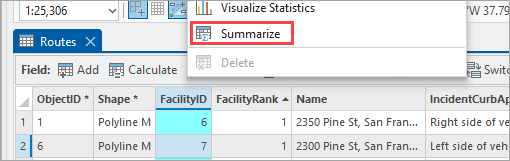
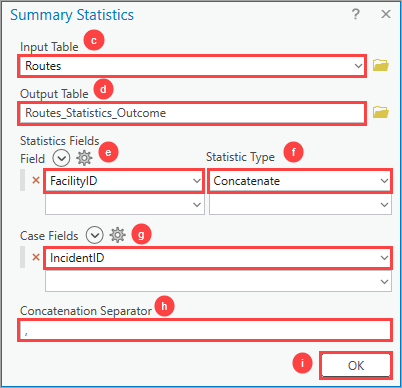
- In the attribute table, right-click a field header and click Summarize. In this example, the FacilityID field is used.
- In the Summary Statistics dialog box, for Input Table, click the drop-down and select Closest Facility\Routes.
- For Output Table, specify a name. Click Browse and specify a location for the output stand-alone table.
- For Statistics Fields, click the Field drop-down and select the preferred field name. In this example, FacilityID is selected.
- Click the Statistic Type drop-down and click Concatenate.
- For Case Fields, click the drop-down and select the preferred field name. In this example, IncidentID is selected.
- For Concatenation Separator, specify a character to separate the concatenated values in the field. In this example, a comma (,) is specified.
- Click OK.
A stand-alone table is created and added to the Contents pane.
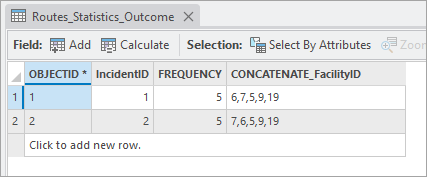
The stand-alone table below shows the closest facilities summarized into a single, sorted field and grouped for each incident in ArcGIS Pro.
Article ID: 000034194
- ArcGIS Pro 3 1
- ArcGIS Pro 3 3
- ArcGIS Pro 3 2
Get support with AI
Resolve your issue quickly with the Esri Support AI Chatbot.


Related Information
Discover more on this topic
Search for related information
Find training related to this topic
Explore ideas and give feedback
Get help from ArcGIS experts
Start chatting now