Frequently asked question
Can polygon features be symbolized with multiple fill colors in ArcGIS Pro?
No, symbolizing polygon features with multiple fill colors is not possible in ArcGIS Pro. A fill symbol layer applies a uniform style across the entire polygon, treating the geometry as a single continuous surface without internal divisions.
However, applying multiple fill colors to polygon features becomes necessary when internal variation is essential for map interpretation, such as hazardous zonal divisions within a building or conservation areas within a natural reserve. In such cases, use one of the following workarounds, depending on the workflow requirements, to achieve this effect in ArcGIS Pro.
Symbolize the polygon features with a gradient fill
This workaround is recommended when distinct boundaries between multiple fill colors are unnecessary and only two main colors are used for each feature.
- Open the ArcGIS Pro project.
- Apply a gradient fill symbol layer to the polygon feature layer.
Note:
If only certain polygon features must be symbolized with multiple fill colors, select the features and create a selection layer, then apply the gradient fill to the selection layer instead of the original polygon layer. Refer to ArcGIS Pro: Selection keyboard shortcuts for more information and ArcGIS Pro: Make a selection layer from selected features for instructions.
- In the Contents pane, right-click the polygon feature layer and click Symbology.
- In the Symbology pane, click the current symbol.
- On the Gallery tab, search for and click Linear Gradient under the ArcGIS 2D section.
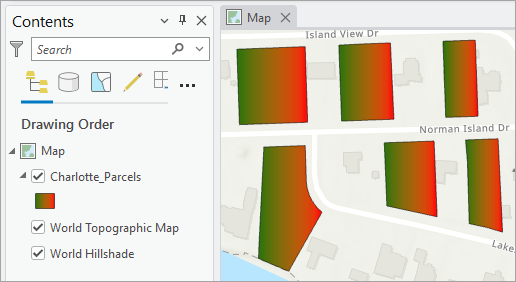
- Adjust the gradient fill symbol layer properties as desired. Refer to ArcGIS Pro: Modify symbol layers for instructions. In this example, to visualize the polygon with side-by-side color differences, the Angle pattern with a 0° angle value is specified.
The polygon features are symbolized with a gradient fill in the map view.
Split the polygon feature and apply a different fill color to each section
This workaround is recommended when distinct boundaries between multiple fill colors are required. Splitting the polygons creates boundaries and adds new attributes to the feature layer, resulting in each section being treated as a separate feature.
- Open the ArcGIS Pro project.
- Select the desired polygon feature to be split. Refer to ArcGIS Pro: Select features for instructions.
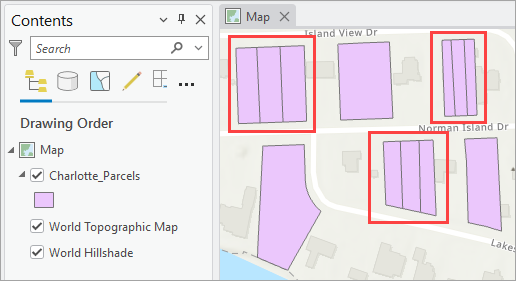
- Split the polygon feature using the Split tool. Refer to ArcGIS Pro: Split a polygon feature for instructions. In this example, the selected polygon feature is individually split into three sections by drawing two lines on the feature.
- If necessary, repeat Steps 2 and 3 on the remaining polygon features to be split.
The image below shows the split polygons in the map view.
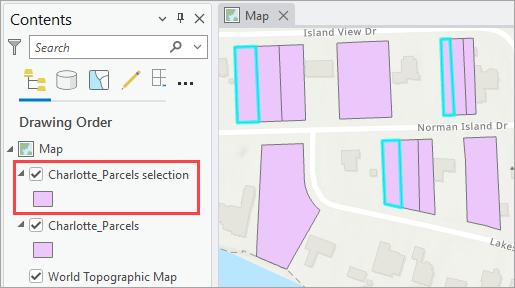
- Select the desired sections of the polygon features to be symbolized with a fill color and create a selection layer. Refer to ArcGIS Pro: Select features and ArcGIS Pro: Make a selection layer from selected features for instructions.
The selection layer is added in the Contents pane and displayed in the map view.
- Apply the desired fill color to the selection layer.
- In the Contents pane, right-click the selection layer and click Symbology.
- In the Symbology pane, click the current symbol.
- Click Properties, and click the Layers
 tab.
tab. - On the Layers tab, select the Solid fill symbol layer.
- Under Appearance, click the Color drop-down arrow and select the desired fill color.
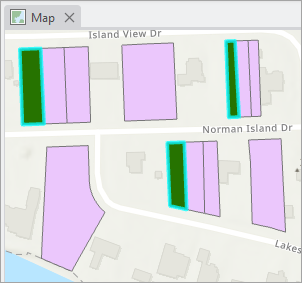
The selection layer is symbolized with a different fill color in the map view.
- Click Clear in the Selection group of the Edit tab to clear the selection.
- Repeat Steps 5 and 6 to apply different fill colors to the remaining polygon sections.
- On the Edit tab, in the Manage Edits group, click Save.
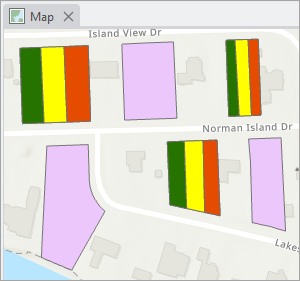
The split polygon features are symbolized with three different fill colors with distinct separation boundaries in the map view.
Article ID: 000036811
- ArcGIS Pro
Get support with AI
Resolve your issue quickly with the Esri Support AI Chatbot.


Related Information
Discover more on this topic
Search for related information
Find training related to this topic
Explore ideas and give feedback
Get help from ArcGIS experts
Start chatting now