方法
ArcGIS Pro で事前定義されたジオメトリを使用し、ポリゴン フィーチャ テンプレートを作成する
サマリー
When editing a feature class in ArcGIS Pro, a feature can be copied and pasted to other locations within the same layer. For example, when designing a new land subdivision, a few models of prefabricated houses are placed repeatedly on many different parcels by copying the feature and pasting it on other parcels. However, when pasting a feature, the feature is pasted at the same location from which it was copied. Users must go to the location of the copied feature, and use the repositioning tools to move the pasted feature to the desired location.
This article describes how to create a polygon feature template with a predefined geometry using a preset template to enable creating features with the same geometry repetitively in different locations without using the copy and paste functions.
手順
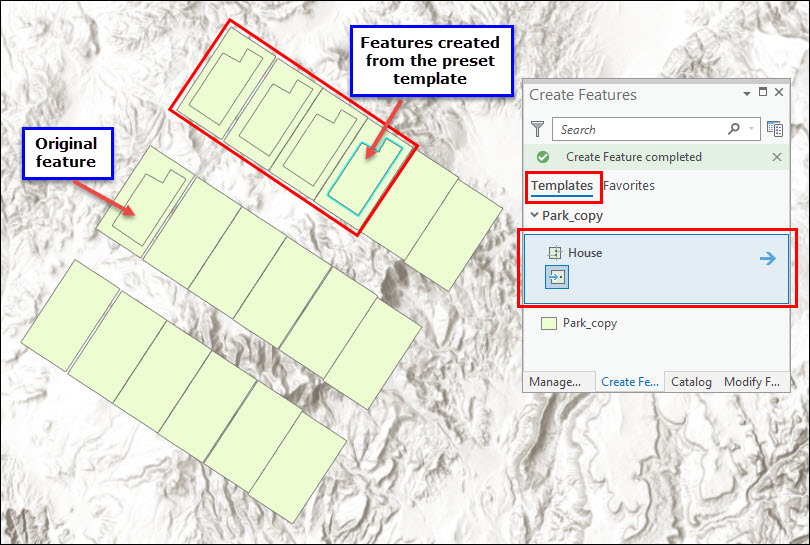
- In ArcGIS Pro, add the feature class to the map.
- Select the desired feature on the map, and create a preset template. Refer to ArcGIS Pro: Create a preset template for steps to do this.
- On the Edit tab, click Create
 to open the Create Features pane.
 - Under the Templates tab, select the created preset template, and click on the map to place the feature at the desired locations.
- Optionally, modify the created features to move or rotate them as desired. Refer to ArcGIS Pro: Modify features for more information.
- On the Edit tab, click Modify to open the Modify Features pane.
- Select the modification method to modify the features as required.
記事 ID: 000024495
AI によるサポートを受ける
Esri サポート AI チャットボットを使用して問題を迅速に解決します。


関連情報
このトピックについてさらに調べる
Search for related information
Find training related to this topic
Explore ideas and give feedback
ArcGIS エキスパートのサポートを受ける
今すぐチャットを開始