CÓMO
Crear un conector de ArcGIS Survey123 para Microsoft Power Automate para su uso con ArcGIS Enterprise
Resumen
ArcGIS Survey123 supports webhooks, which allow integrating surveys into automated workflows using various third-party automation services. Refer to ArcGIS Survey123: Webhooks for more information. One such service is Microsoft Power Automate, which has a built-in Survey123 connector for surveys published to ArcGIS Online.
Note:
Due to limitations in the Power Automate platform, this connector does not support surveys published to ArcGIS Enterprise.
To use Power Automate with surveys published to ArcGIS Enterprise, it is necessary to create a custom connector in Power Automate.
Procedimiento
Note:
Configuring a Survey123 connector for Microsoft Power Automate is not supported for ArcGIS Enterprise deployments that use Integrated Windows Authentication (IWA). Additionally, since Power Automate must communicate with your ArcGIS organization, deployments that are not public-facing are not supported.
Step 1: Register an application in ArcGIS Enterprise for Power Automate
Microsoft Power Automate must be registered as an application in ArcGIS Enterprise so that it can access the list of survey forms and apply webhook settings to surveys. During the registration process a client ID and client secret are created; you will need these to create the custom connector.
- Sign in to your ArcGIS Enterprise instance and go to the My Content tab. Click Add Item and select An application. In the Add an application dialog box, provide the following input:
- Type: Application
- Title: Power Automate Connector
- Tags: power automate

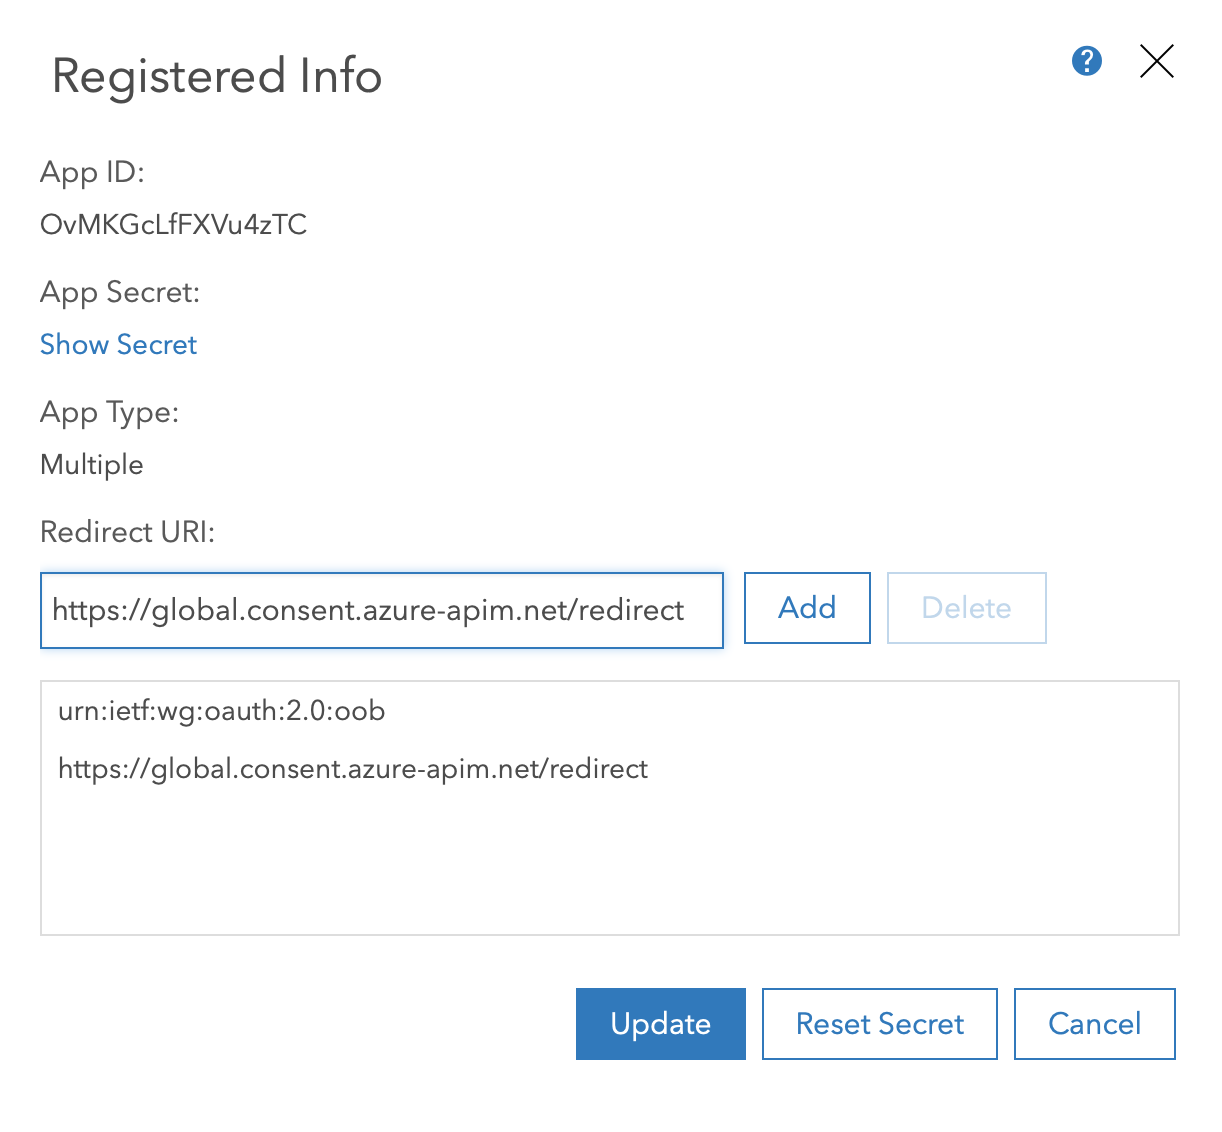
- When the item is created, the Item Details page displays for the application. Go to Settings. In the Application section, click Registered Info and Show Secret. Copy the App ID and App Secret; these are used in the steps below. Keep this tab open; the redirectURI must be updated as well.
Step 2: Create a custom connector in Power Automate using the Survey123 website
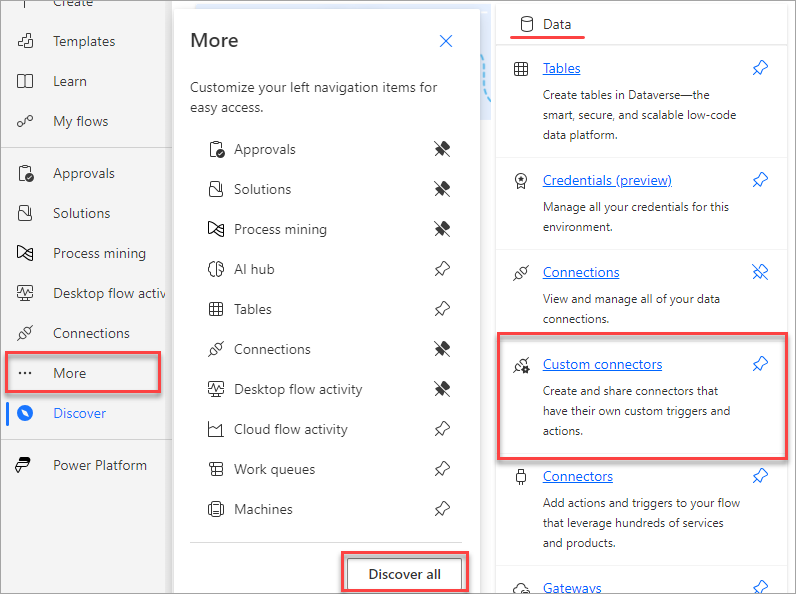
- On a new tab, sign in to Microsoft Power Automate. On the left sidebar, click More and click Discover all. In the Data section, click Custom connectors. If necessary, click the Pin icon to pin Custom connectors to the left sidebar for easy access.
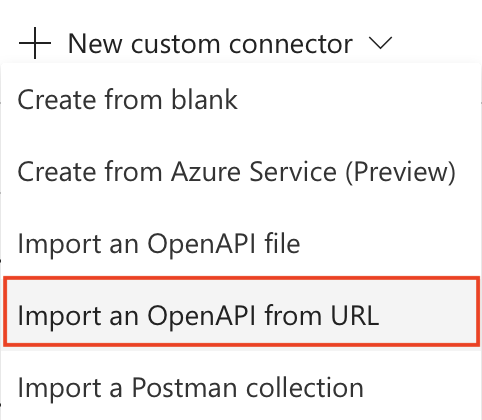
- Click the New custom connector drop-down at the top right and select Import an OpenAPI from URL.
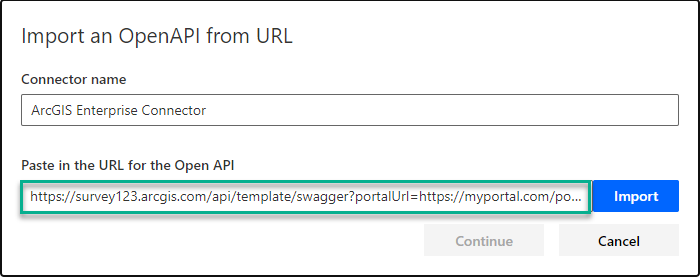
- In the Import an OpenAPI from URL dialog box, complete the following:
In the example below, <ENTERPRISE_URL> is the URL to your ArcGIS Enterprise deployment, including the web adaptor, for example, https://myserver.mycompany.com/arcgis.
https://survey123.arcgis.com/api/template/swagger?portalUrl=<ENTERPRISE_URL>
- Connector Name: ArcGIS Enterprise Connector (this can be whatever you want to call it).
- Paste in the URL for the Open API, and click Import.
- After the API has been imported, click Continue.
- Configure the general properties of the connector, including the icon and description. The Host entry is the location of the Survey123 functions (survey123.arcgis.com, in this case) that will be used by the connector. Click the Security > link below to proceed to the next section.
- The Security section is preconfigured to use OAuth 2.0, and the authorization and token endpoints for the ArcGIS Enterprise deployment.
- Copy the App ID from the application registered in ArcGIS Enterprise into the Client id setting.
- Copy the App Secret from the application registered in ArcGIS Enterprise into the Client secret setting.
- Copy the URL in Token URL into the Refresh URL setting. ArcGIS Enterprise uses the same API location for initial token generation and token refresh.
- Click Create connector.
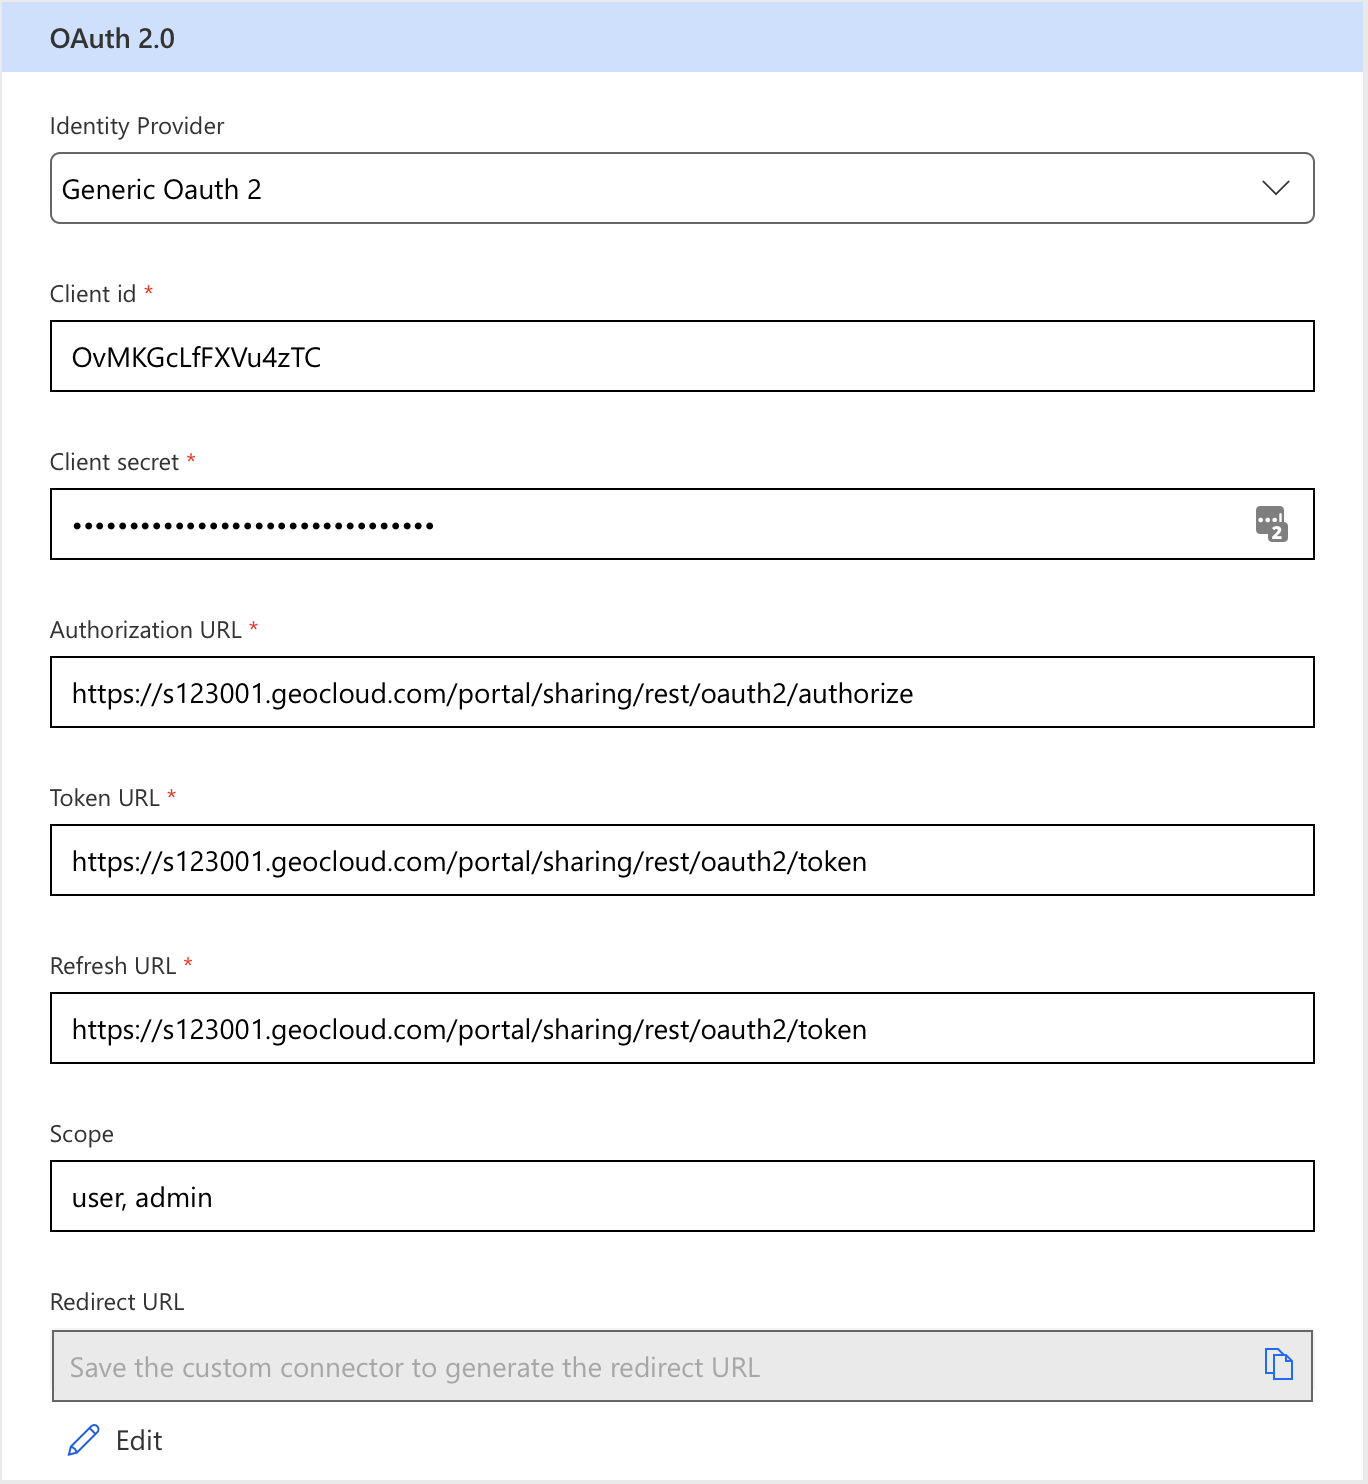
- After the connector is created, the bottom of the security settings has an entry present in the Redirect URL setting. Copy that value. In the ArcGIS Enterprise application settings page, select Update. Add the URL to the list of redirect URIs and click Update, and click Save.
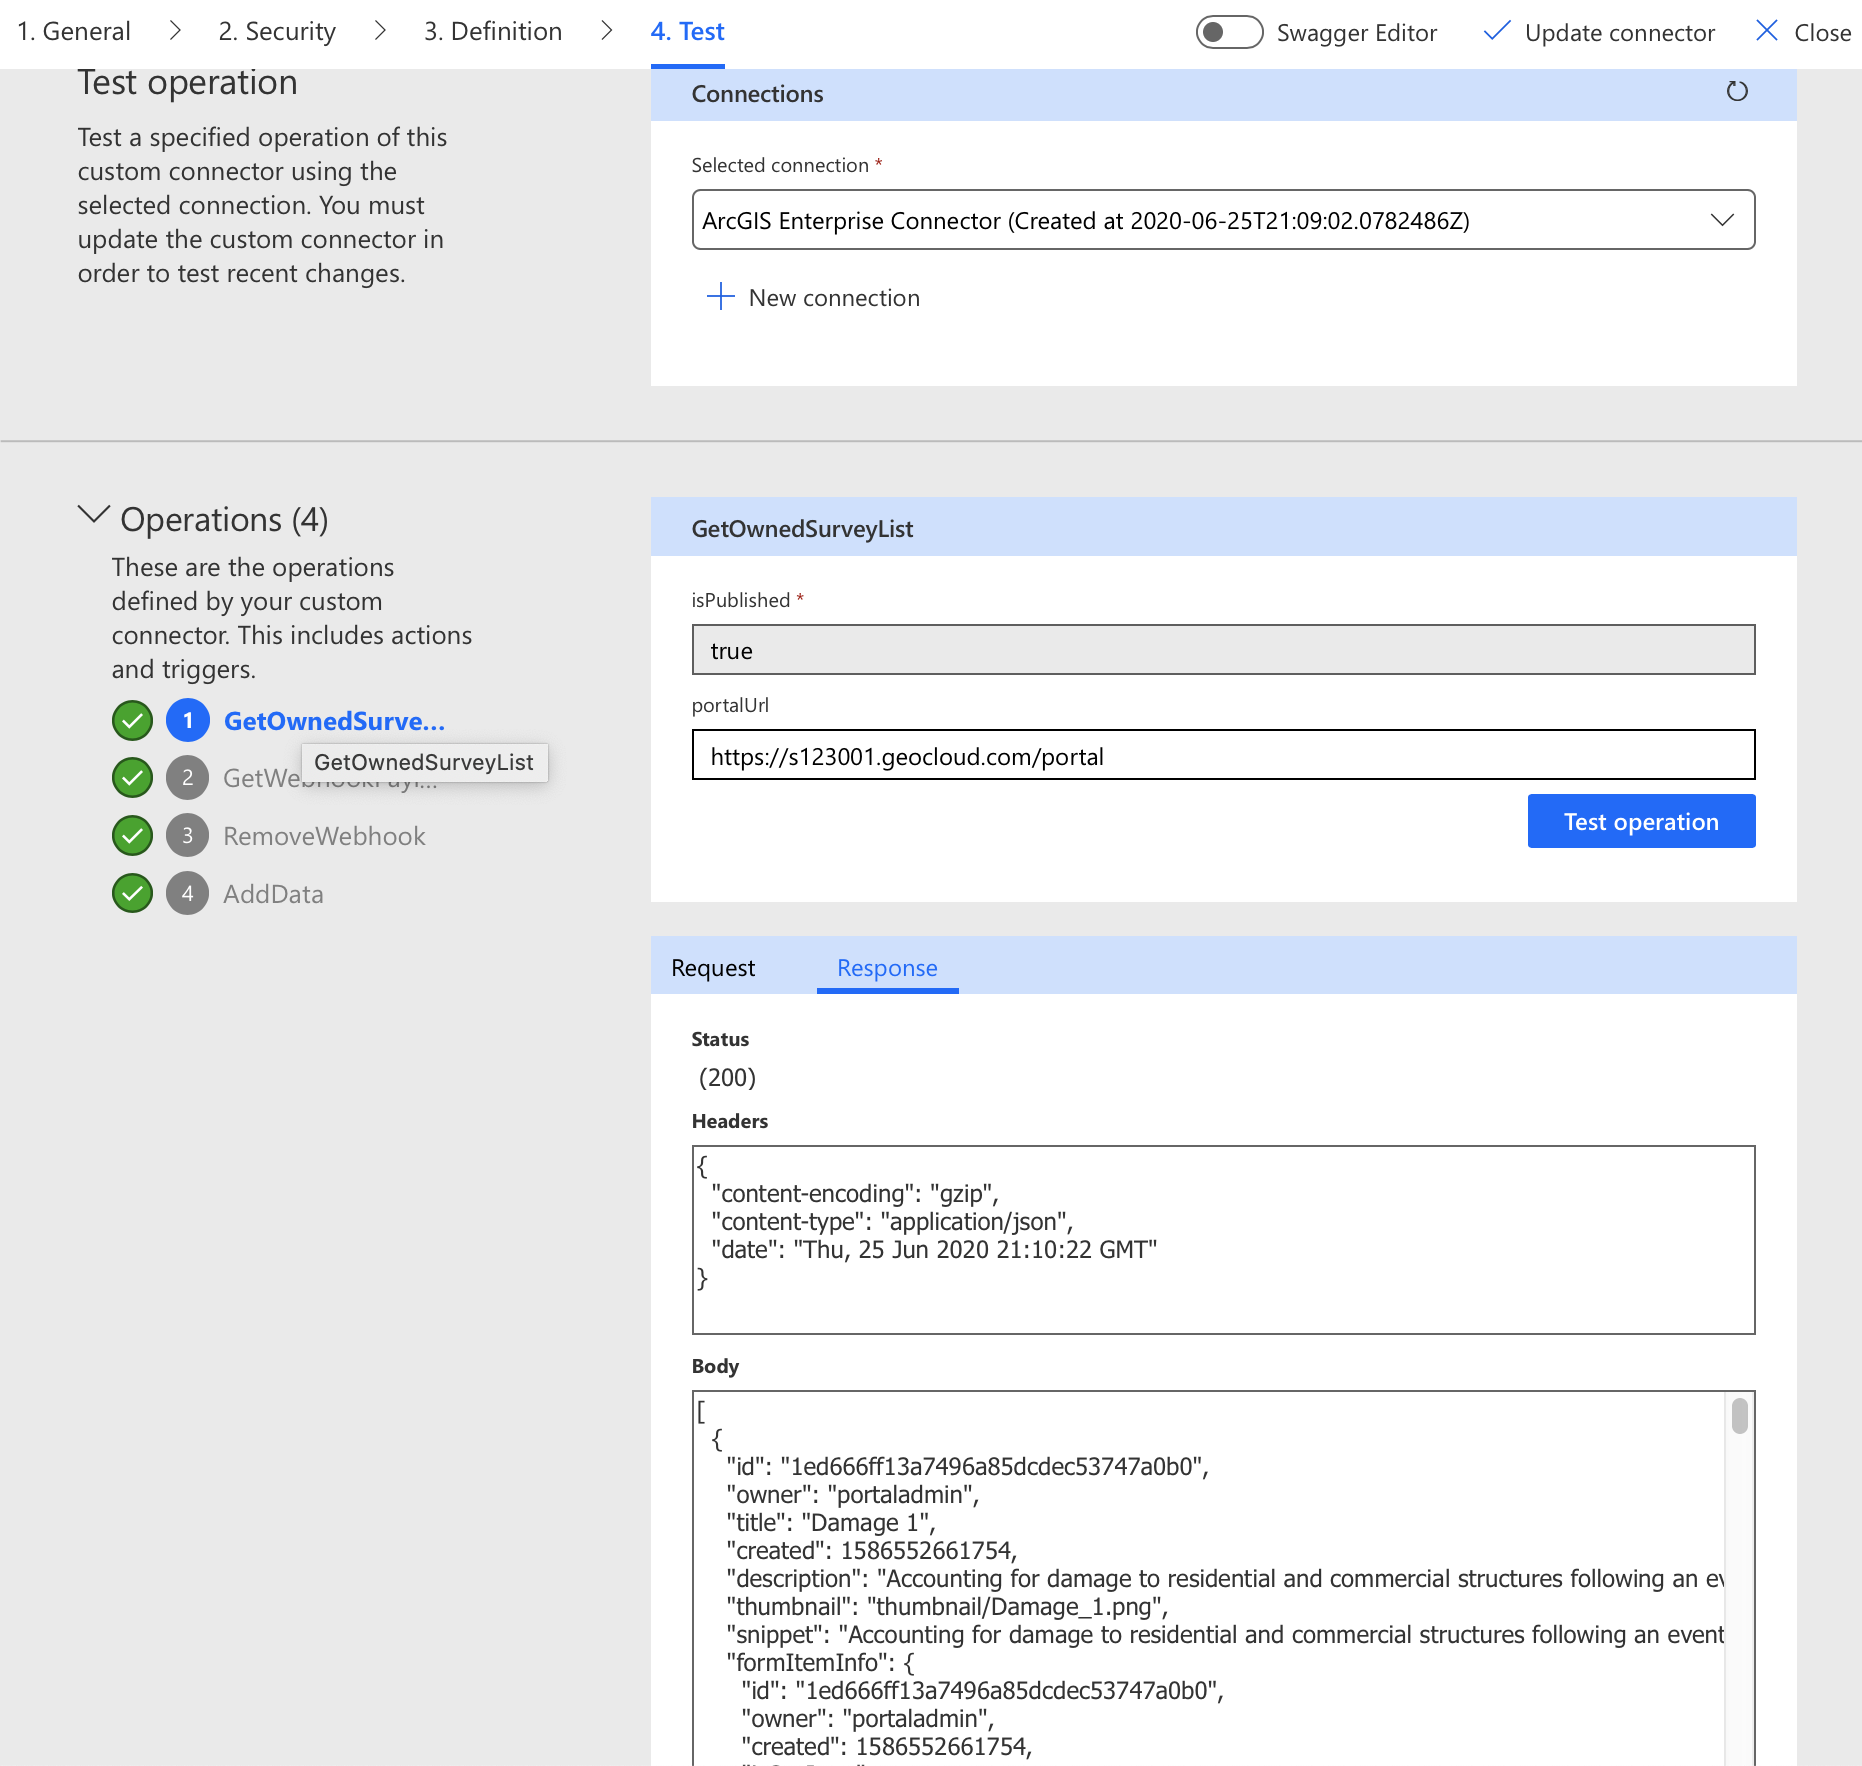
- Return to the Power Automate tab. Click the 5. Test link at the top. Create a new connection - you should be prompted to sign in to ArcGIS Enterprise in a pop-up window. Once a connection has been created, you can test the webhook functions:
- GetOwnedSurveysList - Returns a list of your surveys. Select a survey and copy its id for use in subsequent steps.
- Get WebhookPayload - Returns a payload definition that can be used by Power Automate to automatically present values like the feature's fields in other steps of a flow. Requires a survey id.
- AddData (NOTE: this is out of order from the screen) - Registers a webhook with a form. Requires a survey id and destination URL (can be a test URL like https://localhost). The events that will trigger the webhook (addData|editData|addData,editData) also need to be specified. The results contain a unique id that will be used in the RemoveWebhook step.
- RemoveWebhook (NOTE: this is out of order from the screen) - Removes a given webhook from the form. Requires a survey id and webhook id from the AddData step.
If all operations pass, the connector can be used in Power Automate. When creating a new flow, skip the Choose your flow's trigger in the initial screen and select from your custom connectors in the main flow editing screen.
Id. de artículo: 000025025
Obtenga soporte con IA
Resuelva su problema rápidamente con el chatbot de inteligencia artificial de soporte de Esri.


Descubrir más sobre este tema
Search for related information
Find training related to this topic
Explore ideas and give feedback
Obtener ayuda de expertos en ArcGIS
Empieza a chatear ahora