HOW TO
Fly a vertical scan in ArcGIS Flight
Summary
ArcGIS Flight's Vertical flight mode is used to safely and reliably scan vertical surfaces, such as mine walls, bridges, dams, building facades, and towers. Instructions provided describe how to set up a vertical scan on the ArcGIS Flight app.
Procedure
To perform a Vertical Scan:
- Open the app on the iPad.
- Select an existing project, or create a new one within your organization.
- Select Vertical
 from the project home screen.
 - Provide a name for your mission.
- Type the address or closest city to the flight location. Use the map to zoom to the specific flight area.
- Select Next in the bottom left corner to go to the Flight Path menu.
- Drag the horizontal line using the three vertices (white circles) so that the line runs along the wall of the facade to be scanned. Ensure that the green line (representing the path of the drone) is facing the facade of the structure you are scanning.
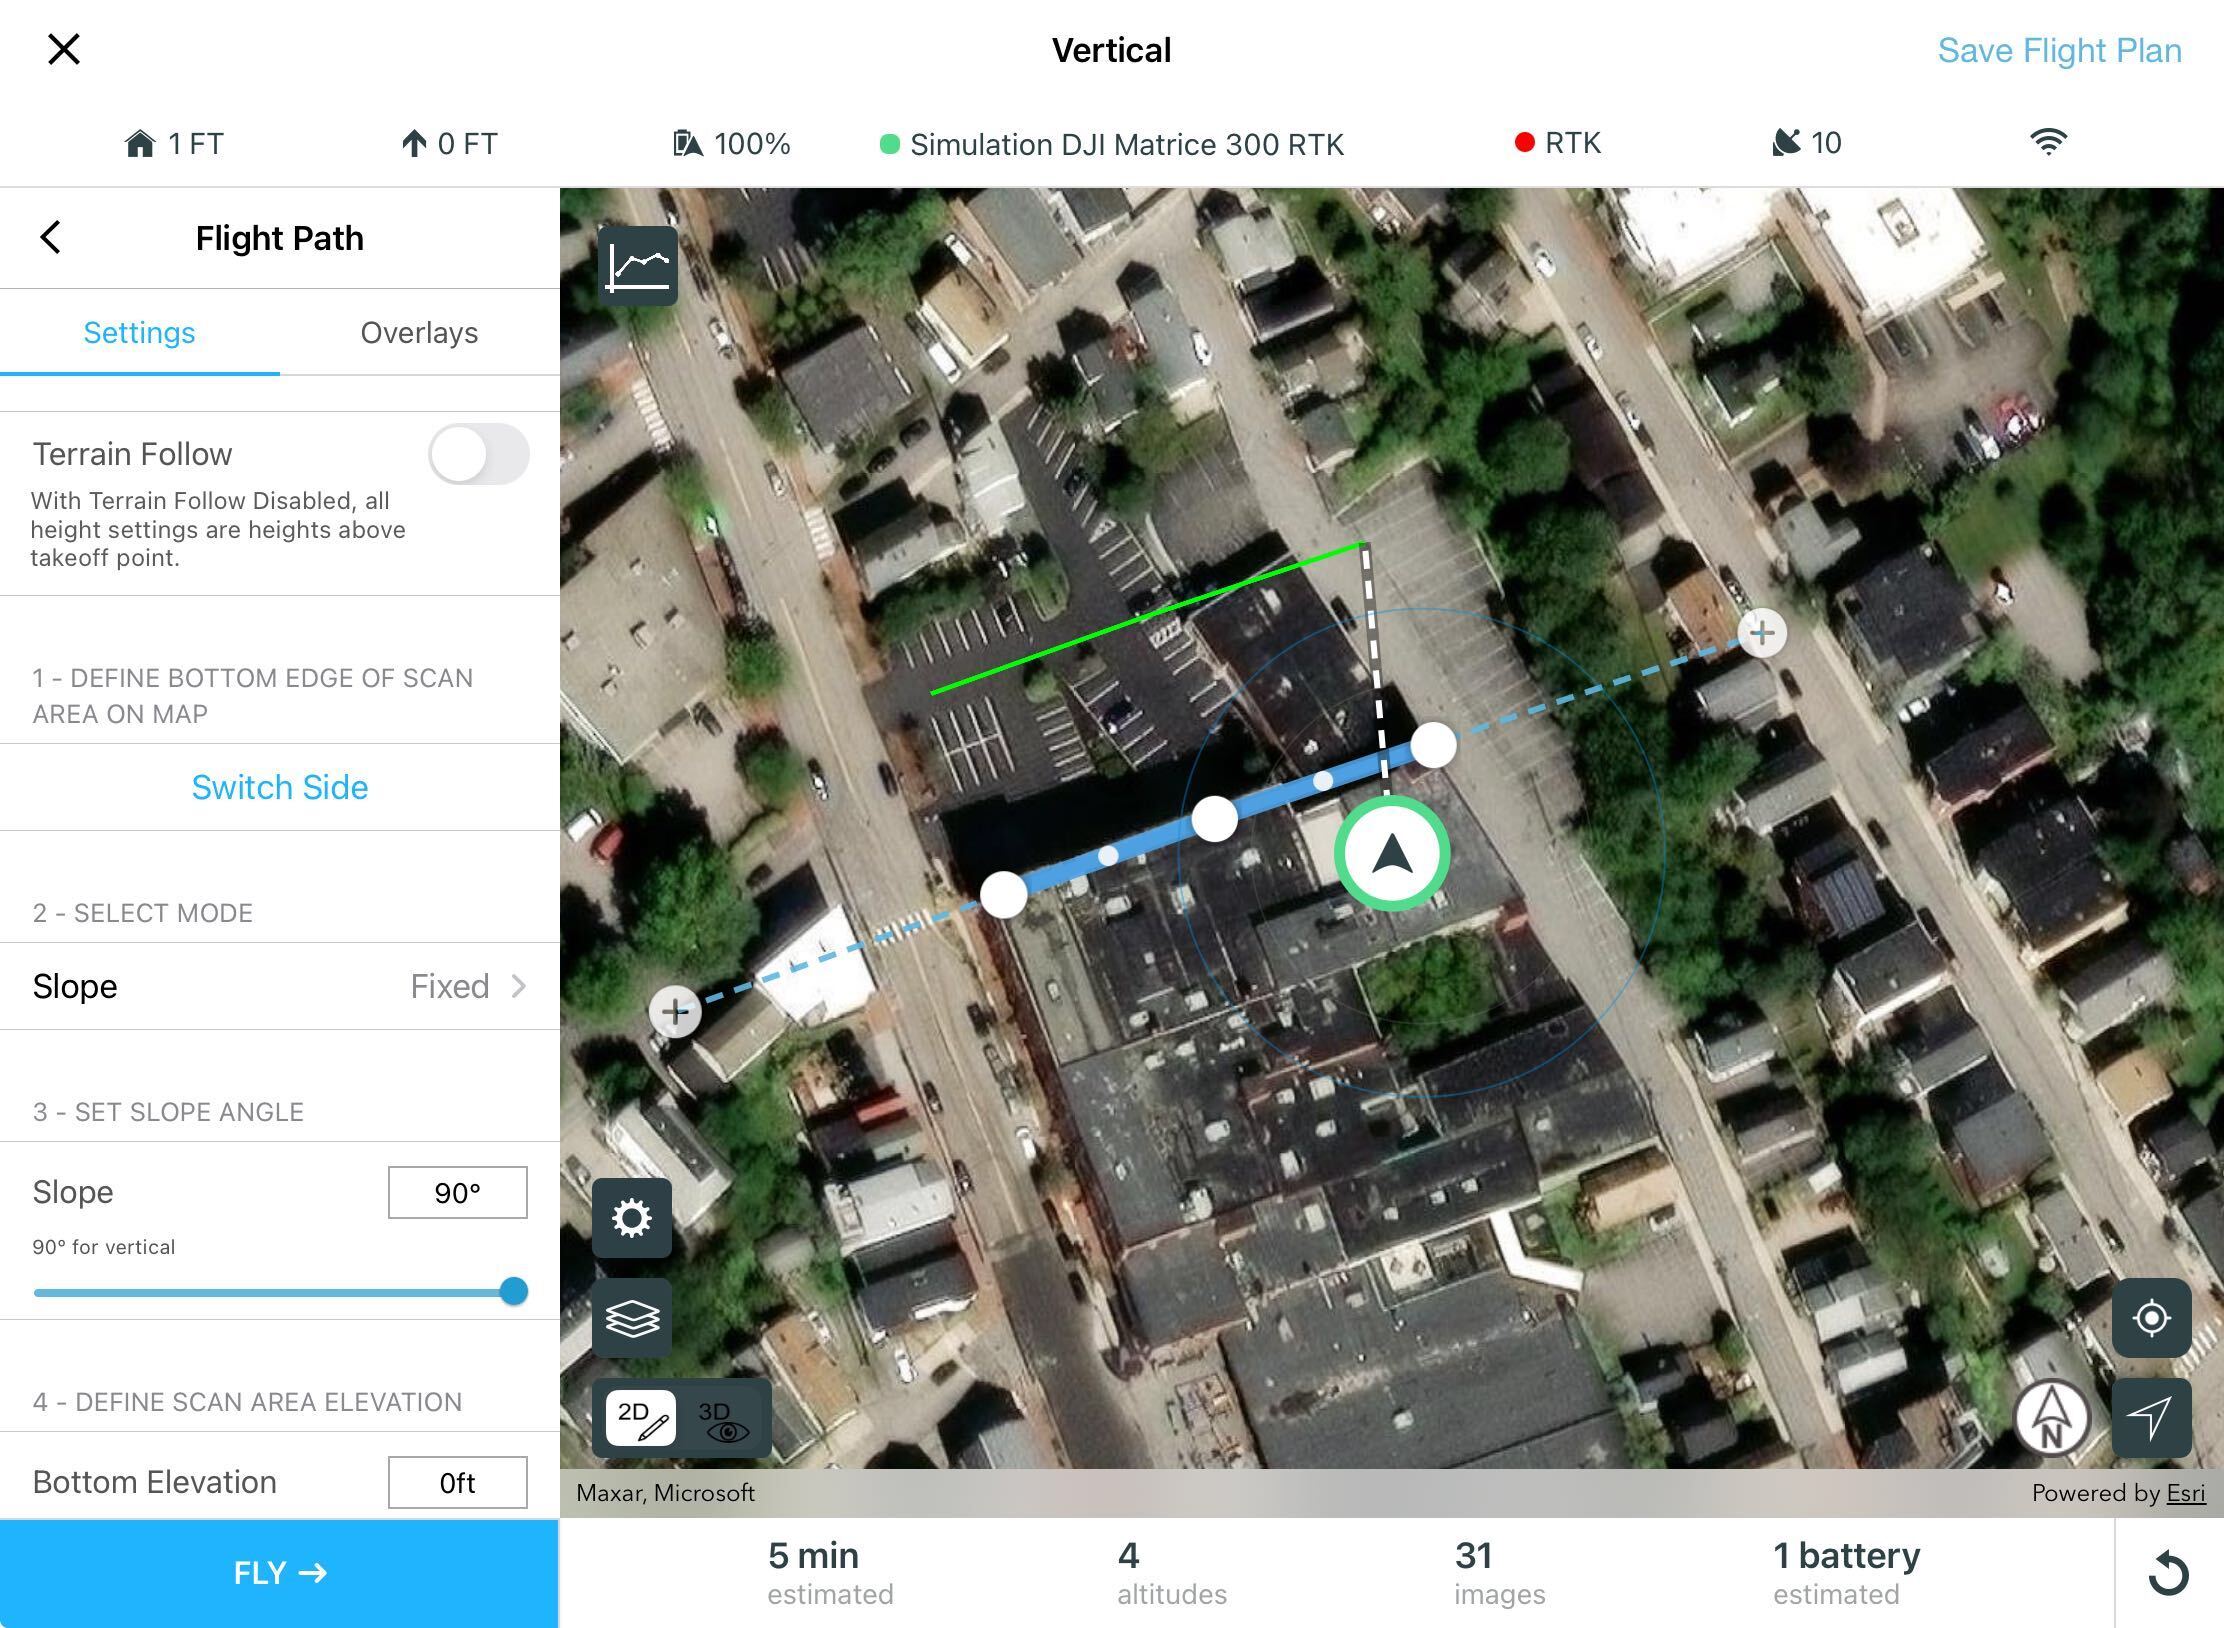
- Within the Flight Path menu use the following settings to customize your mission:
-
- Terrain Follow
- Switch Side
- Slope Mode
- Slope Angle
- Bottom Elevation
- Top Elevation
- Minimum Flight Height
- Maximum Flight Height
- Departure/Minimum Return Height
- Offset
- Video Mode
- Some settings recommendations are as follows:
- To reduce the flight time and number of images increase the Offset.
- Additional visual flight path settings can be accessed in the Advanced section at the bottom of the settings list.
- Camera Projections can be enabled by tapping the settings button (gear icon) in the lower left corner of the map viewer. This displays the camera location & orientation of each photo to be taken during flight.
- After finalizing the settings in the Flight Path menu tap FLY, to go to the System Checks screen.
- Make sure the iPad is connected to the drone. Check one last time for any potential obstacles above and on the flight path to the region of interest. When ready, slide the green bar below the checklist to the right to initiate take-off.
- Use the in-flight view to monitor the progress of your mission, and maintain visual line-of-sight with the drone. Mission progress will be indicated by the green bar at the bottom of the screen.
- The Mission Complete screen will display when all imagery has been captured and the drone has landed. From the Mission Complete screen select Done to return to the project home screen.
- For information on methods to import the captured imagery from your drone into ArcGIS Flight, refer to Import images to ArcGIS Flight and upload to Site Scan Manager.
Article ID: 000022980
Software:
- Mobile Applications
Get support with AI
Resolve your issue quickly with the Esri Support AI Chatbot.


Discover more on this topic
Search for related information
Find training related to this topic
Explore ideas and give feedback
Get help from ArcGIS experts
Start chatting now