PROBLEM
Inconsistent display of multiple ring buffer labels in ArcGIS Enterprise or ArcGIS Online Map Viewer
Description
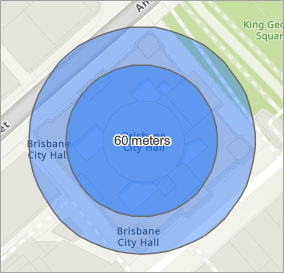
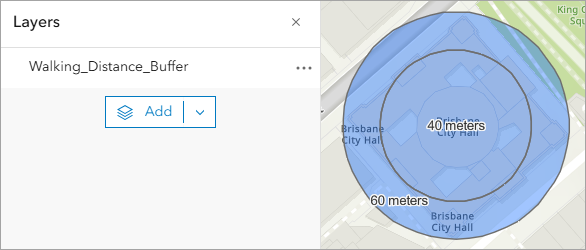
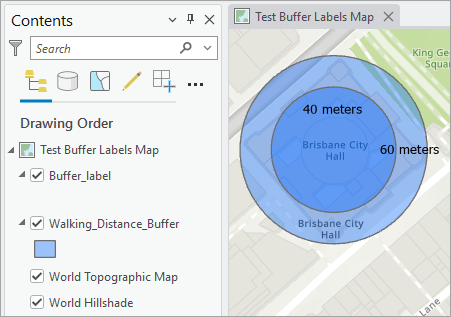
In ArcGIS Enterprise or ArcGIS Online Map Viewer, labels for multiple ring buffers derived from the same source feature are displayed inconsistently, where only the uppermost buffer polygon label appears while the remaining labels are hidden.
The map below shows only one of the two buffer labels displayed, while the other label is hidden.
Cause
The buffer polygons share the same centroid position, causing Map Viewer to resolve the labeling conflict by displaying only one label while suppressing the remaining labels.
Solution or Workaround
Erase the overlapping buffer area using the Pairwise Erase tool in ArcGIS Pro
Note:
This workaround edits and overwrites the original buffer polygon feature layer.
- Open the web map in ArcGIS Pro. Refer to ArcGIS Pro: Add a web map or web scene for instructions.
- Turn off labels for the buffer polygon feature layer.
- In the Contents pane, select the buffer polygon feature layer.
- On the Labeling tab, in the Layer group, click Label.
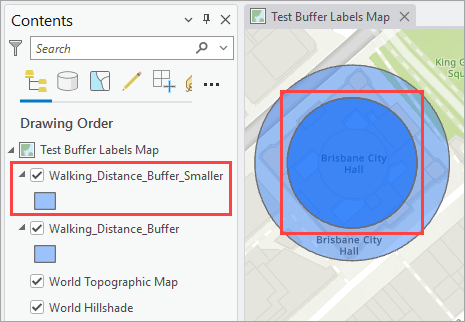
- Export the smaller buffer polygons using the Export Features tool.
- In the Contents pane, right-click the buffer polygon feature layer and click Attribute Table.
- On the table view, click the index row of the smaller buffer polygon to select the feature.
- In the Contents pane, right-click the buffer polygon feature layer and click Data > Export Features.
- In the Export Features window, for Output Feature Class, specify a name. Click Browse and specify a location for the output feature class.
- Click OK.
- On the table view, click Clear to clear the selection.
The exported feature class is added to the Contents pane and displayed on the map.
- Erase the overlapping buffer area to create a polygon with holes using the Pairwise Erase tool.
- On the Analysis tab, in the Geoprocessing group, click Tools.
- In the Geoprocessing pane, search for and click Pairwise Erase (Analysis Tools).
- On the table view, click the index row of the desired polygon. In this example, the bigger buffer polygon is selected.
- In the Pairwise Erase pane, for Input Features, click the drop-down arrow and select the buffer polygon feature layer.
- For Erase Features, click the drop-down arrow and select the output polygon feature layer from Step 3.
- For Output Feature Class, specify a name. Click Browse and specify a location for the output feature class.
- Click Run.
- On the table view, click Clear to clear the selection.
The output feature class is added to the Contents pane and displayed on the map.
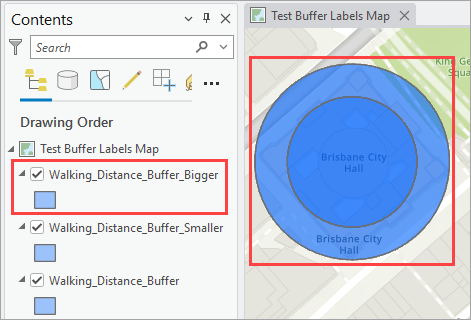
Note:
Repeat Step 4 as required when the buffer polygon layer contains multiple overlapping ring buffers that share a common centroid.
- Merge the polygon feature layers using the Merge tool.
- In the Pairwise Erase pane, click Back
 .
. - In the Geoprocessing pane, search for and click Merge (Data Management Tools).
- In the Merge pane, for Input Datasets, click the Add Many
 drop-down arrow and check the check boxes for the output polygon layer from Steps 3 and 4. Click Add.
 - For Output Dataset, specify a name. Click Browse and specify a location for the output dataset.
- Configure the remaining parameter as necessary. Refer to ArcGIS Pro: Parameters for more information.
- Click Run.
- In the Pairwise Erase pane, click Back
The output polygon feature layer is added to the Contents pane and displayed on the map.
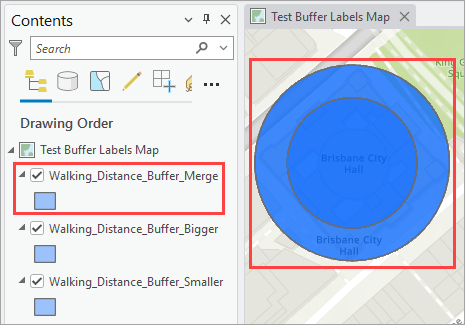
- Turn on labels for the merged buffer polygon feature layer. Refer to ArcGIS Pro: Turn on labels for instructions.
- Overwrite the original buffer polygon feature layer in the ArcGIS Enterprise portal or ArcGIS Online. Refer to ArcGIS Pro: Overwrite a web feature layer for instructions.
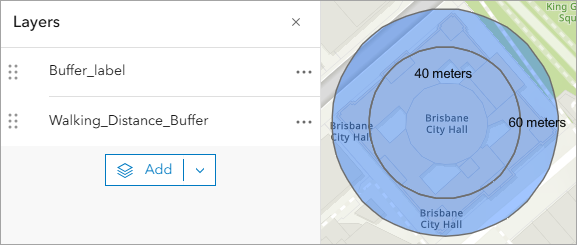
The labels for each buffer polygon are displayed in Map Viewer.
Note:
If the web map is opened in Map Viewer before overwriting the feature layer, refresh the page to reflect the changes.
Label the buffer polygons using point features with no fills in ArcGIS Pro
Note:
This workaround replaces polygon-based labels with labels from a separate point feature layer. Use this workflow when the original buffer polygon feature layer cannot be overwritten.
- Open the web map in ArcGIS Pro. Refer to ArcGIS Pro: Add a web map or web scene for instructions.
- Turn off labels for the buffer polygon feature layer and update the web map.
- In the Contents pane, click the buffer polygon feature layer.
- On the Labeling tab, in the Layer group, click Label.
- Save updates to the web map. Refer to ArcGIS Pro: Save a web map in a portal for instructions.
- Create a point feature class. Refer to ArcGIS Pro: Create a feature class in a feature dataset for instructions.
- In Step 3(c), click Point from the Feature Class Type drop-down list.
- In Step 4, add the labelling field with the correct data type to the point feature class. In this example, a short integer data type field named Distance is added.
The point feature layer is added to the Contents pane.
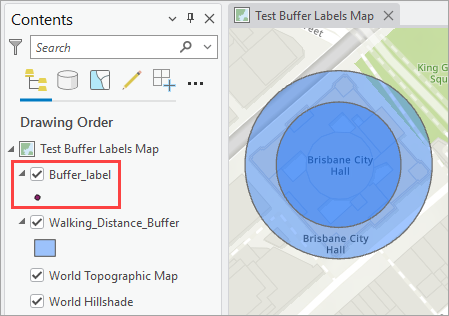
- Digitize the point features at the desired label positions. Refer to ArcGIS Pro: Create point and multipoint features for instructions. In this example, two point features are digitized to label the buffer polygon features.
The point features are added to the map.

- Add the label value to the newly added field.
- In the Contents pane, right-click the point feature layer and click Attribute Table.
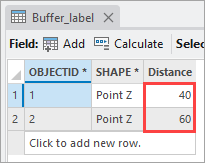
- On the table view, double-click the desired cell and type in the label values on the newly added field column. In this example, the values are added to the Distance field.
- On the Edit tab, in the Manage Edits group, click Save.
The distance value is added to the point feature layer attribute table.
- Configure the labels for the point feature layer.
- On the Labeling tab, in the Layer group, click Label.
- In the Label Class group, click the Field drop-down arrow and select the desired field.
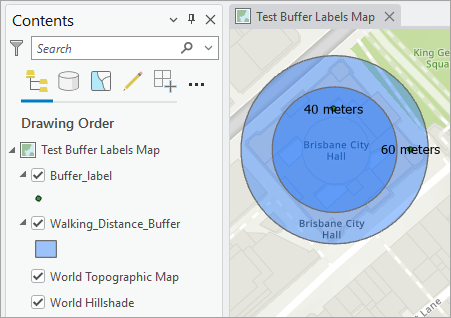
Note:
Optionally, configure the label properties to duplicate the original buffer polygon labels. Refer to ArcGIS Pro: Labeling basics and ArcGIS Pro: Specify text for labels for more information. In this example, the labels are positioned at the point feature center and configured using an expression that includes the selected field with a specific string as the label text.
The labels are added to the point features in ArcGIS Pro.
- Configure the point feature layer symbology to be transparent.
- In the Contents pane, right-click the point feature layer and click Symbology.
- In the Symbology pane, click the symbol.
- In the Format Point Symbol pane, click the Properties tab.
- On the Symbol
 tab, under Appearance, click the Shape fill symbol drop-down arrow and click Format polygon symbol….
 - In the Format Embedded Polygon Symbol pane, on the Symbol
 tab, under Appearance, click the Color drop-down arrow and click No color.
 - Click the Outline color drop-down arrow and click No color.
- Click Apply.
The point features are symbolized with transparent symbols on the map.
- Publish the point feature layer to the ArcGIS Enterprise portal or ArcGIS Online. Refer to ArcGIS Pro: Share a web feature layer using the default configuration for instructions.
- Add the published point feature layer to the web map in Map Viewer. Refer to ArcGIS Online: Browse layers or Portal for ArcGIS: Browse layers for instructions.
The point feature layer is added to the web map to label the buffer polygon features in Map Viewer.
Label the buffer polygon features using text sketch features in Map Viewer
Incorporate text sketch features to display the buffer polygon feature labels. Sketch features provide full manual control over label placement with a fixed position, regardless of scale change or label conflict. Refer to Portal for ArcGIS: Add text or ArcGIS Online: Add text for instructions.
Convert the labels as an annotation layer in ArcGIS Pro
Note:
This workflow consumes credits depending on the number of tiles generated. Refer to ArcGIS Online: Understand credits for more information.
Convert the original labels to an annotation tile layer using the Convert Labels To Annotation tool in ArcGIS Pro. The annotation layer is published as a web tile layer to the ArcGIS Enterprise portal or ArcGIS Online. Refer to ArcGIS Pro: Share a web tile layer using the default configuration for instructions. This approach is recommended for large or repeated maps where retaining the link between the label text and the source feature is necessary.
Note:
Annotations created or upgraded in ArcGIS Pro 3.x require ArcGIS Server 11.0 or later. If a compatibility issue occurs between the annotation dataset version and the server version used when publishing to ArcGIS Online, publish the web tile layer with the ‘Cache locally’ option.
Article ID: 000039757
- ArcGIS Pro
- ArcGIS Online
- Portal for ArcGIS
- ArcGIS Enterprise
Get support with AI
Resolve your issue quickly with the Esri Support AI Chatbot.


Related Information
Discover more on this topic
Search for related information
Find training related to this topic
Explore ideas and give feedback
Get help from ArcGIS experts
Start chatting now