HOW TO
Join attributes from XY table to point features in ArcGIS Pro and export as CSV
Summary
Joining attributes from an XY table to point features in ArcGIS Pro involves linking spatial data from a tabular format to geographic locations based on coordinates. This process integrates tabular data, such as survey results or GPS logs, with spatial data to analyze and visualize them in a geospatial context.
This article describes the workflow to join attributes from an XY table to point features in ArcGIS Pro and export them as a CSV file.
Procedure
- Open the ArcGIS Pro project consisting of the point features.
- Convert the XY table to point features using the Coordinate Table To Point tool.
- On the Analysis tab, in the Geoprocessing group, click Tools.
- In the Geoprocessing pane, search for and click Coordinate Table To Point (Defense Tools).
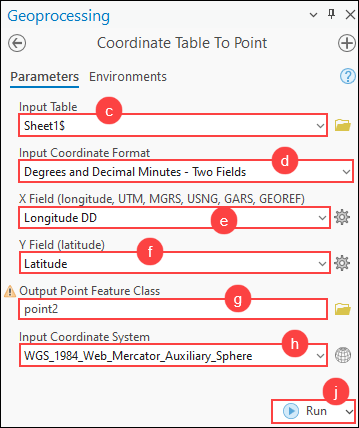
- In the Coordinate Table To Point pane, for Input Table, click Browse and select the Excel file containing the coordinate values.
- For Input Coordinate Format, specify the coordinate format for the input table. In this example, Degrees, Minutes, and Seconds - Two Fields is specified.
- For X Field (longitude, UTM, MGRS, USNG, GARS, GEOREF), select the longitude field from the drop-down list.
- For Y Field (latitude), select the latitude field from the drop-down list.
- For Output Point Feature Class, specify a name and location.
- For Input Coordinate System, click Select coordinate system to open the Input Coordinate System window.
- Expand Projected Coordinate System or Geographic Coordinate System to specify the coordinate system. In this example, WGS 1984 Web Mercator (auxiliary sphere) is specified. Click OK.
- Click Run.
Note:
Alternatively, use the XY Table To Point tool to convert tables containing x-, y-, and z-coordinates into point feature classes.
- Combine the attributes based on spatial relationships using the Add Spatial Join tool.
- In the Contents pane, right-click the point feature layer and click Joins and Relates > Add Spatial Join.
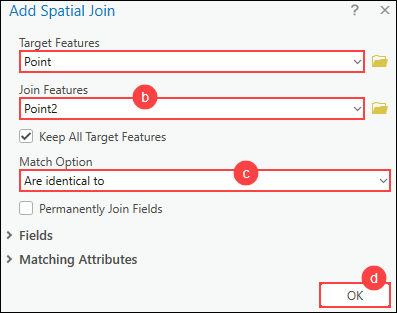
- In the Add Spatial Join window, for Join Features, select the output point feature layer from Step 2.
- For Match Option, select the preferred criteria to match the rows. In this example, Are identical to is selected.
- Click OK.
- Export the point feature attribute table to a CSV file using the Export Table tool.
- On the Analysis tab, in the Geoprocessing group, click Tools.
- In the Geoprocessing pane, search for and click Export Table (Conversion Tools).
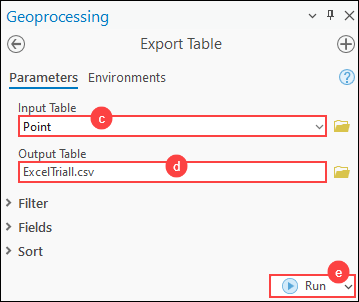
- In the Export Table pane, for Input Table, select the output point feature layer in Step 3 from the drop-down list.
- For Output Table, specify a name and add the .csv file extension at the end of the name. Click Browse and specify its location.
- Click Run.
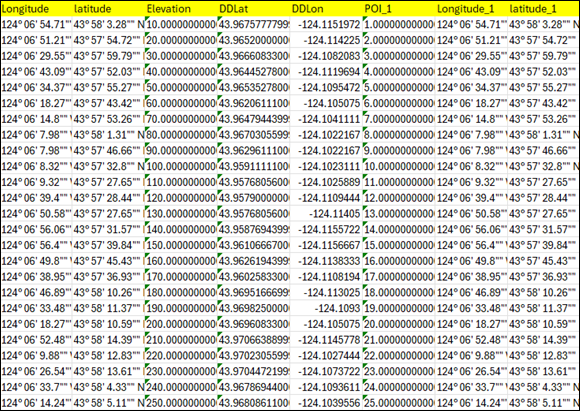
The CSV table is generated based on the spatial relationship of the XY table and point features.
Article ID: 000034206
- ArcGIS Pro 3 3
- ArcGIS Pro 3 2
- ArcGIS Pro 3 4
Get support with AI
Resolve your issue quickly with the Esri Support AI Chatbot.


Related Information
Discover more on this topic
Search for related information
Find training related to this topic
Explore ideas and give feedback
Get help from ArcGIS experts
Start chatting now