HOW TO
Create a polygon from an XY data table in ArcGIS Pro
Summary
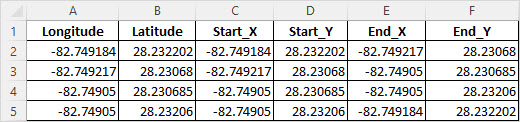
An XY data table contains information such as the latitude and longitude of point features. To create polygons from an XY data table, the table must contain the latitude and longitude of the start and end point features (polygon vertices) as shown in the images below. Refer to ArcGIS Pro: Parameters for more information.
The workflow below shows how to create a polygon from an XY data table containing the coordinates of the polygon vertices from Microsoft Excel in ArcGIS Pro.
Procedure
- Use the Excel To Table tool to convert the Microsoft Excel file into a table in ArcGIS Pro.
- Open the ArcGIS Pro project.
- On the Analysis tab, in the Geoprocessing group, click Tools.
- In the Geoprocessing pane, search for and click the Excel To Table tool.
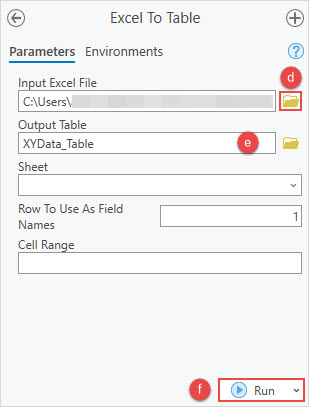
- In the Excel To Table pane, on the Parameters tab, click Browse
 from the Input Excel File parameter and select the Excel table.
 - For the Output Table parameter, click Browse to specify a name and the file location for the table.
- Click Run. The table is created and displayed in the Contents pane under Standalone Tables.
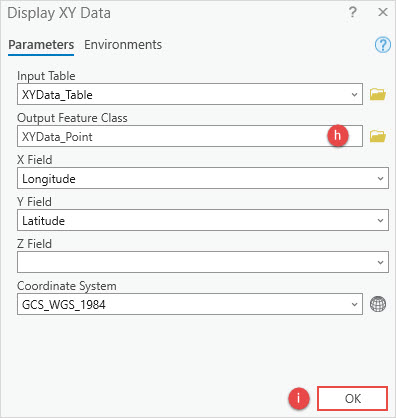
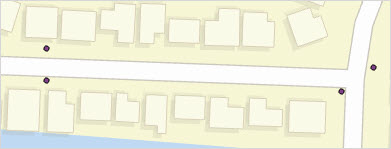
- In the Contents pane, right-click the created table and select Display XY Data.
- In the Display XY Data window, for the Output Feature Class parameter, click Browse to specify a name and the file location for the feature layer.
- Click OK.
The map below shows the created point features.
- Use the XY To Line tool to create a feature class containing geodetic or planar line features.
- On the Analysis tab, in the Geoprocessing group, click Tools.
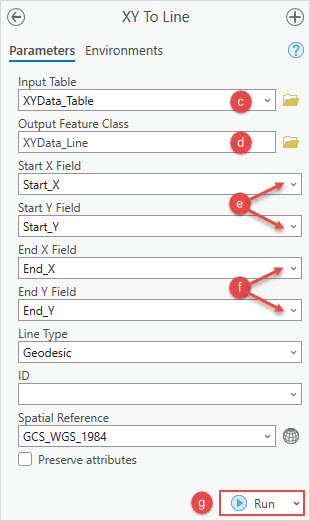
- In the Geoprocessing pane, search for and click the XY To Line tool.
- In the XY To Line pane, on the Parameters tab, select the table created in Step 1 from the Input Table drop-down list.
- For the Output Feature Class parameter, click Browse to specify a name and the file location for the line feature.
- For Start X Field and Start Y Field, select the field containing the X coordinates (longitude) and Y coordinates (latitude) of the starting points, respectively.
- For End X Field and End Y Field, select the field containing the X coordinates (longitude) and Y coordinates (latitude) of the ending points, respectively.
- Click Run.
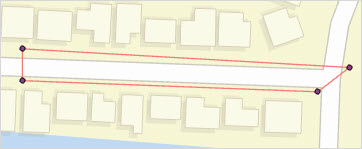
The map below shows the created line features.
- Use the Feature To Polygon tool to create a feature class containing polygons generated from areas enclosed by the input line features created in Step 2.
- On the Analysis tab, in the Geoprocessing group, click Tools.
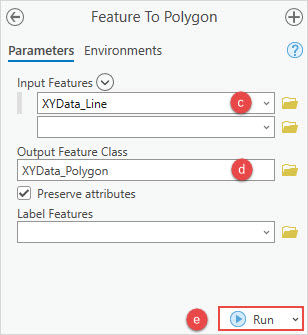
- In the Geoprocessing pane, search for and click the Feature To Polygon tool.
- In the Feature To Polygon pane, on the Parameters tab, select the line feature class from the Input Features drop-down list.
- For the Output Feature Class parameter, click Browse to specify a name and the file location of the polygon.
- Click Run.
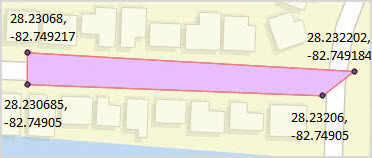
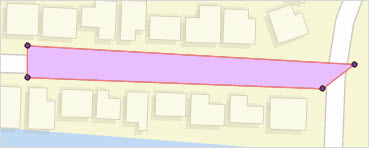
The image below shows the polygon created from an XY data table in ArcGIS Pro.
Article ID: 000029301
- ArcGIS Pro 3 0
- ArcGIS Pro 2 8 x
- ArcGIS Pro 2 7 x
- ArcGIS Pro 2 x
Get support with AI
Resolve your issue quickly with the Esri Support AI Chatbot.


Related Information
Discover more on this topic
Search for related information
Find training related to this topic
Explore ideas and give feedback
Get help from ArcGIS experts
Start chatting now