HOW TO
Extract raster values at point locations in ArcGIS Pro
Summary
A raster is comprised of a collection of cells or pixels arranged in rows and columns, where each cell has a value representing information such as temperature, land-cover type, or elevation. ArcGIS Pro contains the spatial analysis and modeling tools for both raster (cell-based) and feature (vector) data in ArcGIS Pro. This article describes the Extraction tools used to extract the values of each cell from a raster by either the cells' attributes or their point location.
Procedure
Extract Values to Points
The Extract Values to Points tool extracts the cell values of a raster and creates a new point feature class.
- In ArcGIS Pro, click the Analysis ribbon, and click the Tools icon. In the Geoprocessing pane, search for and click Extract Values to Points.
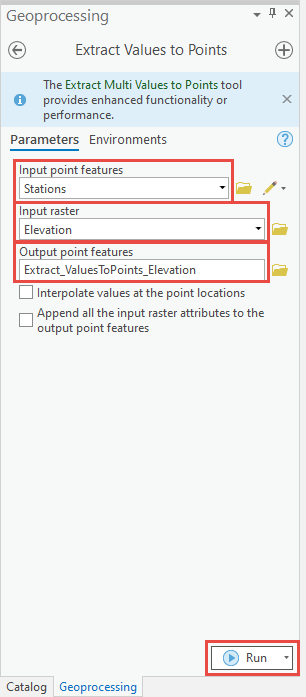
- In the Extract Values to Points pane, configure the following parameters.
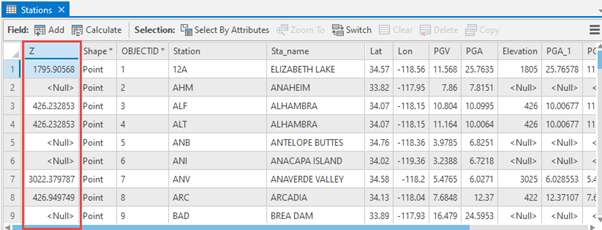
- For Input point features, select the point layer. In this example, it is Stations.
- For Input raster, select the raster layer. In this example, it is Elevation.
- For Output point features, set a name and location for the output feature class.
- Click Run.
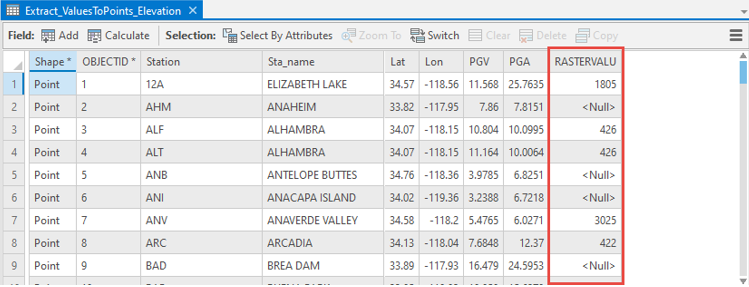
A new point feature class is created in the Contents pane and geodatabase. A RASTERVALU field column is created in the attribute table of the newly created point feature class to display the extracted raster value for each point feature.
Extract Multi Values to Points
The Extract Multi Values to Points tool is similar to the Extract Values to Points tool for multiple rasters.
- In ArcGIS Pro, click the Analysis ribbon, and click the Tools icon. In the Geoprocessing pane, search for and click Extract Multi Values to Points.
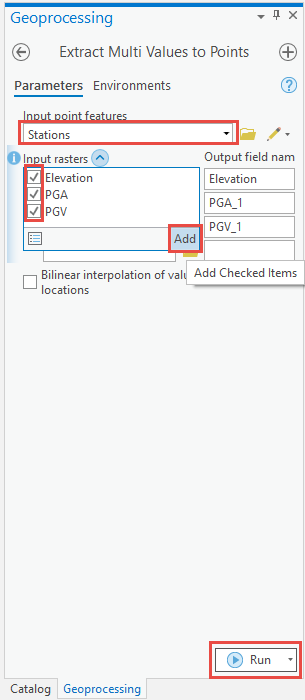
- In the Extract Multi Values to Points pane, configure the following parameters.
- For Input point features, select the point layer. In this example, it is Stations.
- For Input rasters, select the multiple raster layers. In this example, they are Elevation, PGA, and PGV.
- Click Add.
- Click Run.
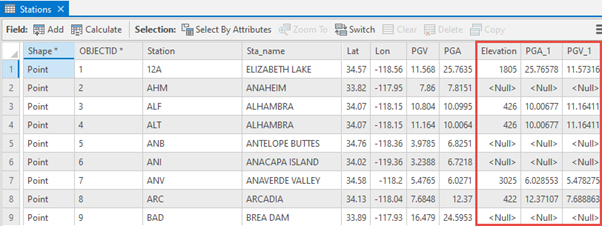
The raster values are extracted for each point feature in the table and added to the geodatabase and Contents pane.
Sample
The Sample tool creates a new table that displays the values of cells from a set of rasters for the defined locations.
- In ArcGIS Pro, click the Analysis ribbon, and click the Tools icon. In the Geoprocessing pane, search for and click Sample.
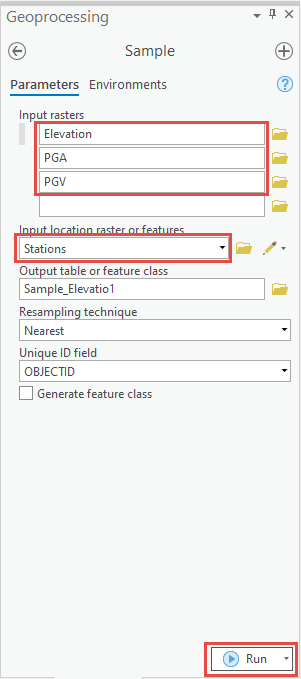
- In the Sample pane, configure the following parameters.
- For Input rasters, select the multiple raster layers. In this example, they are Elevation, PGA, and PGV.
- For Input location raster or features, select the point layer. In this example, it is Stations.
- Click Run.
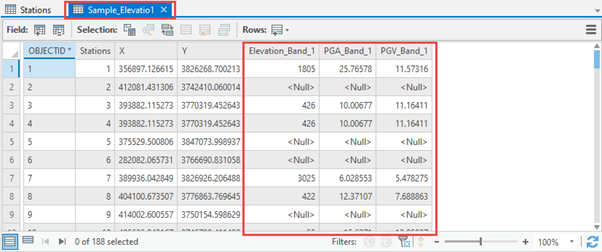
The raster values are extracted for each point feature in a table and are shown in the geodatabase and Contents pane.
Add Surface Information
The Add Surface Information tool appends the values of a raster layer to the input point layer.
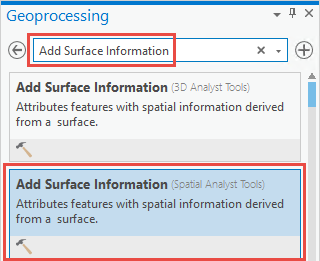
- In ArcGIS Pro, click the Analysis ribbon and click the Tools icon. In the Geoprocessing pane, search for and click Add Surface Information.
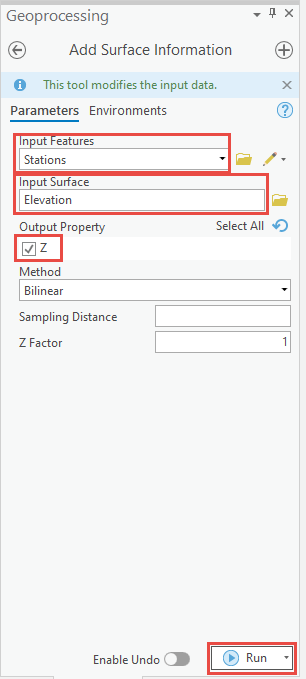
- In the Add Surface Information pane, configure the following parameters.
- For Input Features, select the point layer. In this example, it is Stations.
- For Input Surface, select the point layer. In this example, it is Elevation.
- For Output Property, check the Z checkbox.
- Click Run.
The raster values are extracted for each point feature in a table and are shown in the geodatabase and Contents pane.
Extract Values To Table
The Extract Values To Table tool extracts the cell values from a set of rasters by referring to a set of point or polygon feature class. The values are recorded in the attribute table of the output feature class.
- In ArcGIS Pro, click the Analysis ribbon and click the Tools icon. In the Geoprocessing pane, search for and click Extract Values To Table.
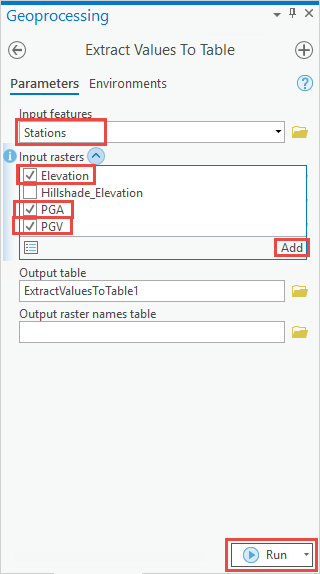
- In the Extract Values To Table pane, configure the following parameters.
- For Input features, select the point layer. In this example, it is Stations.
- For Input rasters, select the multiple raster layers. In this example, they are Elevation, PGA, and PGV.
- Click Add.
- Click Run.
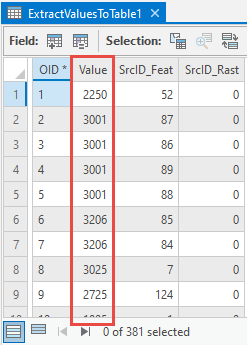
A new table is added to the geodatabase and the Contents pane, with the raster values for each point feature extracted to the Value field column.
Article ID: 000025662
- ArcGIS Pro 2 8 x
- ArcGIS Pro 2 7 x
- ArcGIS Pro 2 x
Get support with AI
Resolve your issue quickly with the Esri Support AI Chatbot.


Related Information
Discover more on this topic
Search for related information
Find training related to this topic
Explore ideas and give feedback
Get help from ArcGIS experts
Start chatting now