HOW TO
Draw a line connecting polygon edges to points within a polygon in ArcGIS Pro
Summary
In mapping, connecting point features with a line is a common workflow to visualize movement or relationships between locations. In some cases, the line may extend to the edge of a surrounding polygon to provide spatial context for logistical, safety, and visual purposes. Examples where the connecting line reflects infrastructure connectivity include electrical boxes connected to public utility lines beyond the parcel edge, and emergency call points connected to the nearest exit in safety or emergency planning. This article outlines the workflow to draw a line connecting polygon edges through points within the polygon in ArcGIS Pro.
Procedure
- Open the ArcGIS Pro project.
- Connect the points within the polygon using the Points To Line tool. Refer to Steps 4 through 7 in How To: Create connection lines between two points from a CSV file for instructions.
Note:
If the point features within the polygons are part of a point layer, select the features to connect and ensure the Use the selected records: <record counts> option under Input Features is toggled on before running the Points To Line tool.
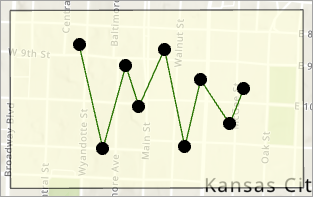
The image below shows the point features connected with a polyline feature in ArcGIS Pro.
- Extend the connecting line to the edge of the enclosing polygon using the Extend or Trim tool. Refer to ArcGIS Pro: Extend or trim a polyline feature for instructions.
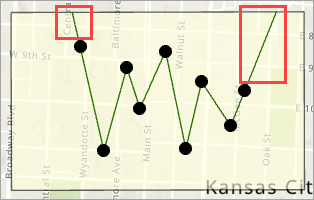
The image below shows the connecting line with the extended segments in ArcGIS Pro.
Note:
Proceed with the remaining workflow if specifying the orientations of the extended segments is necessary.
- Edit the orientation of the extended connecting line segments.
- In the Modify Features pane, click Back
 .
. - Under Reshape, click Edit Vertices.
- On the map view, click the extended connecting line.
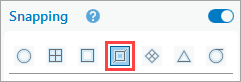
- Configure the required snap agents. Refer to ArcGIS Pro: Enable snap agents for instructions. In this example, the Edge snap agent in Step 3 is enabled to snap the vertices to the polygon edge.
- In the Modify Features pane, click Back
- Click and drag the vertex at the end of the extended connecting line segment to the desired location on the polygon edge, then double-click to fix the vertex in place.
- Repeat Step 4(e) on the vertex at the opposite end of the extended connecting line segment.
- On the editing toolbar, click Finish.
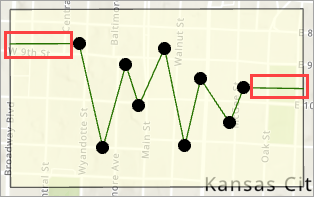
The image below shows the connecting line segments with the specified orientations in ArcGIS Pro.
Article ID: 000036083
- ArcGIS Pro
Get support with AI
Resolve your issue quickly with the Esri Support AI Chatbot.


Related Information
Discover more on this topic
Search for related information
Find training related to this topic
Explore ideas and give feedback
Get help from ArcGIS experts
Start chatting now