HOW TO
Display subheadings in the ArcGIS StoryMaps collection navigation
Summary
In ArcGIS StoryMaps, story navigation provides clickable bookmarks only for top-level text blocks within a story. When a story contains many sections, access to subsections becomes necessary for better navigation. As a workaround, each section can be organized as an individual story within a collection, allowing subsections to be displayed in the collection navigation. This article provides the workflow to display subheadings in the ArcGIS StoryMaps collection navigation.
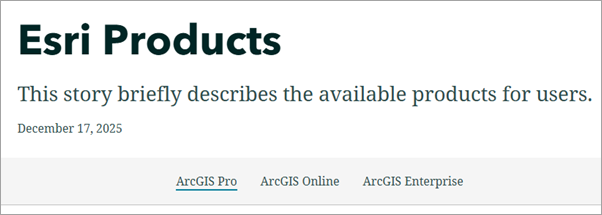
In this example, the story used for the workflow includes three headings, each with three subheadings.
Procedure
Note:
This workflow requires clicking individual stories from the collection cover, as continuous scrolling between stories is not supported in StoryMaps collections. This limitation occurs because each story is published as a distinct web page and uses a separate navigation structure.
- Create and publish each heading as an individual story.
- Create individual stories. Refer to Steps 1 through 4 in ArcGIS StoryMaps: Create a story for instructions. In Step 3(a), set the original heading as the title.
- Enable story navigation. Refer to Step 1 in ArcGIS StoryMaps: Add story navigation for instructions.
- Close the Design panel.
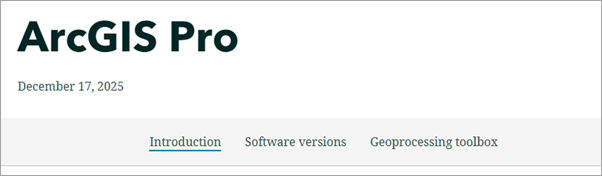
- On the story builder, highlight a subheading, click the text type drop-down menu on the text editing toolbar and select Heading 1. Repeat this step to add other subheadings.
- Publish the story. Refer to Step 7 in ArcGIS StoryMaps: Create a story for instructions.
The subheadings are displayed on the navigation bar.
- Repeat Steps 1(a) through 1(e), as required, for each heading.
- Create a collection and add the individual stories. Refer to Steps 1 through 4 in ArcGIS StoryMaps: Create a collection for instructions.
- In Step 3(a), set the original title as the collection title.
- In Step 4(b), select ArcGIS content.
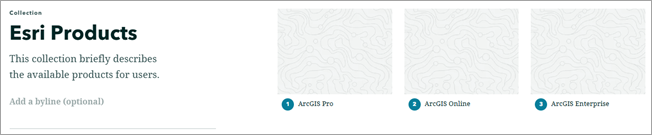
- In Step 4(c), check the check box of each individual story created in Step 1.
- Click Add.
The published stories are added to the collection.
- Configure the collection navigation. Refer to ArcGIS StoryMaps: Change collection navigation for more information.
- In the collection builder header, click Design.
- In the Design panel, under Navigation, click Tabbed.
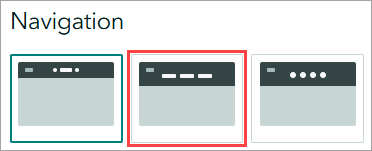
- Close the Design panel.
- Publish the collection. Refer to Step 9 in ArcGIS StoryMaps: Create a collection for instructions.
The headings and subheadings are displayed in the collection navigation upon clicking the individual stories on the collection cover in StoryMaps.
Article ID: 000039675
- ArcGIS StoryMaps
Get support with AI
Resolve your issue quickly with the Esri Support AI Chatbot.


Related Information
Discover more on this topic
Search for related information
Find training related to this topic
Explore ideas and give feedback
Get help from ArcGIS experts
Start chatting now