HOW TO
Automatically generate a vertical line when creating an elevated point feature
Summary
When working with local or global scenes in ArcGIS Pro, 2D layers can be represented with elevations on the map. Elevations can be rendered as a floating or underground feature relative to the ground. In some cases, elevated point features must be connected to a line feature for a visual representation of a standing structure, for example, a light pole or a power line on a street. This article provides the workflow to automatically generate a connecting vertical line based on an elevated point created on an existing line feature.
Procedure
- In ArcGIS Pro, create a new z-enabled line and a new z-enabled point feature in the geodatabase. Refer to ArcGIS Pro: Create features for more information. This workflow uses these examples, Line3D, and Point3D, respectively.
- Add the GlobalID field into both the newly created point and line feature classes using the Add Global IDs (Data Management) tool.
- Draw a single line for the line feature on a global or local scene. Refer to ArcGIS Pro: Create polyline features for more information.
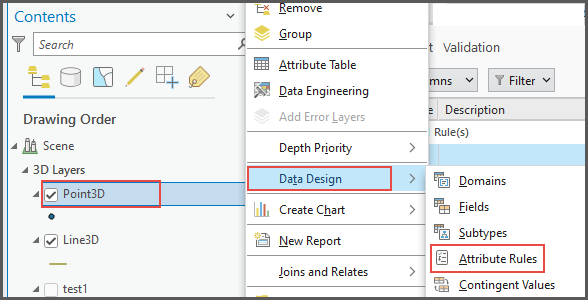
- On the point feature, add a new attribute rule.
- In the Contents pane, right-click the point features, click Data Design > Attribute Rules.
-
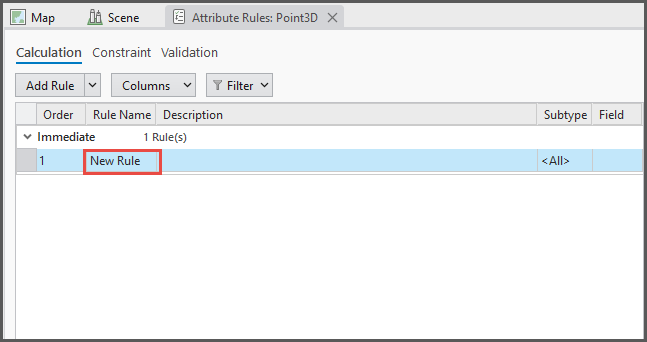
- On the Attribute Rules: <Layer Name> window, click Add Rule on the Calculation tab.
- Specify a Rule Name. In this example, New Rule is used.
-
- On the New Rule pane, in the Expression box, fill in the following expression. Change <Line_Feature> to reflect the name of the line feature created in Step 1.
var lines = FeaturesetByName($datastore, "<Line_Feature>", ["GlobalID"], true)
var i_line = First(Intersects(lines, Buffer($feature, 1, "meters")))
if(i_line == null) { return }

var line_geo = Geometry(i_line)
var point_geo = Geometry($feature)
var d_start = Distance(point_geo, line_geo.paths[0][0])
var d_end = Distance(point_geo, line_geo.paths[-1][-1])

var i = IIf(d_start < d_end, 0, -1)
var v = [line_geo.paths[i][i].x, line_geo.paths[i][i].y, point_geo.z, null]

var new_point_geo = {x: v[0], y: v[1], z: v[2], m: v[3], spatialReference: point_geo.SpatialReference}

var new_line_geo = Dictionary(Text(line_geo))
var j = IIf(i == 0, 0, Count(new_line_geo.paths[0]))
Insert(new_line_geo.paths[0], j, v)

return {
    result: { geometry: Point(new_point_geo) },
    edit: [{
        className: "<Line_Feature>",
        updates: [{
            globalID: i_line.GlobalID,
            geometry: Polyline(new_line_geo)
        }]
    }]
}
-
- Under Triggers, check both the Insert and Update checkboxes.
- On the ArcGIS Pro ribbon, on the Attribute Rules tab, click Save.
- Create a new point feature on the line feature created in Step 3. Hover over the end of the line feature, right-click and select Absolute X, Y, Z.
- In the Absolute X,Y,Z pane, fill in the appropriate value for Z. In this article, the value is 35m.
- Press Enter to save, and the vertical line connecting to the point feature is automatically drawn.
Article ID: 000030799
- ArcGIS Pro 3 1
- ArcGIS Pro 3 0
- ArcGIS Pro 2 9x
Get support with AI
Resolve your issue quickly with the Esri Support AI Chatbot.


Related Information
Discover more on this topic
Search for related information
Find training related to this topic
Explore ideas and give feedback
Get help from ArcGIS experts
Start chatting now