HOW TO
Alphabetically sort data in the List widget in ArcGIS Experience Builder
Summary
In ArcGIS Experience Builder, the data in the List widget is displayed in its original order and not sorted alphabetically resulting in inefficient data search.
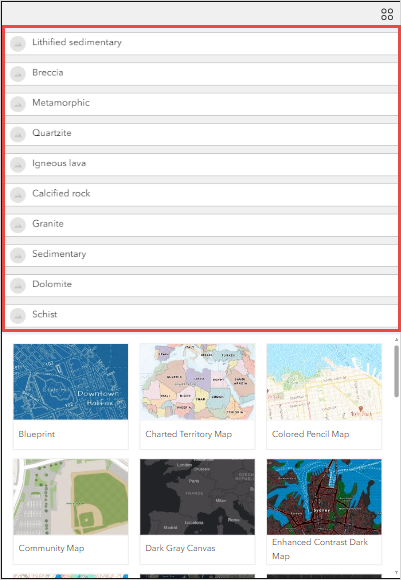
The image below shows the unsorted attribute data within the List widget in ArcGIS Experience Builder.
This article describes several workflows to alphabetically sort the data to be displayed in the List widget.
Procedure
Sort data through Tools in the List panel
- Log in to ArcGIS Online, and open the web experience.
- Drag and drop the List widget onto the canvas. Configure the template and data source for the widget.
- In the List panel, on the Content tab, expand Tools and toggle Sort on.
- In the menu option box, select the field to sort and click the preferred sequence. In this example, the Geological_Type field and the Ascending sequence are selected.

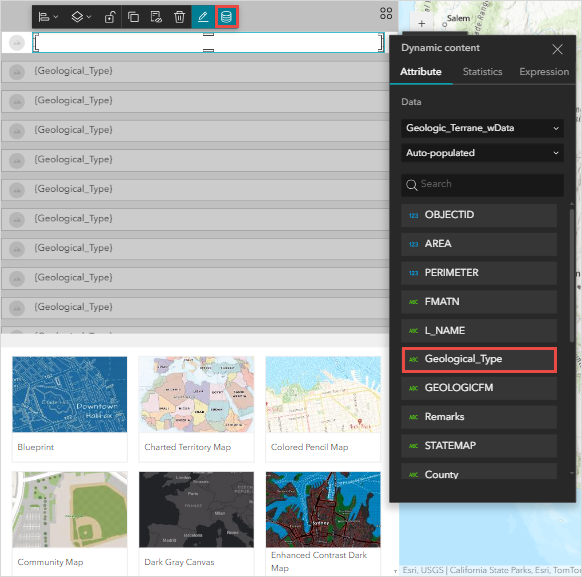
- On the canvas, click the text on the List widget. Click Dynamic content
 .
. - In the Dynamic content panel, on the Attribute tab, under the list of attribute fields, select the attribute to display. In this example, Geological_Type is selected.
- Click the canvas to refresh the changes made on the List widget.
- Click Save
 > Publish.
Sort data through the Data panel
- Log in to ArcGIS Online, and open the web experience.
- Click the Data
 tab, and select the feature layer card. Click Settings
  .
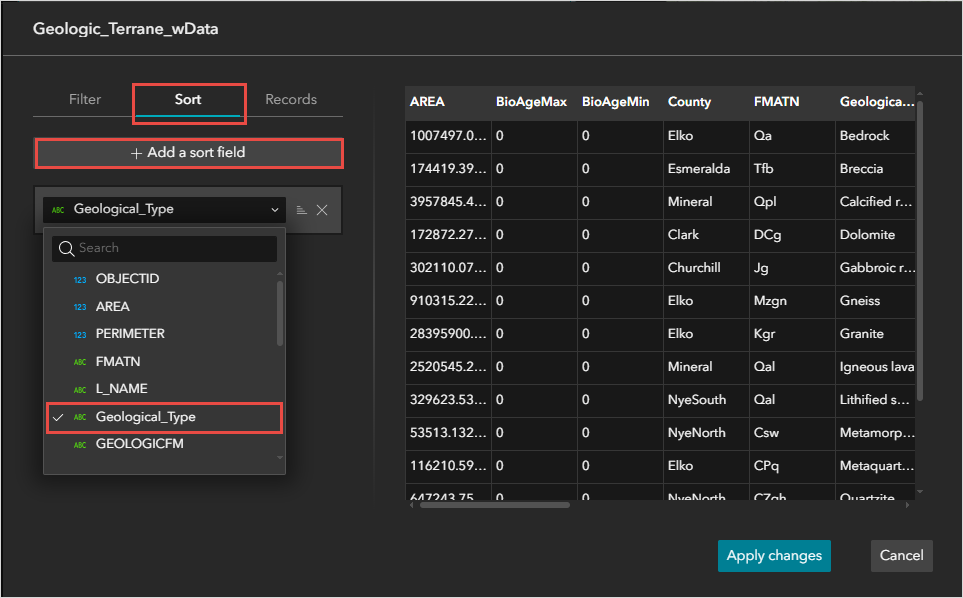
. - In the feature layer window, click Sort > +Add a sort field.
- Select the field to sort and click the preferred sequence. In this example, the Geological_Type field and the Ascending sequence are selected.
- Click Apply changes.
- Drag and drop the List widget onto the canvas. Configure the template and data source for the widget.
- On the canvas, click the text on the List widget. Click Dynamic content .
- In the Dynamic content panel, on the Attribute tab, under the list of attribute fields, select the attribute to display. In this example, Geological_Type is selected.
- Click the canvas to refresh the changes made on the List widget.
- Click Save > Publish.
Note:
Sorting the data through the Data panel maintains the sorted order of the data in the other widgets as well.
Create a data view of the sorted data
- Log in to ArcGIS Online, and open the preferred web experience.
- Click the Data tab, and select the feature layer card.
- On the Data views tab, click + Create a view.
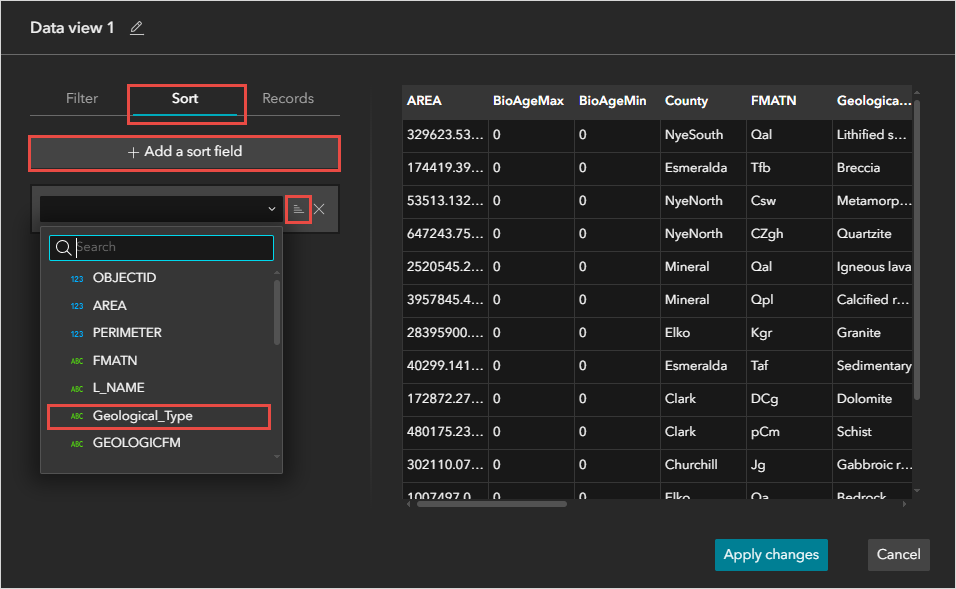
- In the data view window, click Sort > + Add a sort field.
- Select the field to sort and click the preferred sequence. In this example, the Geological_Type field and the Ascending sequence are selected.
- Click Apply changes.
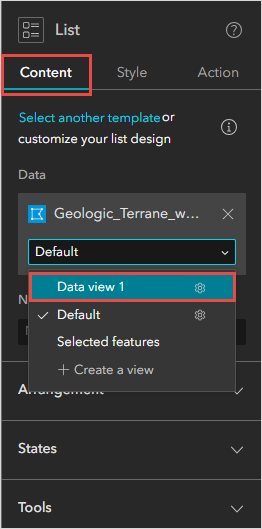
- Drag and drop the List widget onto the canvas. Configure the template and data source for the widget.
- In the List panel, on the Content tab, under Data, click the drop-down list of the added data source, and select the created data view. In this example, 'Data view 1' is selected.
- On the canvas, click the text on the List widget. Click Dynamic content .
- In the Dynamic content pane, on the Attribute tab, under the list of attribute fields, select the attribute to display. In this example, Geological_Type is selected.
- Click the canvas to refresh the changes made on the List widget.
- Click Save > Publish.
The image below shows the sorted attributes in alphabetical order in the List widget in ArcGIS Experience Builder.

Article ID: 000032753
- ArcGIS Experience Builder
Get support with AI
Resolve your issue quickly with the Esri Support AI Chatbot.


Related Information
Discover more on this topic
Search for related information
Find training related to this topic
Explore ideas and give feedback
Get help from ArcGIS experts
Start chatting now