Frequently asked question
Why are KML attributes not auto-populated to attribute fields in ArcGIS Pro?
In ArcGIS Pro, when importing Keyhole Markup Language (KML) files using the KML To Layer tool, the output layer's attributes are not auto-populated to their respective attribute fields due to the different formats used to store the tabular information. Since KML is a tag-based file format, the tabular information is represented within the <ExtendedData> tag. This tag contains one or more <Data> tags to represent the specific attributes associated with the geographic features.
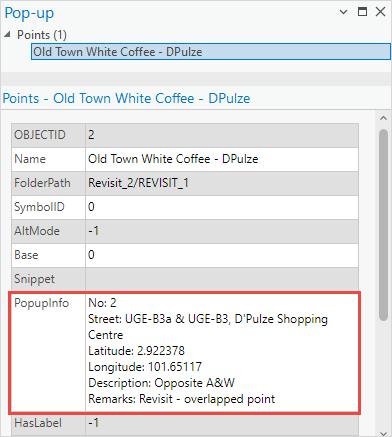
ArcGIS Pro stores feature attributes in a structured tabular format with columns or fields representing the different attributes. Thus, when using the KML To Layer tool, ArcGIS Pro creates a PopupInfo field comprising the visible information displayed in a KML pop-up window, which is based on HTML markup.
The image below shows the attribute information displayed in the pop-up when selecting the features in ArcGIS Pro.
However, users can use the Quick Import tool available with the ArcGIS Data Interoperability extension and license to maintain the attribute fields of the KML file, or manually populate the KML attributes to their respective fields.
Use the Quick Import tool with the ArcGIS Data Interoperability extension
Note:
If the KML file is missing its schema, the attribute fields of the layer are not populated in the attribute table.
- Open the ArcGIS Pro project.
- In ArcGIS Pro, on the Analysis tab, click Tools in the Geoprocessing group.
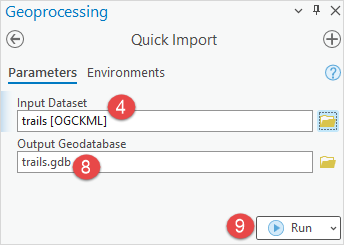
- In the Geoprocessing pane, search for and click the Quick Import tool.
- On the Parameters tab, for Input Dataset, click Browse
 .
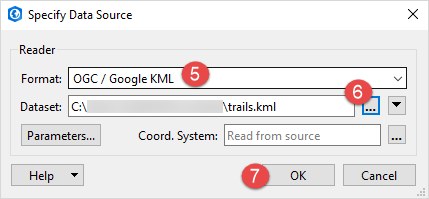
. - In the Specify Data Source dialog box, search for and select OGC/Google KML from the Format drop-down list.
Note:
Optionally, click More Formats…, search for and select OGC/Google KML from the format list in the FME Reader Gallery dialog box, and click OK.
- For Dataset, click Open file browser
 and select the KML file from the Select 'File' dialog box.
 - Click OK.
- In the Quick Import pane, provide a name for Output Geodatabase and click Browse
 to specify the location of the file geodatabase.
 - Click Run.
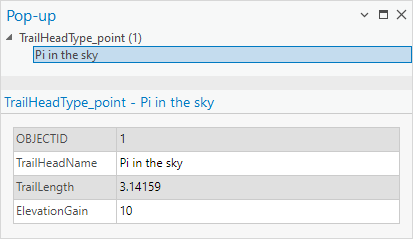
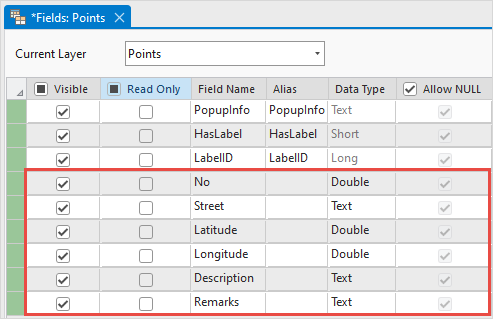
The image below shows the attributes automatically populated in their respective fields when using the Quick Import tool.
Manually populate the converted KML layer attributes to their respective fields in the attribute table
Note:
This workaround is applicable for smaller datasets. Manually populating larger datasets consumes time.
- Open the ArcGIS Pro project.
- In the Contents pane, right-click the KML layer and click Attribute Table.
- Create new fields to populate the KML attribute information.
- Manually populate the KML attributes in their respective fields.

Note:
In the attribute table, delete or hide other fields if necessary.
Article ID: 000032102
- ArcGIS Pro 3 1
- ArcGIS Pro 3 0
- ArcGIS Pro 3 2
Get support with AI
Resolve your issue quickly with the Esri Support AI Chatbot.


Related Information
Discover more on this topic
Search for related information
Find training related to this topic
Explore ideas and give feedback
Get help from ArcGIS experts
Start chatting now