Frequently asked question
Can data-driven map tours be populated from multipoint feature layers in ArcGIS StoryMaps?
No, multipoint feature layers cannot be used to populate data-driven map tours in ArcGIS StoryMaps because only point feature layers are supported. However, in scenarios such as a sample site with multiple locations, multipoint features need to be emphasized to convey the narrative effectively. As a workaround, the map tour can be created manually within a sidecar block. Although this approach does not highlight the features in the same way as a data-driven map tour, the map on the media panel can be configured to zoom to a specific extent to display the multipoint features. Additionally, media content blocks can be incorporated in the narrative panel to further emphasize the features. Refer to any of the following workarounds for instructions.
Populate the map tour using a web map with multipoint feature layers
This workflow populates a custom map tour using a sidecar block directly from an existing web map in ArcGIS Online. The multipoint feature layer must be added to a web map before proceeding. Refer to ArcGIS Online: Get started creating maps (Map Viewer) for more information.
- Open the story on the story map's edit page.
- Add a sidecar block to the story. Refer to Step 1 through Step 3 in ArcGIS StoryMaps: Add a sidecar to a story for instructions. In this example, the Slideshow layout is selected in Step 3.
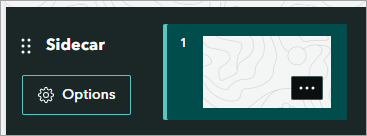
The sidecar block is added to the story.
- Add the web map with the multipoint feature layer to the sidecar media panel.
- On the media panel, click the Add drop-down arrow and click Map.
- In the Add a map dialog box, select the web map.
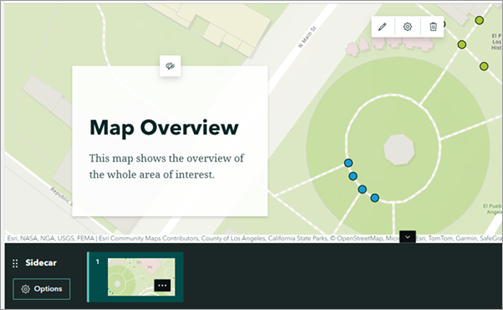
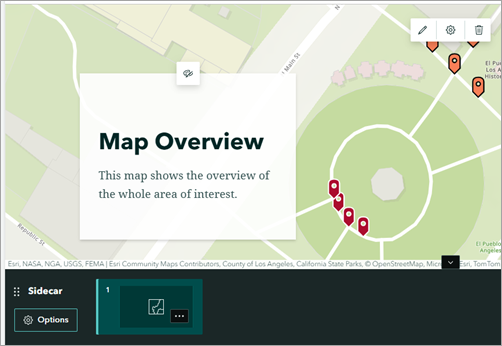
- In the Adjust map appearance dialog box, adjust the map extent as necessary for the first slide and click Save. In this example, the first slide media panel is configured to show the overview of the whole web map.
- On the narrative panel, click Add content block
 to add a content block. In this example, the narrative panel is added with two text blocks.
The web map is added to the sidecar media panel, and text blocks are added to the narrative panel.
- On the slide panel, on the first slide, click Slide options
 > Duplicate slide
  .
.
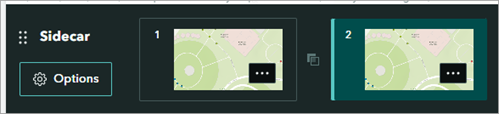
The duplicated slide is added to the sidecar slide panel.
- Configure the duplicated slide properties.
- On the duplicated slide media panel, click Edit
 .
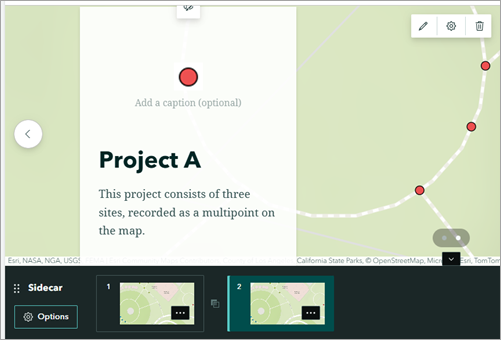
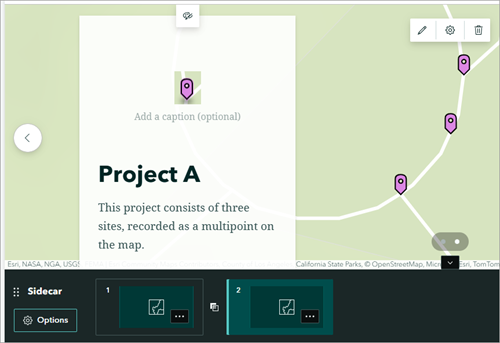
. - In the Adjust map appearance dialog box, adjust the map extent as necessary and click Save. In this example, the duplicated slide media panel is configured to show the first multipoint feature.
- On the narrative panel, edit the existing content block or click Add content block
 to add a content block. In this example, the existing text blocks are updated accordingly, and an image block displaying the intended symbol is added to the narrative panel.
- On the duplicated slide media panel, click Edit
The duplicated slide media panel and the narrative panel are updated.
- Repeat Step 4 and Step 5 as necessary.
- On the story map's edit page, in the story builder header, click Publish to save the changes.
Populate the map tour using an express map
This workflow populates a custom map tour in a sidecar block using an express map, which requires manual digitizing and direct symbol configurations of the multipoint features in ArcGIS StoryMaps. Express maps only support fade animation when transitioning between slides and do not support panning like the default data-driven map tours.
- Open the story on the story map’s edit page.
- Add a sidecar block to the story. Refer to Step 1 through Step 3 in ArcGIS StoryMaps: Add a sidecar to a story for instructions. In this example, the Slideshow layout is selected in Step 3.
The sidecar block is added to the story.

- Add an express map with the multipoint features to the sidecar media panel.
- On the media panel, click the Add drop-down arrow and click Map.
- In the Add a map dialog box, click New express map.
- In the Edit express map dialog box, adjust the map extent as necessary. In this example, the express map is configured to show the overview of the whole map.
Note:
Optionally, in the Search by location search box, search for the area of interest.
- On the editing toolbar, click Add a point
 , then click the location on the map.
 - On the Layers
 tab, specify the point properties as necessary.
 - Click the Style drop-down arrow and select the color for the point feature.
- Repeat Steps 3(d) through Step 3(f) to fully digitize a multipoint feature.
Note:
If necessary, repeat Step 3(g) and assign a different color to each of the multipoint features. In this example, this step is repeated three times to represent three multipoint features on the map.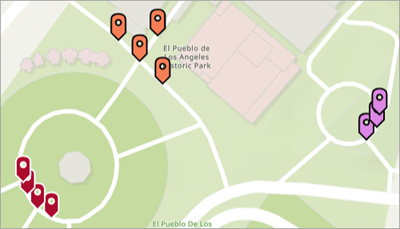
- In the Edit express map dialog box, click Save.
- On the narrative panel, click Add content block
 to add any content to the map tour. In this example, the narrative panel is added with two text blocks.
The express map is added to the sidecar media panel, and text blocks are added to the narrative panel.
- On the slide panel, click Slide options
 and click Duplicate slide
  .
. - Configure the duplicated slide properties.
- On the duplicated slide media panel, click Edit
 .
. - In the Adjust map appearance dialog box, adjust the map extent as necessary and click Save. In this example, the duplicated slide media panel is configured to show the first multipoint feature.
- On the narrative panel, edit the existing content block or click Add content block
 to add a content block. In this example, the existing text blocks are updated accordingly, and an image block displaying the intended symbol is added to the narrative panel.
- On the duplicated slide media panel, click Edit
The duplicated slide media panel and the narrative panel are updated.
- Repeat Step 4 and Step 5 as necessary.
- On the story map's edit page, in the story builder header, click Publish to save the changes.
Article ID: 000037843
- ArcGIS Online
- ArcGIS StoryMaps
Get support with AI
Resolve your issue quickly with the Esri Support AI Chatbot.


Related Information
Discover more on this topic
Search for related information
Find training related to this topic
Explore ideas and give feedback
Get help from ArcGIS experts
Start chatting now