HOW TO
Importieren von Bildern in Site Scan Flight und Hochladen in den Site Scan Manager
Zusammenfassung
This article describes the steps to import images from a drone to Site Scan Flight for ArcGIS version 4.2 and later, and upload them to Site Scan Manager for ArcGIS, along with how to import images captured using a third-party flight control application and how to use the Quick Upload functionality. The Site Scan Flight app uses the iOS Files application to store and access images from drone missions.
Starting with the August 2021 update (version 4.2), Site Scan Flight migrates image management from the iOS Photos application to the iOS Files application. Using this native iOS application designed for managing large numbers of files simplifies image management and increases security by restricting access from third-party apps to your imagery.
Vorgehensweise
After completing a mission, you can either import the images to the iPad for upload and processing in Site Scan Manager, or upload images manually to Manager from a computer. To load images manually through a computer, see the article: How To: Upload photos to Site Scan Manager for ArcGIS.
Importing images to an iPad from the drone using wireless download
Wireless image transfer from drone to iPad is ideal for smaller datasets. The drone and controller must be powered on, and the iPad must be connected to the controller throughout the image transfer. Once the drone has landed, tap the Missions section of the Flight app located in the upper left corner of the main screen. This section displays the number of Pending Missions in red.
- Ensure the Flight app is connected to the drone.
- Go to the Missions menu. This is in the upper left corner of the main flight planning page, as shown in the following image.

- Select the Mission to import images for in the left-hand menu, then tap Get Images.
- Once the image download is complete, tap Upload to Site Scan Manager to upload the images to Site Scan Manager and automatically start processing. It is recommended to perform this step while connected to strong internet, or to use the Quick Upload functionality, as described below.
To reference these images outside of Site Scan, they are located in the Files app, On My iPad > Site Scan > Data > [your organization] > File System transfer.
Importing images to the Flight app with an SD Card reader dongle (Recommended)
The recommended option to transfer images to the Flight app is using an SD card dongle. This is preferred, especially for large missions, as it is more efficient than wirelessly downloading many images. This method also allows automatically downloading the images for all Pending Missions at once.
- Open the Site Scan Flight app and select Missions in the top left corner.
- Connect the SD card dongle to the iPad.
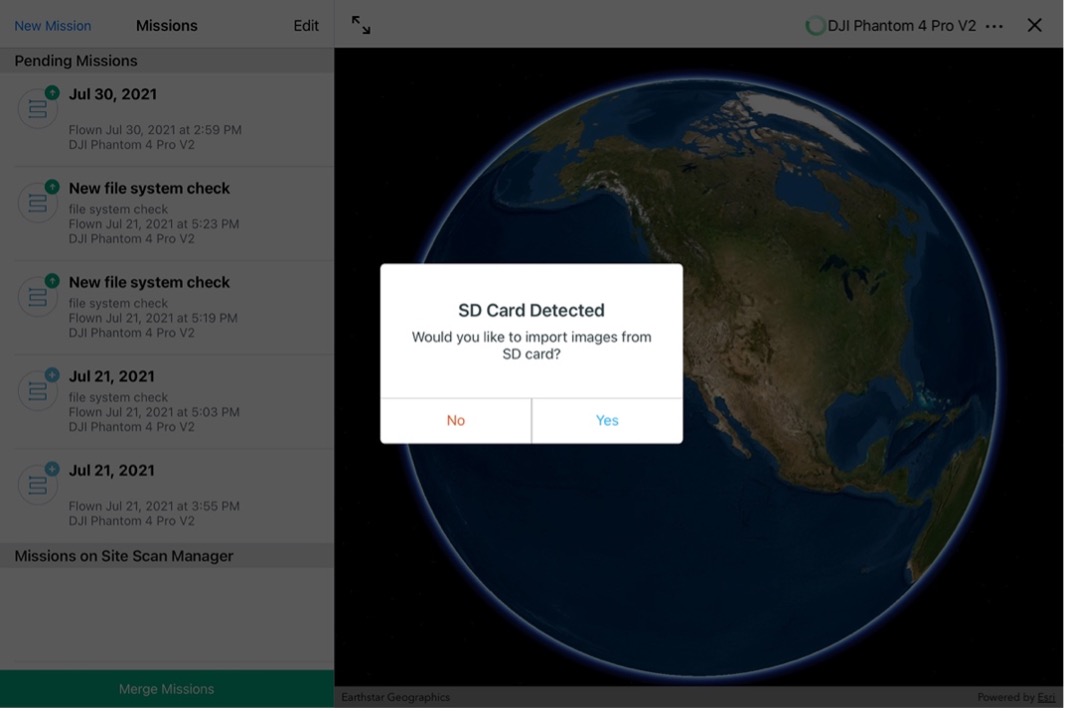
- Site Scan Flight should detect the SD card and show the following alert: SD Card Detected. Would you like to import images from the SD card?
- Another way to access the Import Images menu is by tapping the options menu in the upper right ellipsis menu (•••), and then Import Images. This brings up the Files app browser. Skip to Step 8 to continue with the import workflow.
- Select Yes.
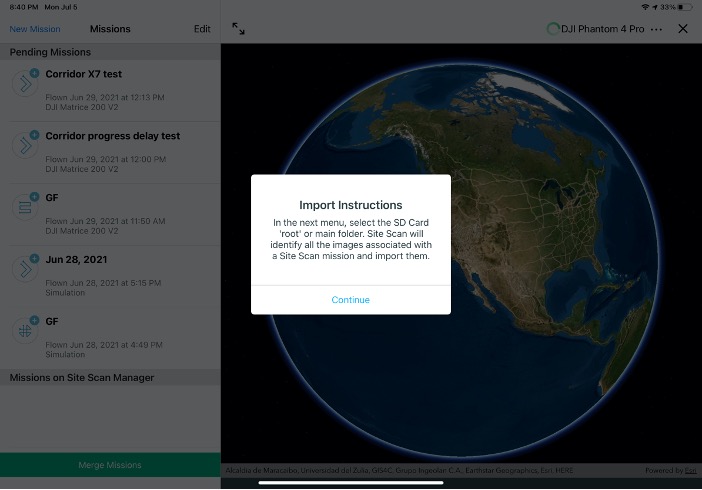
- This opens a new window showing the following message: Import Instructions. In the next menu, select the SD Card 'root' or main folder. Site Scan will identify all the images associated with a Site Scan mission and import them.
- Select Continue.
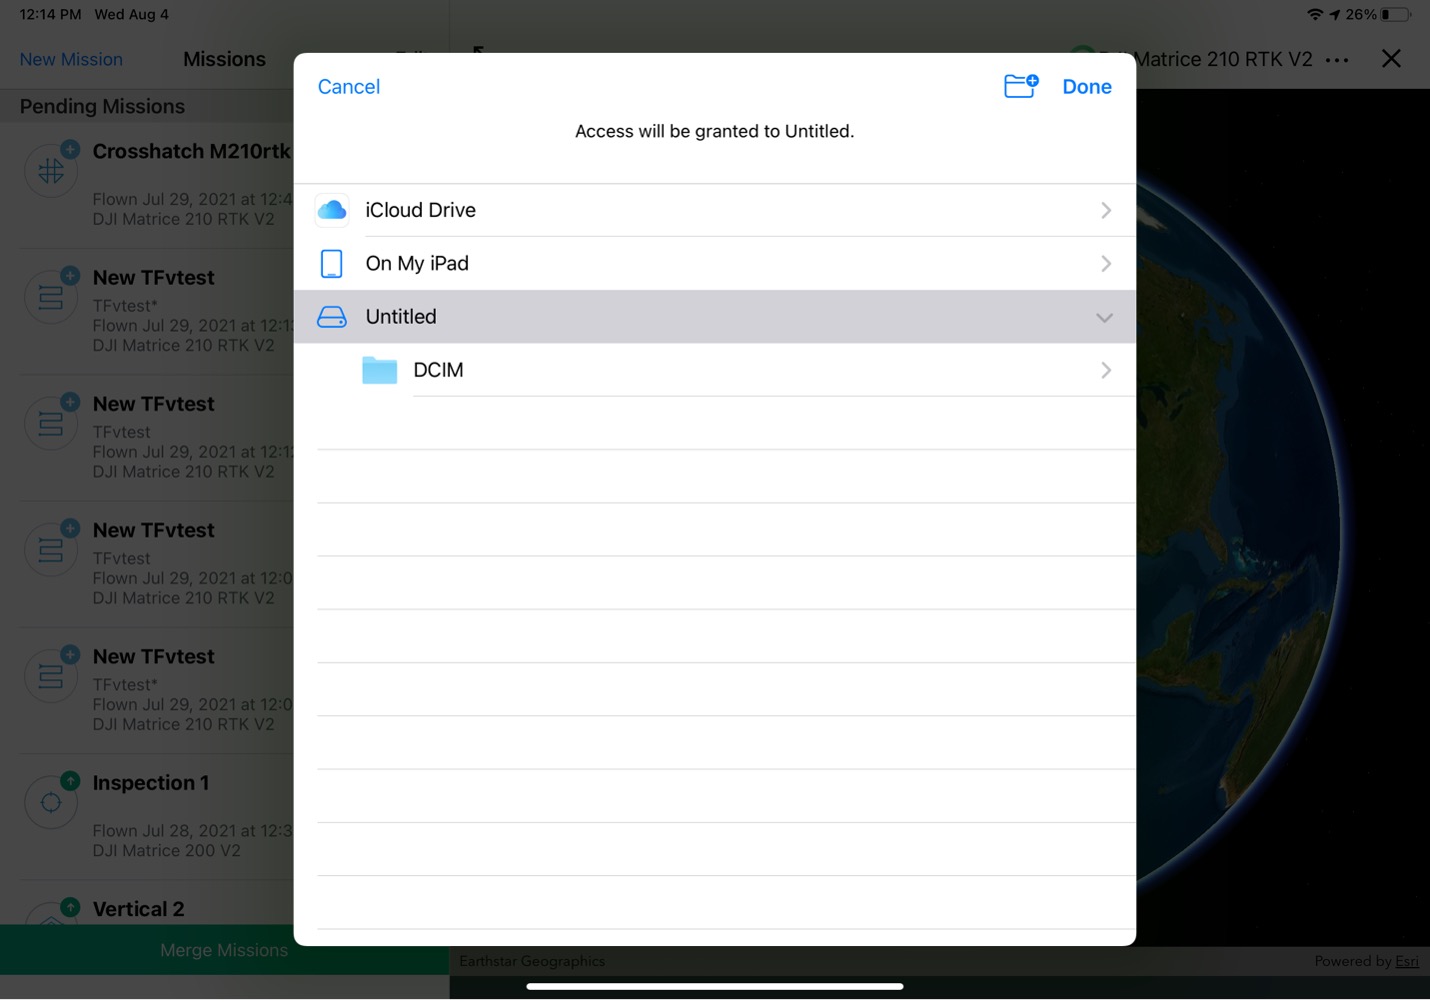
- The app brings up the Files window.
- Select the SD card main folder. In the example below, the SD Card is called Untitled.
Note:
It is not necessary to select the individual folder where the images are located, Site Scan automatically locates the images.
- Tap Done on the top right corner, as shown below.
-
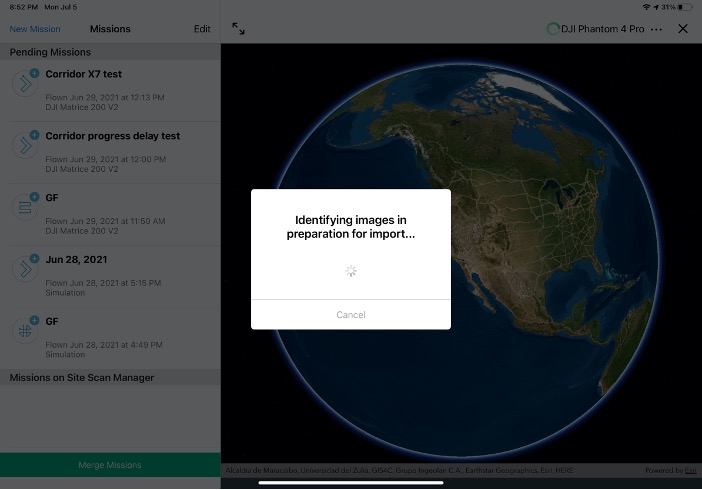
The app automatically identifies the images and imports them to the correct Pending Mission(s).
- A Pending Mission is any mission that has not yet been uploaded to Site Scan Manager. If you have multiple Pending Missions in the Missions menu, the previous step imports all the images from the selected folder (and any subfolder) to the correct mission. Therefore, it is not necessary to repeat this step for each Pending Mission if all the images for the missions are on the same SD card.
Note:
Allow Site Scan to identify the images. Depending on how many images are stored on the SD Card, this may take a few minutes.
- Once the app has detected all the images within the Pending Missions, Site Scan Flight starts to import the images to the device.
- Do not close the app. Import may take a few minutes.
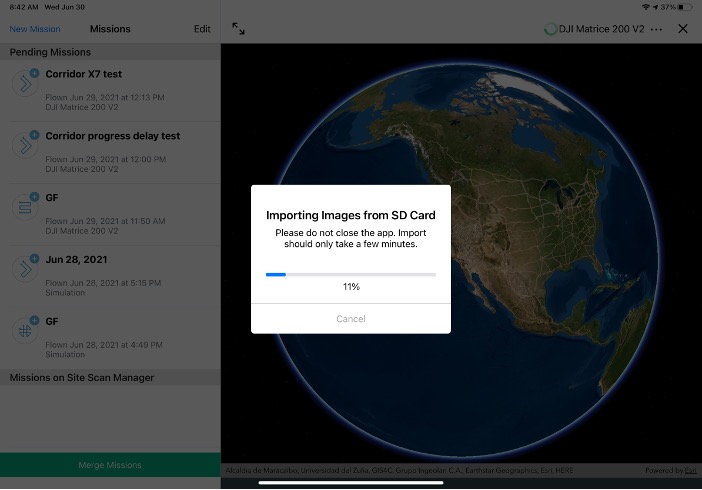
- Once completed, the app shows the total number of imported images. Select Done.
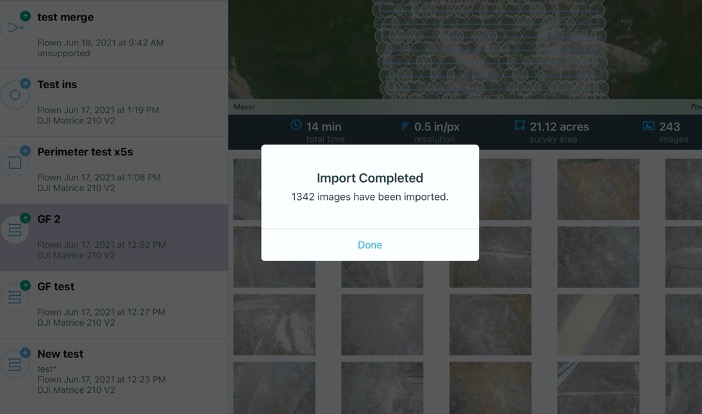
- To confirm the images have been imported, select any of your Pending Missions and the correct number of images should appear on the screen.
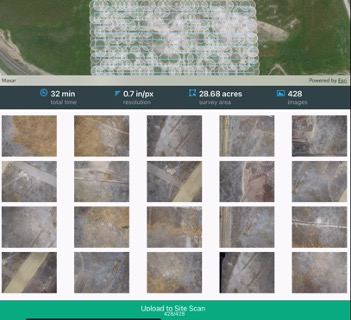
- To process a mission, go to the Mission and tap Upload to Site Scan Manager. This action transfers the images to Manager and initiates processing. It is recommended to perform this step once the iPad is connected to strong internet, or to use the Quick Upload functionality, as described below.
Manually create a new Mission for image import and upload
New Missions can be created from images in the Files app. This is particularly useful to import images captured from third-party apps into Site Scan Flight and upload them to Site Scan Manager for processing.
Note:
Make sure all images are georeferenced before importing images to our app.
Tip:
Before starting, is advisable to have a distinct folder that contains only the images to import for the new custom mission. As a best practice, this folder should be located in My iPad > Site Scan > Data. This preparation step eliminates the need to manually select individual images later.
- Ensure that you are in the desired Project as shown in the top center of the main screen, or tap the Project name to select a different Project.
- Open Missions.
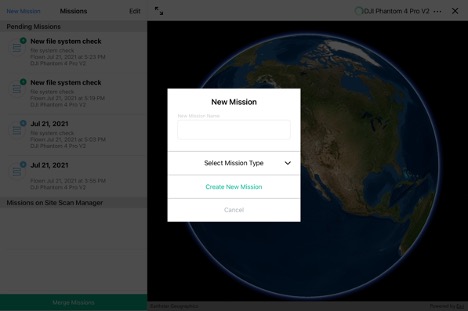
- Select New Mission on the top left corner, as shown in the following image.
The app displays the New Mission menu.
- Enter the New Mission name.
- Select a Flight Mode.
- Tap Create New Mission.
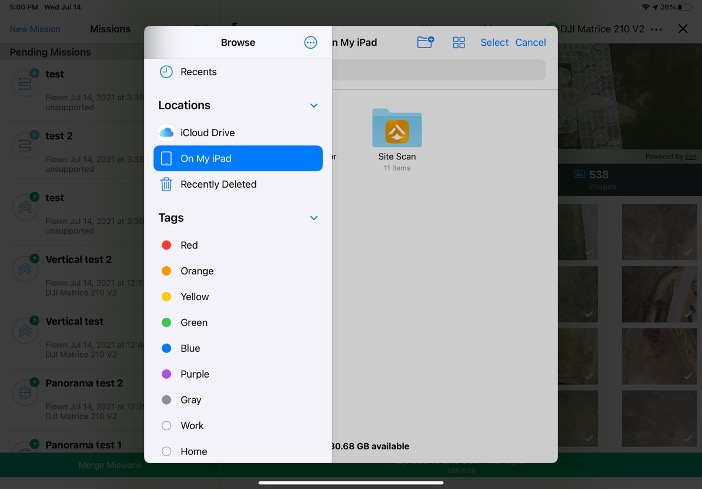
This brings up the Files app.
- Navigate to the folder that contains the images.
- Tap Select.
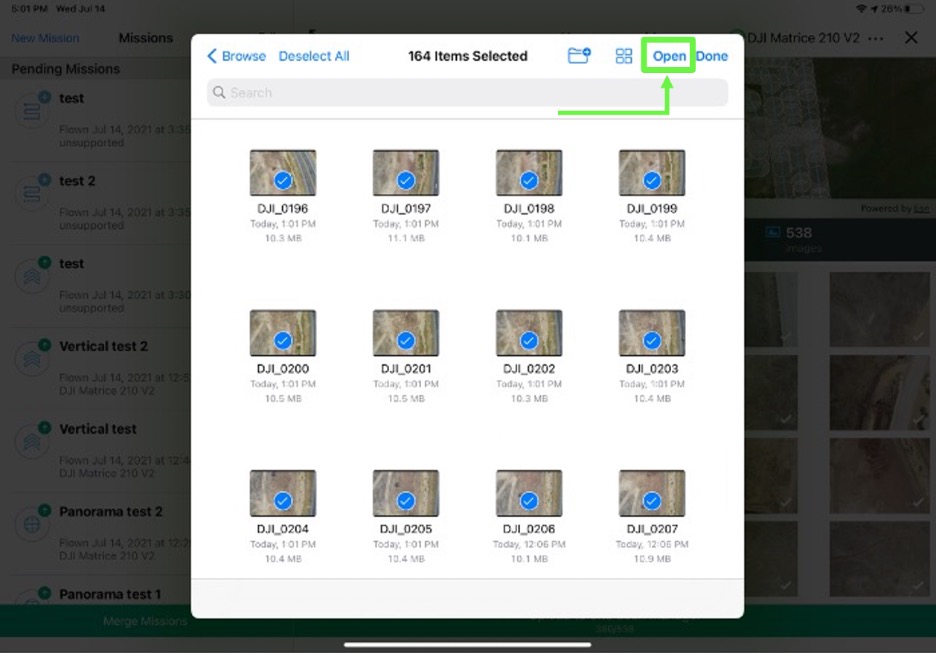
- If the folder contains only the images to import for the custom mission, tap Select All. Otherwise, select the individual images.
Note:
To select multiple images, swipe across the images you want to select.
- Tap Open (do not tap Done).
- Depending on the number of images, this process may take a few minutes.
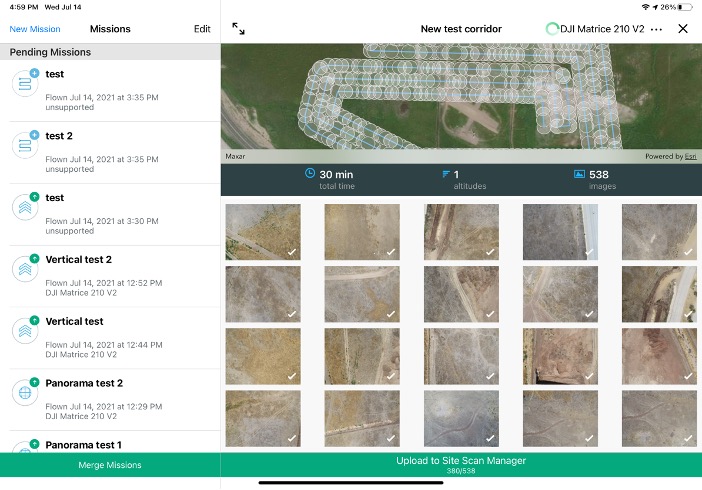
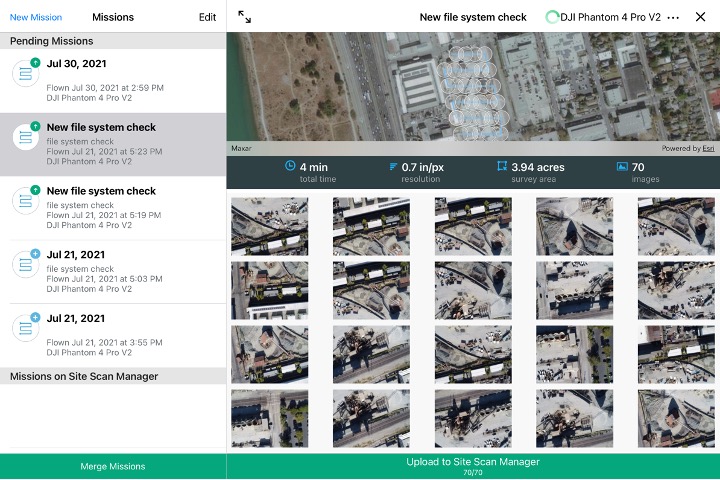
- When import is completed, tap the mission you created under Pending Missions. Verify the number and location of the images on the map. Select Upload to Site Scan Manager to upload and initiate processing.
Quick Upload functionality
- Go to Settings > General Settings.
- Enable Quick Upload Compressed Images.
- Go to the Missions page, select the mission to upload, and tap Upload to Site Scan Manager as normal. The images are uploaded in a compressed format for processing.
- Be sure to disable this option when finished to avoid inadvertently uploading compressed images in the future.
Artikel-ID: 000026165
Holen Sie sich Unterstützung mit KI
Lösen Sie Ihr Problem schnell mit dem Esri Support AI Chatbot.


Zugehörige Informationen
Weitere Informationen zu diesem Thema erkunden
Search for related information
Find training related to this topic
Explore ideas and give feedback
Unterstützung durch ArcGIS-Experten anfordern
Beginnen Sie jetzt mit dem Chatten