Instrução
Baixar dados compartilhados publicamente do ArcGIS Online na máquina local como shapefiles
Resumo
In ArcGIS Online, it is possible to download publicly shared data as shapefiles to the local machine. The owner of the data must configure the hosted feature layer to allow others to export the data. Refer to ArcGIS Online: Export data from hosted feature layers for more information. This article outlines the workflows to export publicly shared data as shapefiles from ArcGIS Online to the local machine.
Procedimento
Export the data from ArcGIS Online
- Log in to ArcGIS Online.
- In ArcGIS Online, navigate to the hosted feature layer's item details page.
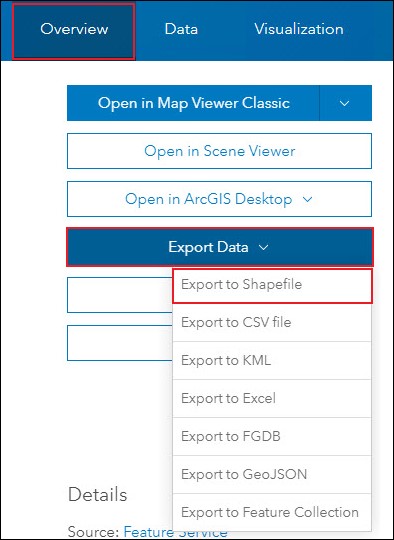
- On the layer's item details page, on the Overview tab, click Export Data > Export to Shapefile.
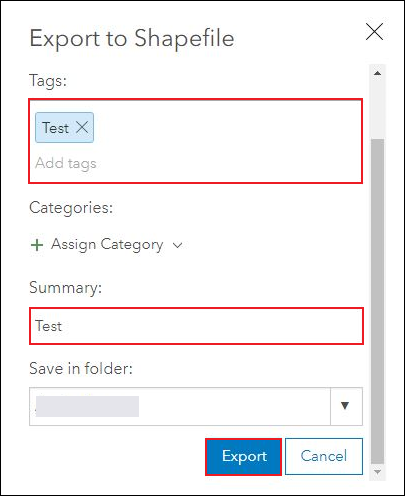
- In the Export to Shapefile window, specify the Tags and Summary sections, and click Export. The layer's item details page opens.
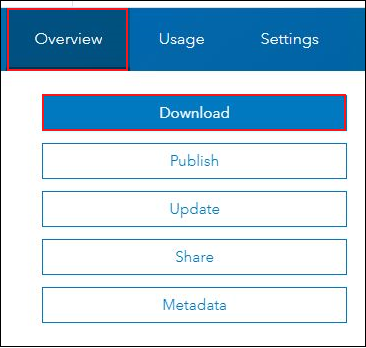
- On the shapefile layer's item details page, on the Overview tab, click Download. The shapefile is downloaded in a zipped folder.
Export the data using ArcGIS Pro
- Open the ArcGIS Pro project, and sign in to ArcGIS Online.
- Add the layer from ArcGIS Online to ArcGIS Pro. Refer to Steps 1 through 8 in ArcGIS Pro: Add data from ArcGIS Living Atlas of the World for instructions.
- In ArcGIS Pro, export the layer as a shapefile using the Feature Class To Shapefile tool.
- On the top ribbon, click the Analysis tab, and click Tools.
- In the Geoprocessing pane, search for and click Feature Class To Shapefile (Conversion). The Feature Class To Shapefile window opens.
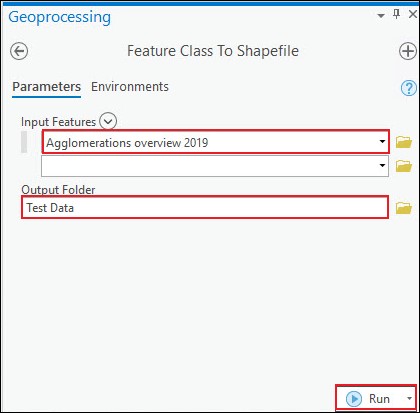
- In the Feature Class To Shapefile window, click Parameters.
- For Input Features, select the desired layer or layers.
- For Output Folder, specify the folder location of the exported shapefile.
- Click Run.
Export the data using ArcMap
- Open the .mxd project in ArcMap.
- Add the layer from ArcGIS Online to ArcGIS Pro. Refer to ArcMap: Adding data from ArcGIS Online for instructions.
- In ArcMap, export the layer as a shapefile using the Feature Class To Shapefile tool.
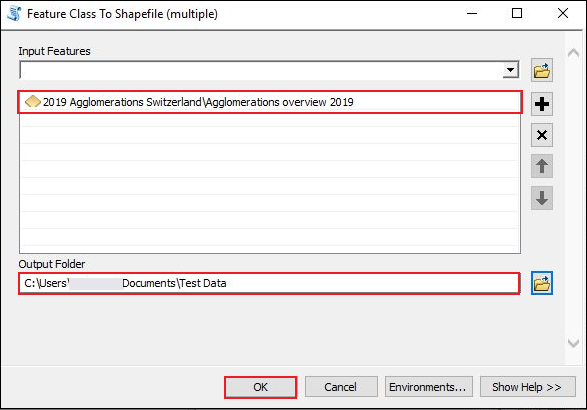
- In ArcMap, navigate to ArcToolbox > Conversion Tools > To Shapefile > Feature Class To Shapefile (multiple). The Feature Class To Shapefile (multiple) window opens.
- For Input Features, select the desired layer or layers.
- For Output Folder, specify the folder location of the exported shapefile.
- Click OK.
ID do Artigo: 000015899
Obtenha suporte com IA
Resolva seu problema rapidamente com o chatbot de IA de suporte da Esri.


Informações Relacionadas
Descubra mais sobre este tema
Search for related information
Find training related to this topic
Explore ideas and give feedback
Obtenha ajuda de especialistas do ArcGIS
Comece a conversar agora