HOW TO
Transfer drone images to an iPad and manage them in ArcGIS Flight
Summary
This article describes how to transfer images from a drone to an iPad using the ArcGIS Flight Planning app, along with workflows to upload images to the Site Scan Manager for ArcGIS Manager web application and manage them on an iPad.
Note:
A new version of this article has been released, please refer to: "How To: Import drone images to ArcGIS Flight"
Procedure
After flying the drone, it is necessary to transfer the images from the drone to the iPad running the ArcGIS Flight Planning app, so the imagery can be uploaded to the Site Scan Manager for ArcGIS web application. Below are steps to complete this using the SD card dongle for iPads, along with directions for deleting photos where necessary.
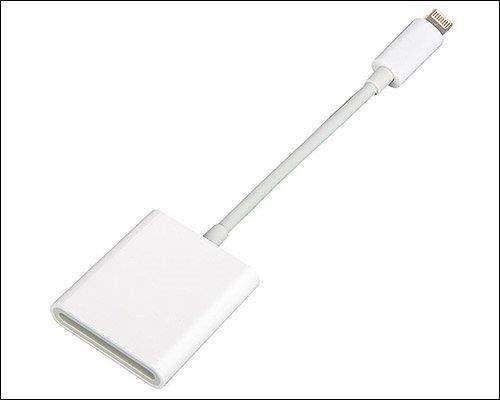
Transferring images to an iPad with an SD Card reader dongle
- After completing all flights, remove the memory card from the DJI drone, and insert it into the SD Card dongle connected to the iPad.
- The Apple Photos screen displays, showing the images to be imported. Select the desired images, and tap Import Selected or tap Import All.
- Return to the Flight Planning app, and go to Flights. Select the desired flight from the list.
- In the upper-right corner, tap the ellipsis to display a pop-up menu. Select Import Images.
Images are imported to Site Scan for ArcGIS, and can be uploaded to Site Scan Manager.
- Insert the SD card in the dongle, and connect the dongle to the iPad. A user prompt displays on the screen requesting to import the images.
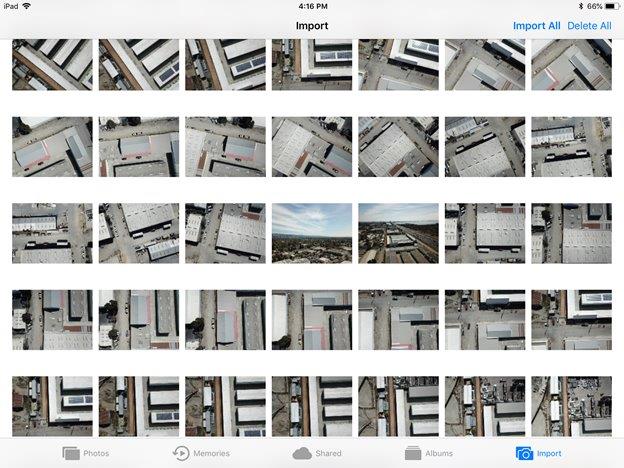
Choose to import all the images, or select only the ones recently taken with ArcGIS Flight.
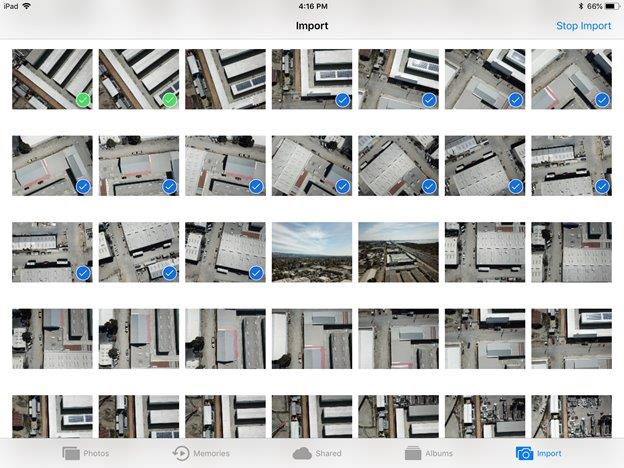
- After selecting the images, click Import All or Import Selected.
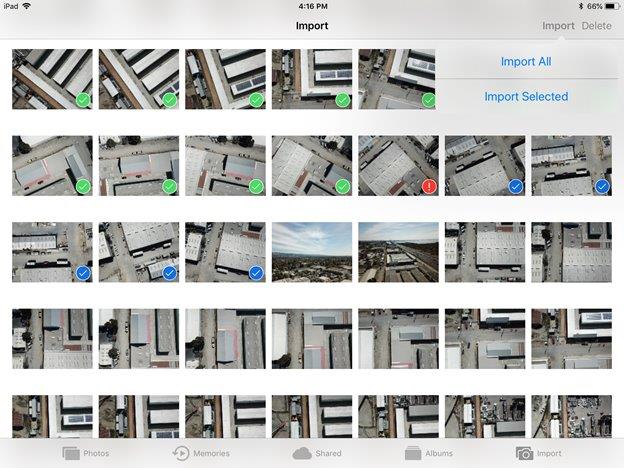
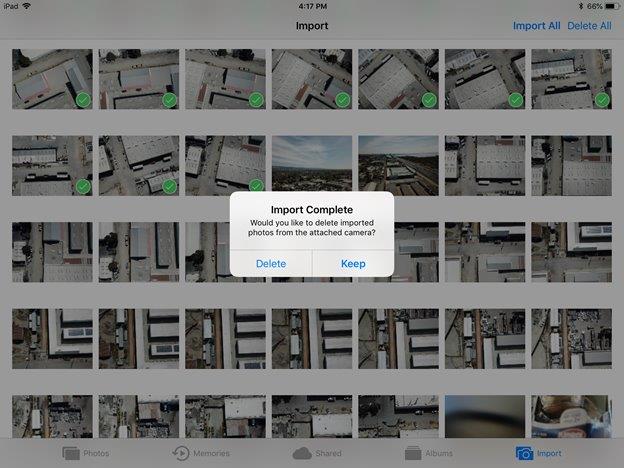
Let the images transfer to the iPad. Once complete, a user prompt requesting either to keep or delete the recently transferred images from the SD card is displayed.
- Return to the Flight Planning app, and tap Import Images.
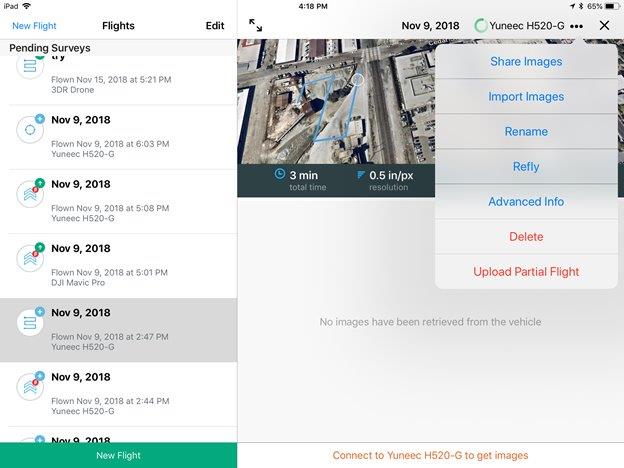
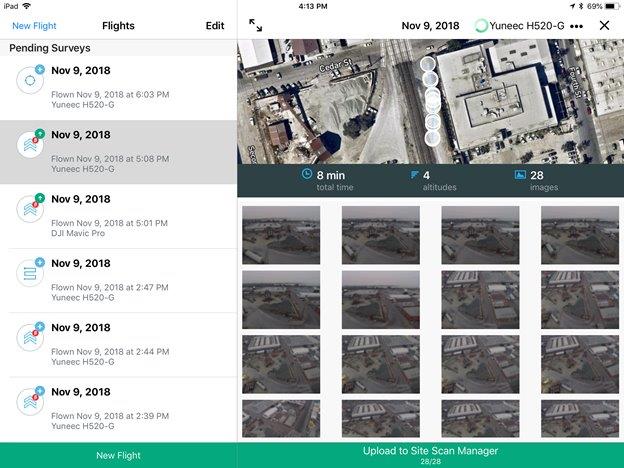
Wait for the app to populate the images. Once complete, the button to upload the images to the cloud is displayed.
Uploading images more rapidly to Site Scan Manager for ArcGIS
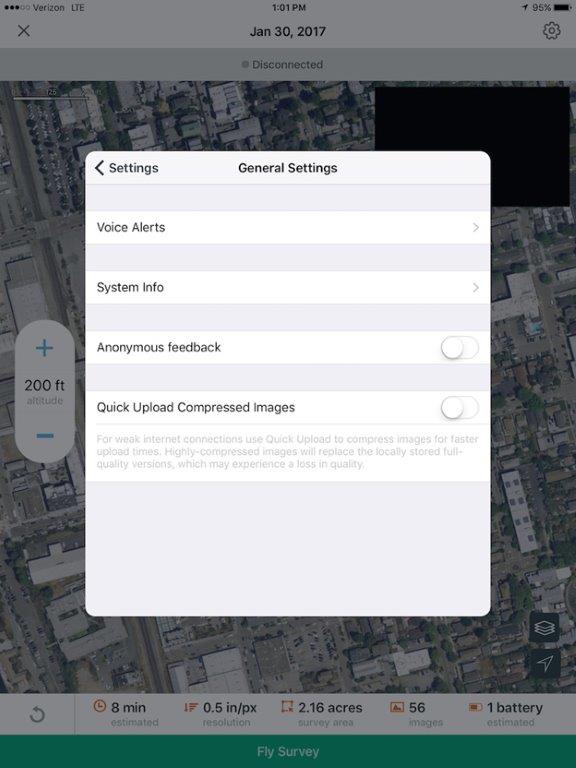
ArcGIS Flight includes a quick upload option that compresses images on the tablet by a factor of seven before uploading. This dramatically speeds upload, at the expense of introducing potential compression artifacts that may affect the quality of the final images. To enable this feature, navigate to the General Settings menu, and slide the Quick Upload Compressed Images toggle to the right.
Deleting images in the ArcGIS Flight app
- If flight images are fully downloaded to the app, select the flight, and tap the ellipses (…) in the upper-right corner.
- Tap Remove Media.
- There may be one or more prompts requesting to remove images. Confirm deletion for all of them.
Deleting all Site Scan photos in camera roll
- Open the Photos app, and go to the Site Scan folder.
- In the Site Scan folder, tap all the photos.
- In the upper-right corner, tap Select and Select All.
- Tap the trash icon in the upper-left corner, and select Delete ‘X’ Photos, where X is the number of images.
Deleting certain Site Scan photos in camera roll
- Go to the Photos app, tap the ArcGIS Flight or Site Scan folder, tap the project folder, and select the desired mission album.
- In the upper-right corner, tap Select and Select All.
- Tap the trash icon in the upper-left corner, select Delete and Delete ‘X’ Photos, where X is the number of images.
Deleting folders
- Open the Photos app.
- To remove the Site Scan folder, tap Edit in the upper-right corner, tap the red icon on top of the folder, and confirm Delete.
- To delete the project or mission folder, go to the Site Scan folder or project folder, and repeat the above process.
Note:
Deleting the folder or album does not delete the folder or album in camera roll. Esri recommends deleting the empty folders manually.

If a folder containing images is inadvertently deleted, select the mission once more in ArcGIS Flight. ArcGIS Flight recreates the folders if the images are still in camera roll, and moves the images back into them.
Cleaning Trash
- Open the Photos app, and select the Recently Deleted folder.
- In the upper-right corner, tap Select.
- In the upper-left corner, tap Delete and select Delete ‘X’ Photos, where X is the number of images.
Esri recommends cleaning the trash periodically to prevent high-storage use.
Note:
Apple automatically removes images that have been in Trash for more than 30 days. If photos are inadvertently deleted, check if they are inside the Recently Deleted folder to recover them.
Article ID: 000023045
- Mobile Applications
- Site Scan Manager for ArcGIS
Get support with AI
Resolve your issue quickly with the Esri Support AI Chatbot.


Discover more on this topic
Search for related information
Find training related to this topic
Explore ideas and give feedback
Get help from ArcGIS experts
Start chatting now