PROBLEM
Unable to view KML layers in ArcGIS Online Map Viewer
Description
In ArcGIS Online Map Viewer, the Keyhole Markup Language (KML) layers are not displayed on the web map, and the following generic error message is returned:
Error:
An error occurred loading this layer

Cause
- The KML layer is larger than 10 MB. This is a known limitation. Refer to ArcGIS Online: KML for more information.
- The URL address of the KML file is invalid.
- The KML file is corrupted.
Solution or Workaround
Depending on the cause, use one of the following workflows:
Split the KML file into smaller files and upload them to ArcGIS Online
- Open the project in ArcGIS Pro.
- Add the KML file to the map. Refer to ArcGIS Pro: Add layers to a map or scene for further instructions.
- Convert the KML file to a feature layer using the KML To Layer tool.
- On the ribbon, click the Analysis tab. In the Geoprocessing group, click Tools.
- In the Geoprocessing pane, search for and click KML To Layer (Conversion Tools).
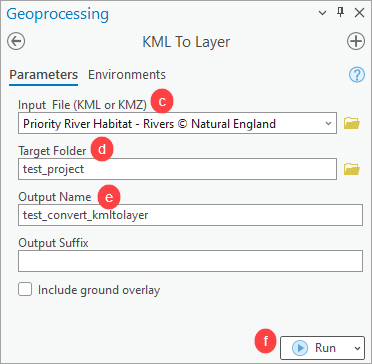
- In the KML To Layer pane, for Input File (KML or KMZ), click the drop-down button and select the KML file.
- For Target Folder, click the folder icon and browse for the desired output location for the layer file.
- For Output Name, specify a name for the output layer file.
- Click Run.
- Split the feature attributes into smaller parts.
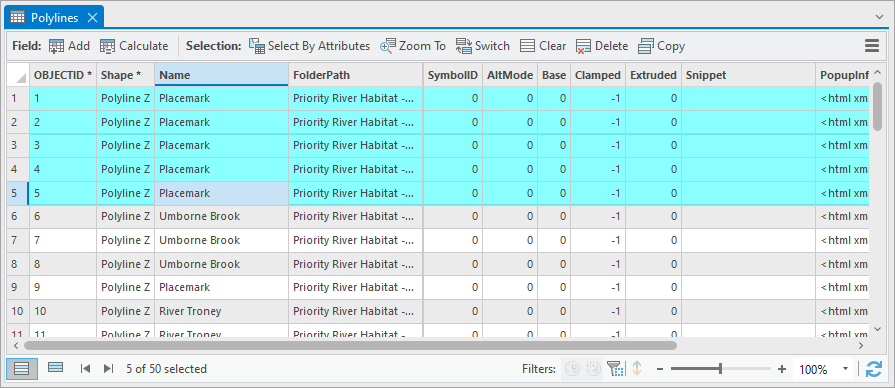
- On the Contents pane, right-click the newly created feature class and click Attribute Table.
- On the attribute table, select a small part of the records.
- Convert the feature layer to KML files using the Layer To KML tool.
- On the ribbon, click the Analysis tab. In the Geoprocessing group, click Tools.
- In the Geoprocessing pane, search for and click Layer To KML (Conversion Tools).
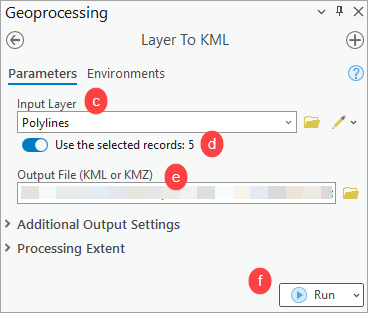
- In the Layer To KML pane, for Input Layer, click the drop-down button and select the feature dataset layer.
- Ensure the Use the selected record: <record counts> option is toggled on.
- For Output File (KML or KMZ), click the folder icon, browse for the desired output location, and specify the name for the output KML file.
- Click Run.
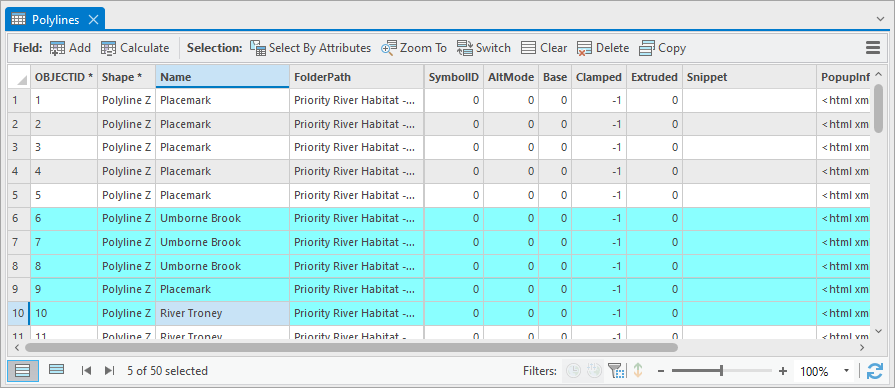
- Repeat Steps 4 and 5 using another part of the records to create another KML file.
- Add the KML files to ArcGIS Online. Refer to ArcGIS Online: Add layers from files for further instructions.
Convert the KML file to a feature layer and publish it to ArcGIS Online
- Open the project in ArcGIS Pro.
- Add the KML file to the map. Refer to ArcGIS Pro: Add layers to a map or scene for further instructions.
- Convert the KML file to a feature layer using the KML To Layer tool.
- On the ribbon, click the Analysis tab. In the Geoprocessing group, click Tools.
- In the Geoprocessing pane, search for and click KML To Layer (Conversion Tools).
- In the KML To Layer pane, for Input File (KML or KMZ), click the drop-down button and select the KML file.
- For Target Folder, click the folder icon and browse for the desired output location for the layer file.
- For Output Name, specify a name for the output layer file.
- Click Run.
- Publish the feature layer as a web layer to ArcGIS Online. Refer to ArcGIS Pro: Share as web layers for further instructions.
Add the KML layer using the valid URL address
In ArcGIS Online Map Viewer, add the KML layer using the correct URL address from the originating services. Refer to ArcGIS Online: Add a KML layer for more information.
Replace the corrupted file
Replace the corrupted KML file with a new file.
Article ID: 000033852
- ArcGIS Online
- ArcGIS Pro 3 1
- ArcGIS Pro 3 3
- ArcGIS Pro 3 2
Get support with AI
Resolve your issue quickly with the Esri Support AI Chatbot.


Related Information
Discover more on this topic
Search for related information
Find training related to this topic
Explore ideas and give feedback
Get help from ArcGIS experts
Start chatting now