PROBLEM
The label placement properties are not honored when label rotation is applied in ArcGIS Pro
Description
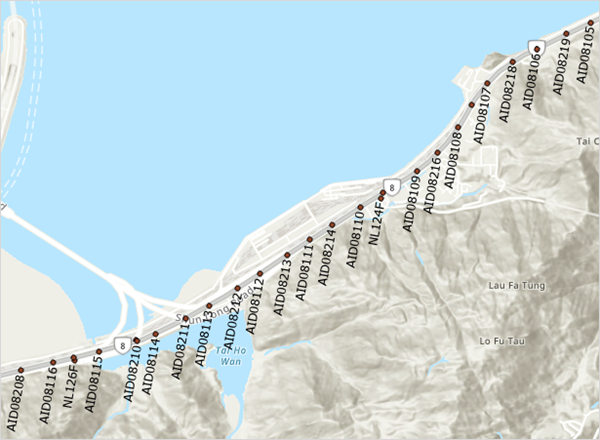
When a rotation value is applied to labels in ArcGIS Pro, certain placement properties do not function as expected, causing the labels to default to an incorrect position relative to the feature. As shown in the example image below, despite setting the label placement to the bottom, the labels are positioned at the top of the points.

Cause
This is expected behavior when label placement options are used with rotation angles. Label positions are defined by anchor points, such as top-left, bottom-right, or center. When a rotation is applied, the label's anchor point becomes misaligned with the feature, causing the label to no longer adhere to the positions predefined in the label placement properties. Because label rotations can be applied in a clockwise or counterclockwise direction, some placement properties become incompatible and override the original placement. Refer to ArcGIS Pro: Set point label rotation for more information.
Solution or Workaround
Use one of the following workarounds to resolve the issue.
Set an additional rotation angle value
Specify a value for the 'Additional rotation' option to apply an extra rotation to the label without modifying the primary rotation source.
- Open the ArcGIS Pro project.
- In the Contents pane, right-click the point feature layer and select Labeling Properties....
- In the Label Class pane, click the Position tab.
- On the Position tab, expand Rotation.
- For Additional rotation, click the drop-down button and select a rotation value. In this example, 180° is selected to position the labels at the bottom of the point.

Set the label offset
The label offset ensures uniform placement when the labels have a consistent length. However, with varying label lengths, using a fixed offset can cause the labels to overlap or be positioned too closely to one another.
- Open the ArcGIS Pro project.
- In the Contents pane, right-click the point feature layer and select Labeling Properties....
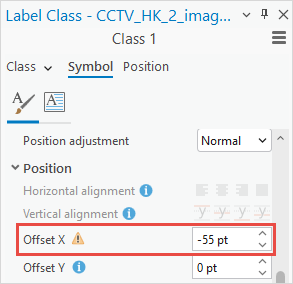
- In the Label Class pane, click the Symbol tab.
- On the General tab, expand Position.
- For Offset X, click the Increment or Decrement arrow to adjust the offset point value. In this example, the value for Offset X is set to -55 pt to position the labels at the bottom of the point.
Convert the labels to annotations
Annotations are stored in a file geodatabase and provide greater control over label position, rotation, and formatting. Once converted, manually reposition the annotations on the map to the required placement or alignment.
- Open the ArcGIS Pro project.
- Convert the labels with the specified rotation value to annotations. Refer to ArcGIS Pro: Convert labels to annotation for instructions.
- Move the annotation feature class to the required position. Refer to ArcGIS Pro: Move, rotate, or resize annotation features for instructions. In this example, the annotations are simultaneously selected and repositioned to align with the bottom of the points.
The map below shows the labels rotated according to the specified rotation angle and positioned at the bottom of each point.
Article ID: 000034454
- ArcGIS Pro 3 3
- ArcGIS Pro 3 2
- ArcGIS Pro 3 4
Get support with AI
Resolve your issue quickly with the Esri Support AI Chatbot.


Related Information
Discover more on this topic
Search for related information
Find training related to this topic
Explore ideas and give feedback
Get help from ArcGIS experts
Start chatting now