PROBLEM
Running the Hillshade tool on raster images produces a gap between adjacent images
Description
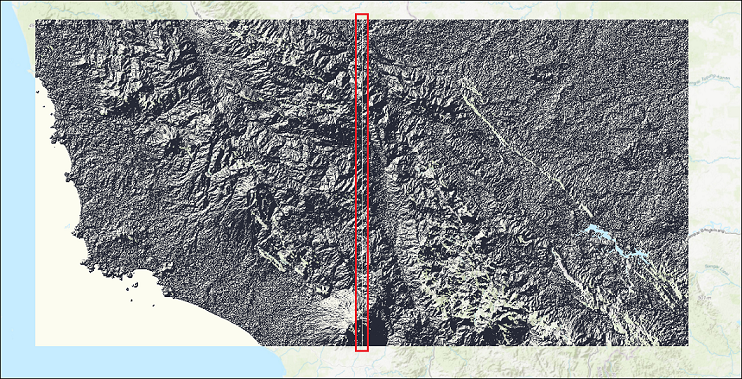
In some instances, creating shaded relief of raster images using the Hillshade tool on each image produces a gap between adjacent images.
The following image shows the gap between adjacent images after running the Hillshade tool in ArcGIS Pro.
Cause
This is expected behaviour. Running the Hillshade tool on a raster image sets the pixels at the border of the image to NoData. If there is more than one raster image in the project and the tool is running on each image, it produces a gap between the images.
Solution or Workaround
To resolve this issue, create a new mosaic dataset and add the raster images to the mosaic dataset. Then, run the Hillshade tool on the mosaic image layer.
Note:
This solution still leaves the pixels at the border of the mosaic dataset as NoData, but eliminates the gap between the individual raster images.
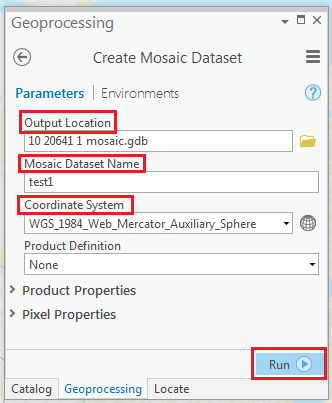
- In ArcGIS Pro, create a new mosaic dataset in the geodatabase.
- Under Output Location, browse to the geodatabase path.
- Under Mosaic Dataset Name, set a name for the new mosaic dataset.
- Under Coordinate System, select the coordinate system for all the items in the mosaic dataset.
- Click Run.
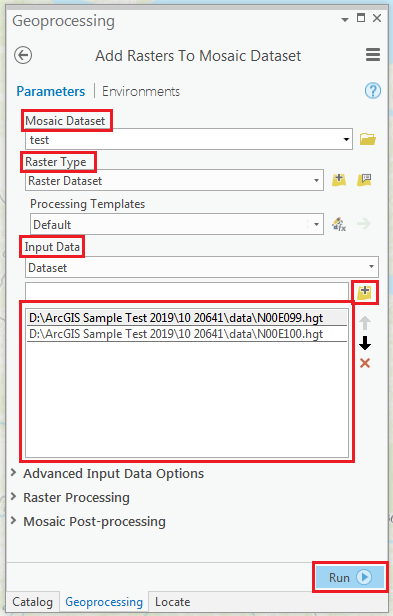
- Add the raster images to the mosaic dataset from the images file.
- Right-click the mosaic dataset created in step 1, click Add Rasters or search the Add Rasters To Mosaic Dataset tool in the geoprocessing pane.
- Under Mosaic Dataset, browse to the path and name of the mosaic dataset to which the raster data will be added.
- Under Raster Type, select which type of raster from the drop-down list.
- Under Input Data, browse to the raster images file and add the images.
- Click Run.
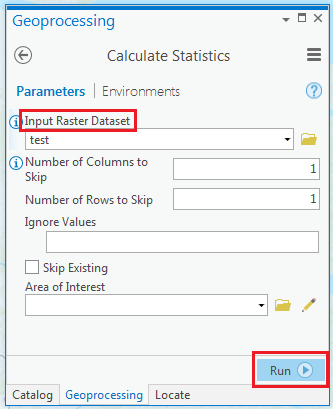
- Calculate statistics for the mosaic dataset.
- In the Catalog pane, right-click the mosaic dataset and click Calculate Statistics or search the Calculate Statistics tool in the Geoprocessing pane.
- Under Input Raster Dataset, set the input raster dataset or mosaic dataset.
- Click Run.
- Run the Hillshade tool on the mosaic image layer.
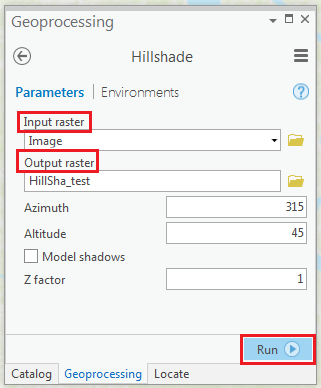
- In the Geoprocessing pane, navigate to 3D Analyst Tools > Raster Surface > Hillshade.
- Under Input raster, set the mosaic image layer.
- Under Output raster, set a name and location for the new hillshade.
- Click Run.
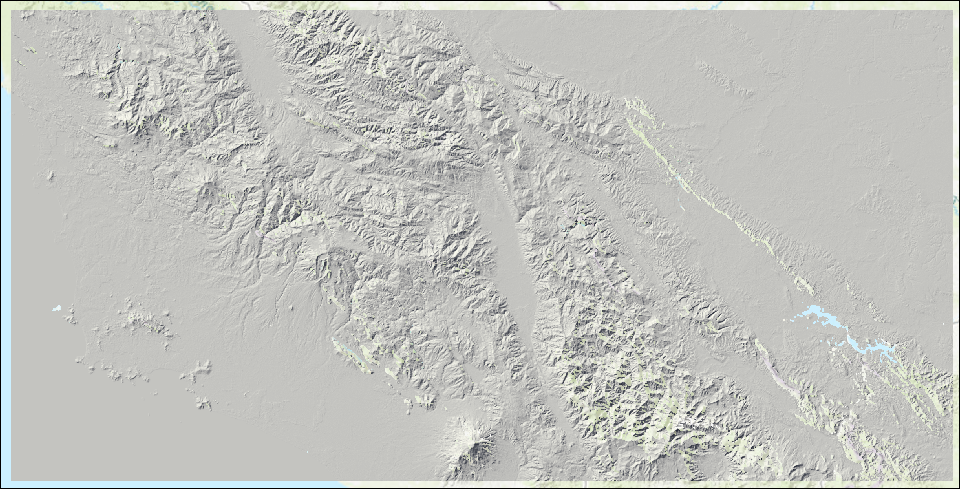
The image below shows the shaded relief of the mosaic dataset without a gap between the adjacent images after running the Hillshade tool.
Article ID: 000020641
- ArcGIS Pro
Get support with AI
Resolve your issue quickly with the Esri Support AI Chatbot.


Related Information
Discover more on this topic
Search for related information
Find training related to this topic
Explore ideas and give feedback
Get help from ArcGIS experts
Start chatting now