PROBLEM
Graphics fail to display after converting labels in ArcGIS Pro
Description
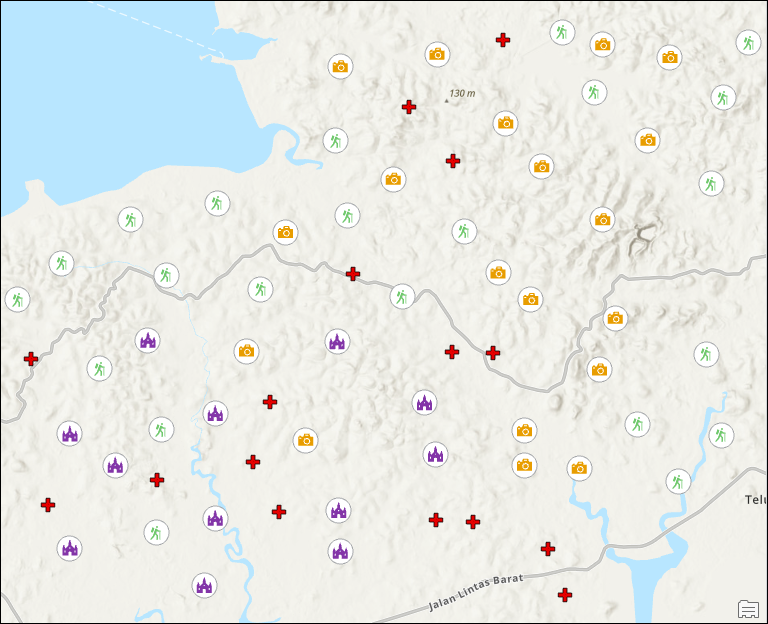
After converting labels to graphics using the Convert Labels To Graphics tool in ArcGIS Pro, some users report the graphics do not display (as demonstrated in the map below), while others report only some are displayed in the project.
Cause
- The Convert Labels To Graphics tool is run on all layers in the map, leading to the loss of label functionality.
- The labelling engine is set to Standard Label Engine, causing inconsistent label placement and preventing access to advanced labeling features.
- The 'Convert unplaced labels to graphics' functionality is not enabled, leading to overlapping or missing labels on the map.
- The existing file geodatabase may be corrupted due to the storage of large datasets, hardware failures, insufficient disk space, file system limitations or improper shutdowns.
- The existing ArcGIS Pro project is corrupted, causing the loss of data, settings, or project structure.
Solution or Workaround
Depending on the cause, the workflows provided are applicable.
Convert the labels to graphics by layers
- Open the ArcGIS Pro project.
- On the Analysis tab, in the Geoprocessing group, click Tools.
- In the Geoprocessing pane, search for and select Convert Labels To Graphics (Cartography Tools).
- Configure the parameters in the Convert Labels To Graphics pane. Refer to ArcGIS Pro: Convert Labels To Graphics (Cartography) for more information.
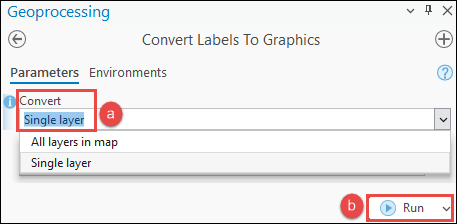
- For Convert, select Single layer from the drop-down menu.
- Click Run.
Switch to the Maplex Label Engine
Before converting the labels to graphics, change the Label Engine option to the Maplex Label Engine instead of the Standard Label Engine.
- Open the ArcGIS Pro project.
- Enable labeling for the feature layer. Refer to ArcGIS Pro: Turn on labels for instructions.
- Enable Use Maplex Label Engine in ArcGIS Pro. Refer to ArcGIS Pro: Change the label engine for instructions.
Enable the 'Convert unplaced labels to graphics' functionality
- Open the ArcGIS Pro project.
- On the Analysis tab, in the Geoprocessing group, click Tools.
- In the Geoprocessing pane, search for and select Convert Labels To Graphics (Cartography Tools).
- Configure the parameters in the Convert Labels To Graphics pane.
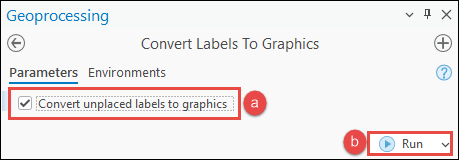
- Check the Convert unplaced labels to graphics check box.
- Click Run.
Export the data into a new file geodatabase
- Open the ArcGIS Pro project.
- Create a new file geodatabase. Refer to ArcGIS Pro: Create a file geodatabase for instructions.
- On the Analysis tab, in the Geoprocessing group, click Tools.
- In the Geoprocessing pane, search for and select Export Features (Conversion Tools).
- Configure the parameters in the Export Features pane. Refer to ArcGIS Pro: Export Features (Conversions) for more information.
- For Input Features, select the feature layer from the drop-down menu.
- For Output Feature Class, specify the location of the feature class.
- Click Run.
Note:
Alternatively, right-click the layer in the Contents pane, select Data and click Export Features.
Copy the existing project data and open in a new map
- Open the ArcGIS Pro project.
- On the Analysis tab, in the Geoprocessing group, click Tools.
- In the Geoprocessing pane, search for and select Copy Features (Data Management Tools).
- Configure the parameters in the Copy Features pane. Refer to ArcGIS Pro: Copy Features (Data Management) for more information.
- For Input Features, select the feature layer from the drop-down menu.
- For Output Feature Class, specify the location of the feature class.
- Click Run.
- Open a new ArcGIS Pro project. Refer to ArcGIS Pro: Create a project for instructions.
- Add the data to the new project. Refer to ArcGIS Pro: Add data to a project for instructions.
Additionally, there are a few other options to copy data from an existing project. Refer to ArcGIS Pro: Copy and move items for instructions.
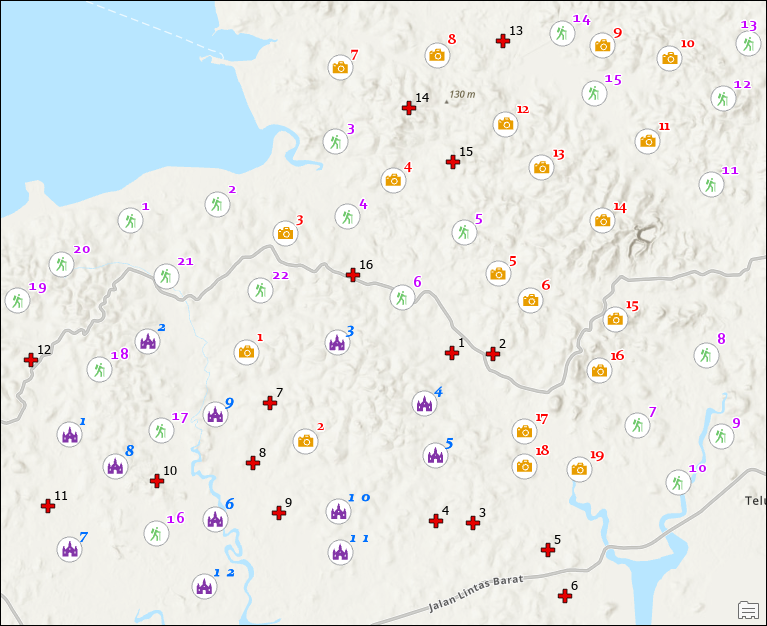
The map shows the graphics displayed after converting the labels to graphics.
Article ID: 000034693
- ArcGIS Pro 3 3
- ArcGIS Pro 3 2
- ArcGIS Pro 3 4
Get support with AI
Resolve your issue quickly with the Esri Support AI Chatbot.


Related Information
Discover more on this topic
Search for related information
Find training related to this topic
Explore ideas and give feedback
Get help from ArcGIS experts
Start chatting now