HOW TO
Automatically add local images as attachments in ArcGIS Pro
Summary
In some cases, images stored in a local folder can be attached to features automatically by matching attribute values in ArcGIS Pro. This workflow is useful when working with multiple feature classes that share the same attachments, such as inspection photos, site images, or asset records. Automating the process eliminates the need to attach each image manually, saving time, and reducing the risk of errors in large datasets. This article describes the workflow to automatically add local images as attachments in ArcGIS Pro.
Procedure
- Open the ArcGIS Pro project.
- Create a new field for the feature layer.
- In the Contents pane, right-click the feature layer and click Attribute Table.
- In the attribute table, click Add Field to open the Fields view.
- Configure the new field with the text data type. Refer to ArcGIS Pro: Create a field and apply a domain and default value for instructions and more information.
- On the Fields tab, in the Manage Edits group, click Save. Close the fields view.
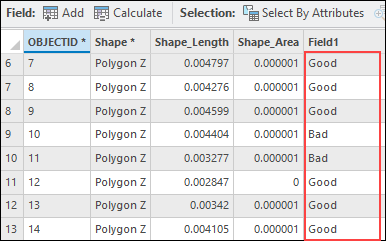
- Auto-populate the newly created field with the image file names.
- On the keyboard, press CTRL and select the rows from the attribute table.
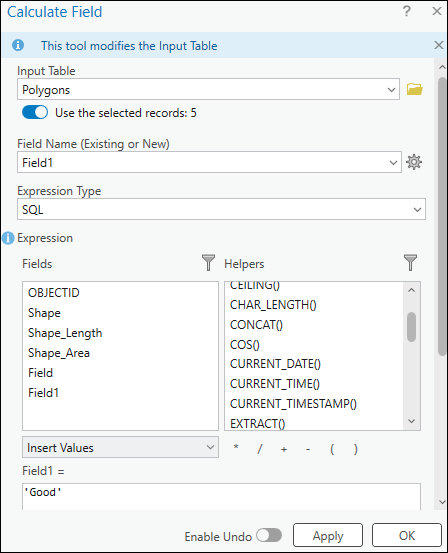
- Right-click the newly created field and select Calculate Field.
- In the Calculate Field window, for Expression Type, select SQL from the drop-down list.
- Under Expression, in the expression box, type the name of the image file '<filename>'.
- Click Apply > OK.
Note:
To update each row manually in the attribute table, double-click each cell in the newly added field and enter the corresponding image file names.
- Repeat Step 3 until all rows in the field are populated with image file names.
Note:
Ensure all images are stored or extracted in the same local folder so the file paths are referenced correctly, and the images are matched to the corresponding features during the process.
- Create a match table between the newly created field and the image stored in the local folder using the Generate Attachment Match Table tool.
- On the Analysis tab, in the Geoprocessing group, click Tools.
- In the Geoprocessing pane, search for and click Generate Attachment Match Table.
- In the Generate Attachment Match Table pane, for Input Dataset, select the feature layer from the drop-down list. Ensure the Use the selected records option is disabled.
- For Input Folder, click Browse and navigate to the folder containing the images.
- For Output Match Table, click Memory Workspace
 .
. - For Key Field, select the field created from Step 3 from the drop-down list.
- Uncheck the Store Relative Path check box.
- Click Run.
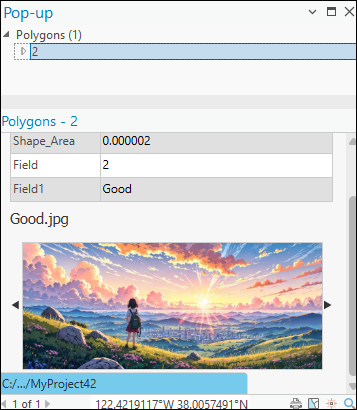
- Enable attachments for the feature layer, and add the attachments using the generated match table. Refer to ArcGIS Pro: Add Attachments for instructions and more information.
The image below illustrates the pop-up with the image attachment.
Article ID: 000037840
- ArcGIS Pro
Get support with AI
Resolve your issue quickly with the Esri Support AI Chatbot.


Related Information
Discover more on this topic
Search for related information
Find training related to this topic
Explore ideas and give feedback
Get help from ArcGIS experts
Start chatting now