HOW TO
Apply background color to a hatched fill in ArcGIS Pro
Summary
In ArcGIS Pro, a hatched fill is a fill type that uses a series of parallel lines (hatches) to fill polygons instead of a solid color or gradient. Applying background color to a hatched fill improves visibility, contrast, and overall map readability. This article describes the workflow to apply a background color to a hatched fill in ArcGIS Pro.
Procedure
- Open the ArcGIS Pro project.
- In the Contents pane, right-click the polygon feature layer and click Symbology.
- In the Symbology pane, click the symbol to apply a hatch symbology. Click and search for the desired hatch in the search box. In this example, '10% Simple hatch' is selected.
- Apply a new solid fill layer to the polygon feature layer.
- On the Properties tab, click the Structure tab and expand Layers.
- Click Add symbol layer and select Fill layer.
- Reorder the newly added symbol layer to the bottom.
- Click the Layers tab and click the Solid fill layer. Under Appearance, specify the desired background color.
- Click Apply to save the changes. For more information, refer to ArcGIS Pro: Automatically apply symbol edits.
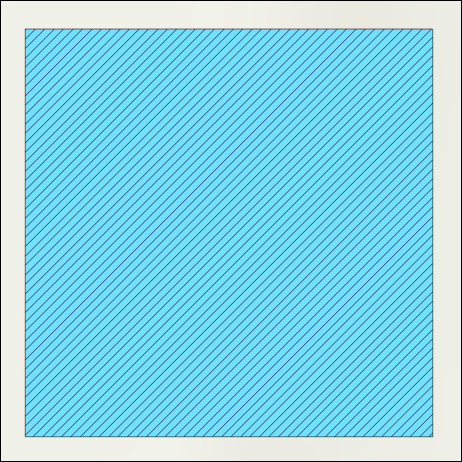
The image below shows the background color applied to the hatched fill.
Article ID: 000035222
- ArcGIS Pro
Get support with AI
Resolve your issue quickly with the Esri Support AI Chatbot.


Related Information
Discover more on this topic
Search for related information
Find training related to this topic
Explore ideas and give feedback
Get help from ArcGIS experts
Start chatting now