HOW TO
Append non-intersecting multipoint features to point features in ArcGIS Pro
Summary
In ArcGIS Pro, the Append tool is used to add new features from one or more input datasets to an existing target dataset of the same geometry types without creating a new output. However, there are situations where appending multipoint features to point features is necessary. For example, this method enables the integration of detailed survey data, such as multiple ground control points (GCPs), into a point feature class for mapping and analysis. This article describes the workflow to append non-intersecting multipoint features to point features in ArcGIS Pro.
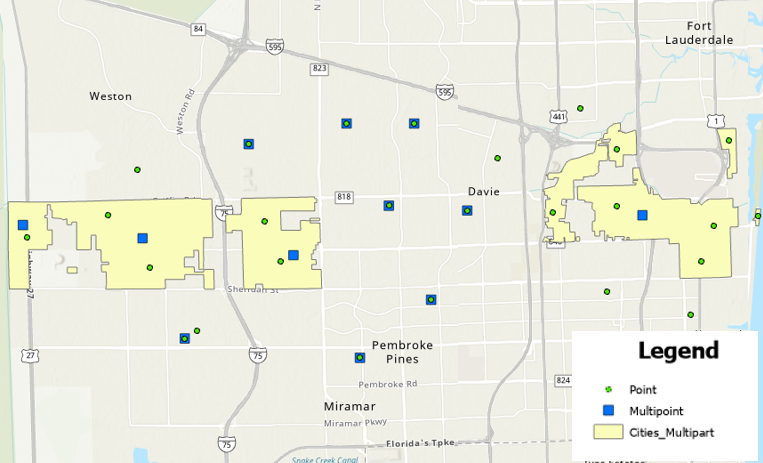
The map below shows the multipoint features, some of which are not located within the polygon features and must be appended to the existing point features.
Procedure
- Open the ArcGIS Pro project.
Note:
For instructions to find and use geoprocessing tools, refer to ArcGIS Pro: Find a geoprocessing tool.
- Convert the multipoint features to point features using the Multipart To Singlepart tool.
- Select the non-intersecting point features using the Select Layer By Location tool.
- In the Select Layer By Location pane, for Input Features, select the output feature layer from Step 2.
- For Relationship, select Intersect.
- For Selecting Features, select the desired feature layer intersecting with the input feature layer. In this example, the polygon feature layer is selected.
- Check the Invert Spatial Relationship check box.
- Click Run.
- Append the selected point features to the existing point feature layer using the Append tool.
Note:
Ensure both layers have matching field names for the append to work properly.
- In the Append geoprocessing pane, for Input Datasets, select the output point feature layer from Step 2.
- For Target Dataset, select the existing point feature layer.
- For Field Matching Type, select the preferred matching type. Refer to ArcGIS Pro: Parameters for more information. In this example, Use the field map to reconcile field differences is selected.
- Click Run.
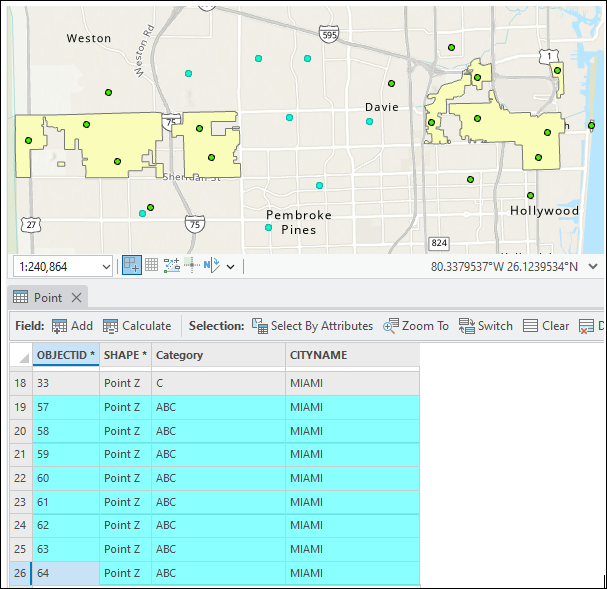
The image below shows the appended point features on the map and in the attribute table.
Article ID: 000035799
- ArcGIS Pro
Get support with AI
Resolve your issue quickly with the Esri Support AI Chatbot.


Related Information
Discover more on this topic
Search for related information
Find training related to this topic
Explore ideas and give feedback
Get help from ArcGIS experts
Start chatting now