Frequently asked question
How do I include metadata when publishing layers?
Answer
Users can publish layers using one of three processes, with different effects on metadata.
- From ArcMap (metadata not automatically included)
- Publish from the Share tab on the ribbon in ArcGIS Pro (metadata not automatically included)
- Publish from the Contents pane > Sharing > Share As Web Layer in ArcGIS Pro (metadata automatically included)
When publishing with ArcGIS Pro from the Share tab, or publishing layers with ArcMap, there is no information auto-populated in the Summary or Tags fields of the sharing pane.
Include Metadata When Publishing from ArcMap
When using ArcMap, a layer can be zipped in a folder and uploaded into ArcGIS Online; this ensures that all the metadata is included. For more information on this method, refer to ArcGIS Online: Items in ArcGIS Online.
Alternatively, the metadata can be exported and imported into the web feature layer using the following steps.
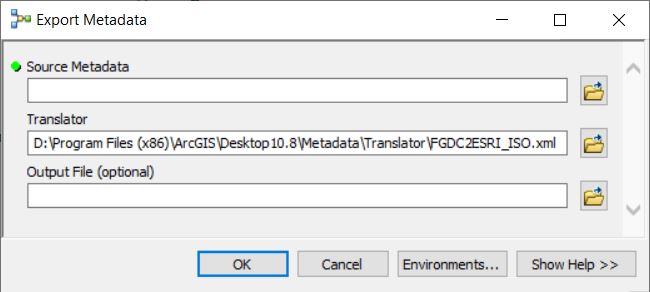
- Open the Export Metadata (Conversion) tool.
- Use either ISO19139_2ESRI_ISO or FGDC2ESRI_ISO translators; otherwise the .xml file is not recognized by ArcGIS Online.
- Publish the layer from the File tab > Share As > Service. For more information, refer to ArcMap: Publish to ArcGIS Online and ArcGIS Enterprise.
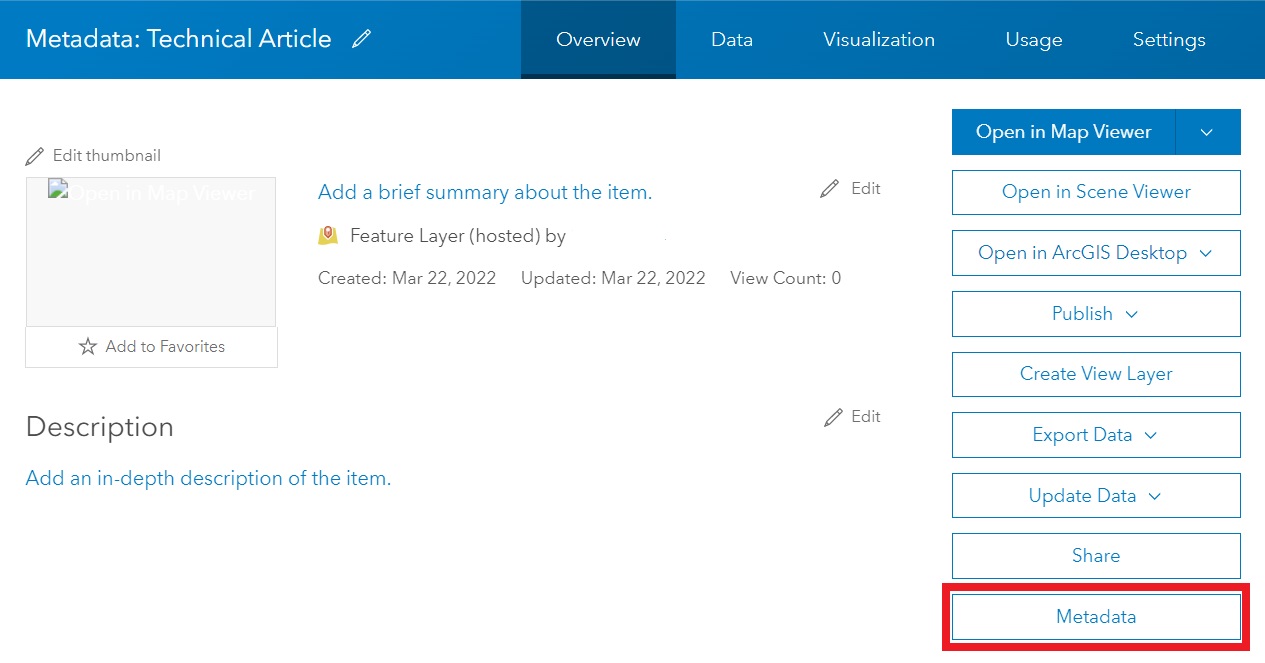
- Once published, open the layer in ArcGIS Online and click Metadata in the menu on the right of the screen.
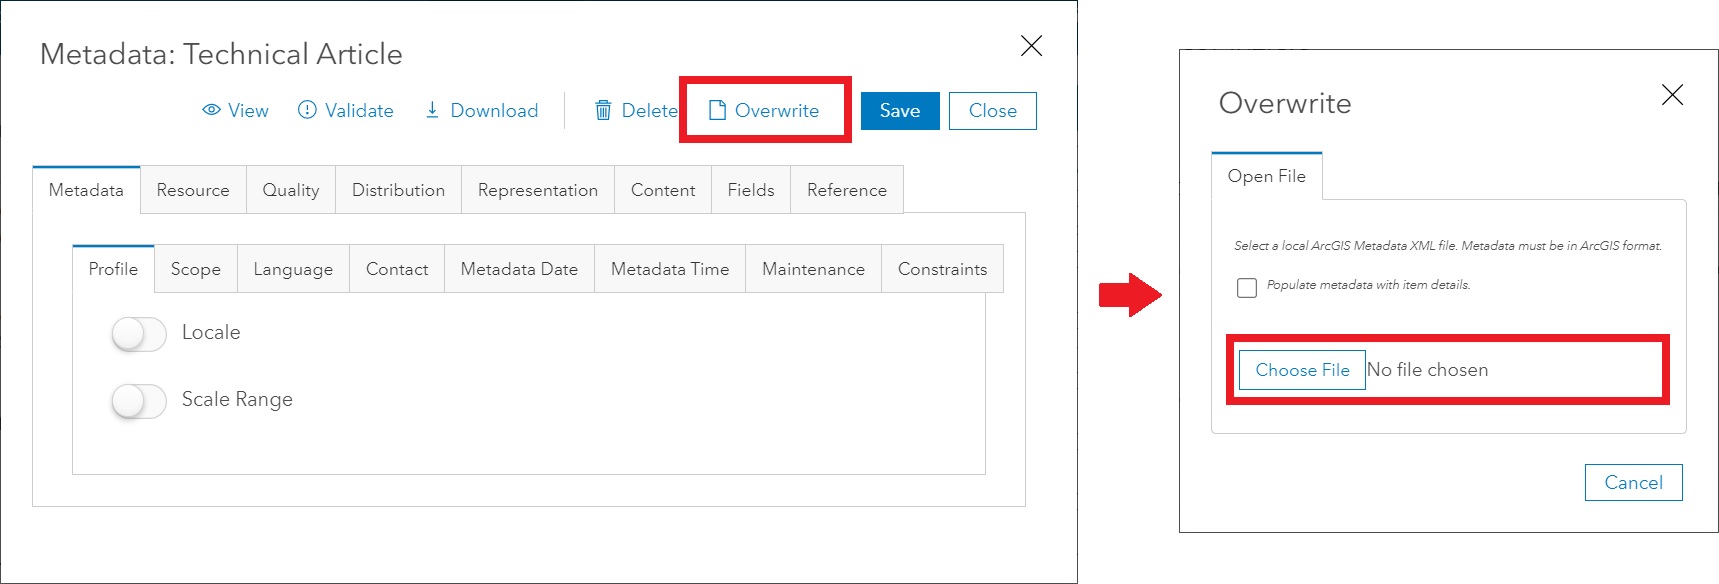
- Click Overwrite and upload the .xml file. Click Save.
Add Metadata When Publishing from ArcGIS Pro
- Click the Share tab on the top ribbon.
- In the Share As group, click Web Layer.

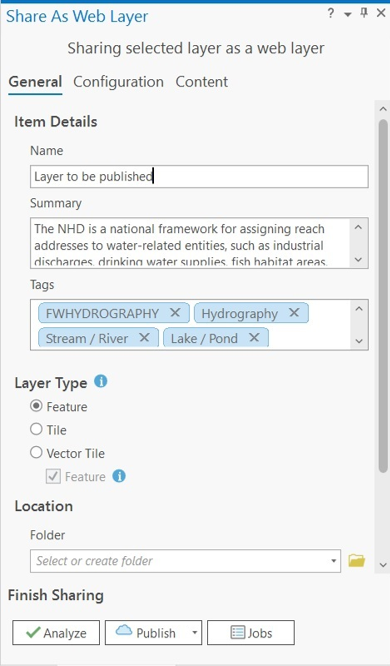
- The Share As Web Layer pane opens without data auto-populated in the Summary and Tags fields.
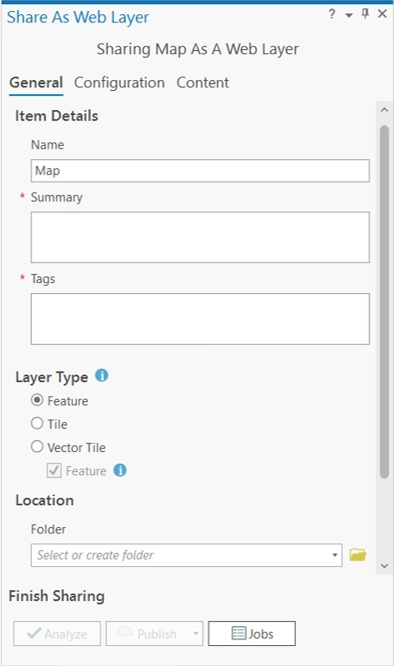
- Add the metadata and click Publish to share the map as a web layer.
Automatically Include Metadata When Publishing from ArcGIS Pro
- Right-click the layer in the Contents pane.
- Point to Sharing, and click Share As Web Layer.
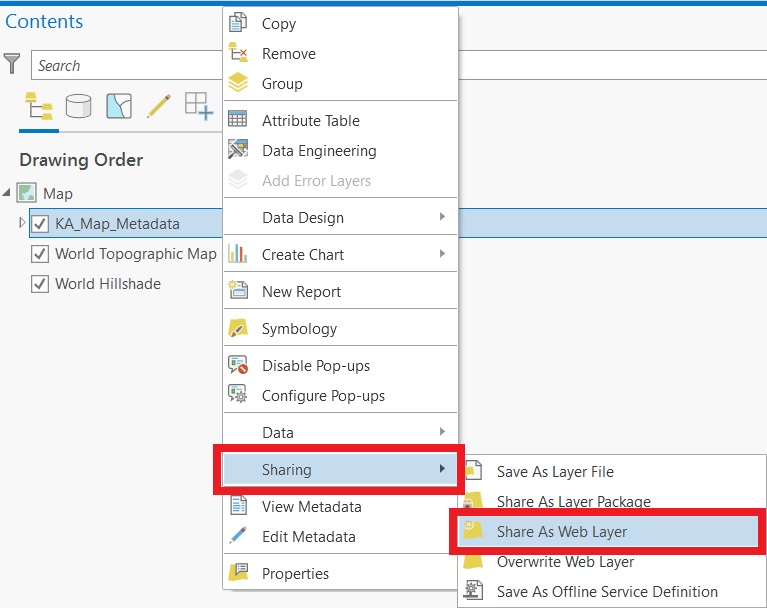
- The Item Details section is auto-populated. Click Publish to share the layer as a web layer.
Article ID:000027406
- ArcGIS Pro
- ArcMap
- ArcGIS Online
Receive notifications and find solutions for new or common issues
Get summarized answers and video solutions from our new AI chatbot.


Related Information
Discover more on this topic
Search for related information
Find training related to this topic
Explore ideas and give feedback
Get help from ArcGIS experts
Download the Esri Support App