操作方法
操作方法:共享 ArcGIS Pro 工具箱
摘要
In ArcGIS Pro, created new custom toolboxes can be shared with others. This article describes the steps to share an ArcGIS Pro toolbox.
过程
- In ArcGIS Pro, navigate to the Catalog pane.
- Under the Toolboxes node, hover over the toolbox to display its storage location.

- Note the storage location of the toolbox, save the project, and close ArcGIS Pro.
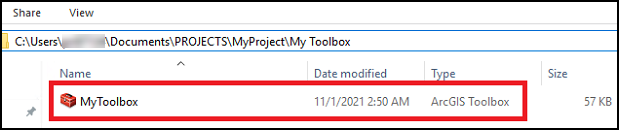
- On the machine, navigate to the storage location of the toolbox. In this example, the toolbox is in the following location:
C:\Users\<username>\Documents\PROJECTS\MyProject\My Toolbox
- Right-click the toolbox, hover over Send to, and select Compressed (zipped) folder.
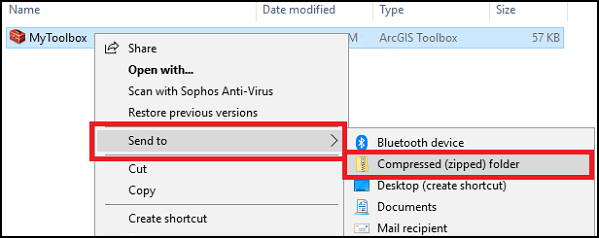
- Type a name for the zipped folder, or accept the default name, and press Enter on the keyboard. The image below shows that a shareable zipped folder containing the toolbox is created.

- Share the folder via Google Drive, Dropbox, Microsoft Outlook, Microsoft Exchange, or other methods.
文章 ID:000026749
从 ArcGIS 专家处获得帮助
下载 Esri 支持应用程序
相关信息
发现关于本主题的更多内容
Search for related information
Find training related to this topic
Explore ideas and give feedback