操作方法
操作方法:在 ArcGIS Pro 中进行编辑时同时移动点要素和线要素
摘要
In ArcGIS Pro, it is possible to move a feature by selecting and and dragging it using the Move tool. In some cases, when editing in ArcGIS Pro, it is necessary to move point and line features together. This article describes the workflow to do so using the Move tool.
过程
- Open the ArcGIS Pro project.
- Turn snapping on. Refer to ArcGIS Pro: Turn snapping on or off for steps to do so.
- On the top ribbon, click the Map tab, and in the Selection group, click Select.

- On the map, select the desired point feature intersecting the line feature. To select multiple point features, press Shift, and select multiple point features.
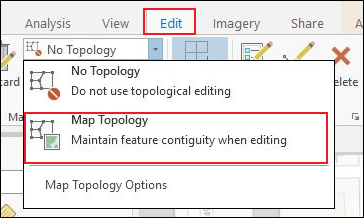
- On the top ribbon, click the Edit tab. In the Manage Edits group, select Map Topology.
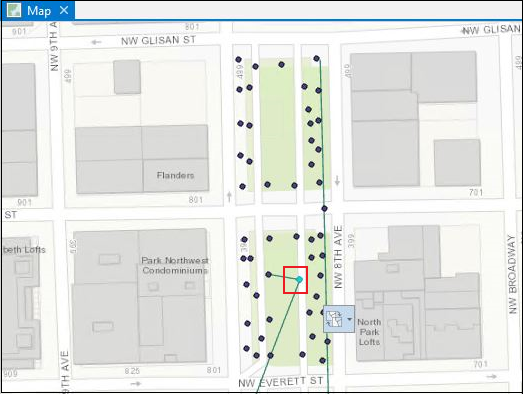
- On the Edit tab, in the Tools group, click Move. In the Modify Features pane, Move is selected. The selected point feature turns yellow when the Move tool is activated.

- On the map, select and drag the point feature to the desired location. The line feature is moved along with the point feature. Double-click the moved point, or press F2.

- On the top ribbon, on the Edit tab, click Save.
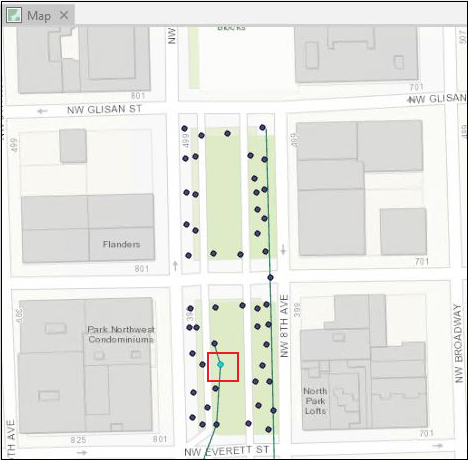
The image below shows the point and line features moved to a new location.
文章 ID: 000026031
获得人工智能支持
使用 Esri Support AI Chatbot 快速解决您的问题。


相关信息
发现关于本主题的更多内容
Search for related information
Find training related to this topic
Explore ideas and give feedback
获取来自 ArcGIS 专家的帮助
立即开始聊天