操作方法
操作方法:在 ArcGIS Online Map Viewer 中创建临时圆形
摘要
In some instances, a temporary circle needs to be created in ArcGIS Online Map Viewer for reference and analysis purposes. This article describes how to create a temporary circle with a specific radius length by creating a map notes layer in Map Viewer, instead of using the Create Buffers tool that requires privileges to creature features and perform spatial analysis.
过程
- In ArcGIS Online, open the desired hosted feature layer in Map Viewer.
- At the top-left corner, click Add > Add Map Notes.
- In the Add Map Notes dialog box, type a name for Name, and select Map Notes for Template. Click CREATE.
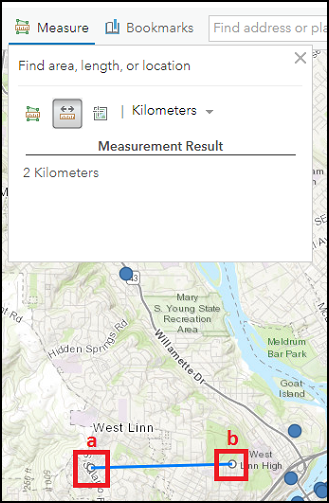
- On the ribbon, click Measure. Click the Distance tool
 , and select the unit of measurement from the drop-down list.
 - Construct a radius line.
- Click a point of interest on the map.
- Drag the line, and double-click to create an endpoint at the desired radius length. In this example, the radius length is two kilometers.
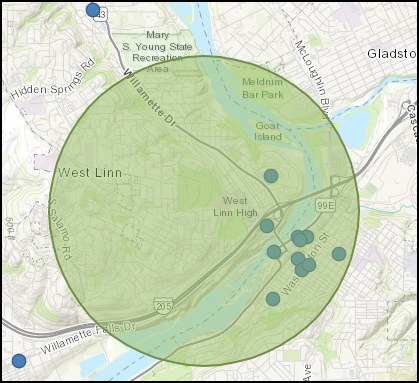
- Create a circle based on the constructed radius line.
- Click Circle in the Add Features pane.
- Click one of the line endpoints, drag until the circle’s edge touches the other endpoint, and release the cursor.
- Accept the default values in the Areas dialog box, or refer to Step 5 and 6 in ArcGIS Online: Add map notes on completing the fields.
- Click CLOSE.
In this example, a circle with a diameter of four kilometers is created around West Linn High as a reference for a housing development project.
Note:
A circle’s diameter is twice the circle’s radius. The color of the circle may differ from the image shown below.
- Click the Close button
 on the top-right corner of the Measure window.
 - Optionally, refer to ArcGIS Online: Save maps for the guide on saving the map, or save the map notes layer as a feature collection item in My Content.
Note:
By default, the features in a map notes layer are saved with the map to allow the map author to edit, and save the edits.
文章 ID: 000024267
获得人工智能支持
使用 Esri Support AI Chatbot 快速解决您的问题。


相关信息
发现关于本主题的更多内容
Search for related information
Find training related to this topic
Explore ideas and give feedback
获取来自 ArcGIS 专家的帮助
立即开始聊天