操作方法
操作方法:在 ArcGIS Pro 中为符号类添加自定义比例范围
摘要
When authoring a multiscale map in ArcGIS Pro, refining the visible scale ranges for symbol classes is a crucial step to limit the amount of detailed data drawing at different scales without having to separate or duplicate data in multiple layers.
By default, a list of factory default scales is displayed, and it is not an option to set custom scale ranges for symbol classes in the Symbology pane. However, this can be done by adding a custom scale range in the map scale list.
This article describes how to add a custom scale range for symbol classes in ArcGIS Pro.
过程
- Open an ArcGIS Pro project.
- At the bottom of the map, click the drop-down arrow of the scale bar, and select Customize….
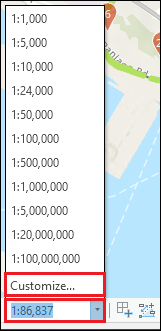
- In the Scale Properties window, on the Standard Scales tab, type the desired scale in the box above Scale.
- Click Add > OK. In this example, a new scale of 1:500 is added to the map scale list.

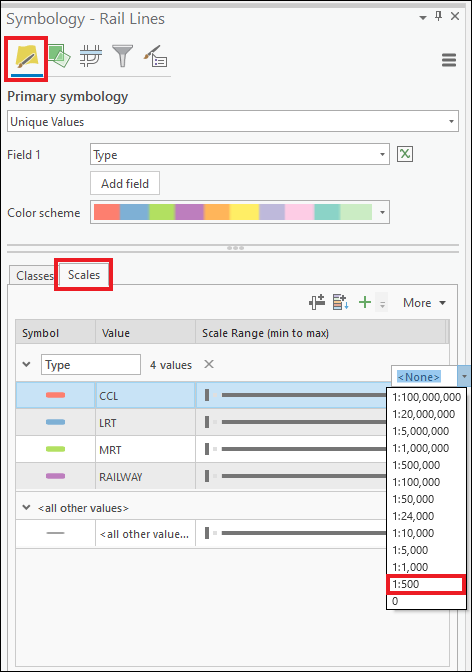
- In the Contents pane, browse to and right-click the layer, and select Symbology. The Symbology pane opens.
- In the Symbology - <Layer_name> pane, on the Primary symbology tab, click Scales.
- Click the stop of the slider, and click the drop-down arrow to select the custom scale range.
文章 ID: 000024950
获得人工智能支持
使用 Esri Support AI Chatbot 快速解决您的问题。


相关信息
发现关于本主题的更多内容
Search for related information
Find training related to this topic
Explore ideas and give feedback
获取来自 ArcGIS 专家的帮助
立即开始聊天