PROCÉDURE
partager une boîte à outils ArcGIS Pro
Résumé
In ArcGIS Pro, created new custom toolboxes can be shared with others. This article describes the steps to share an ArcGIS Pro toolbox.
Procédure
- In ArcGIS Pro, navigate to the Catalog pane.
- Under the Toolboxes node, hover over the toolbox to display its storage location.

- Note the storage location of the toolbox, save the project, and close ArcGIS Pro.
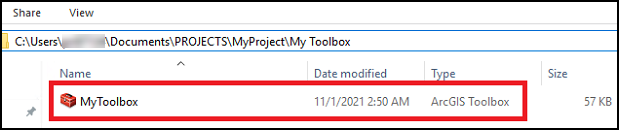
- On the machine, navigate to the storage location of the toolbox. In this example, the toolbox is in the following location:
C:\Users\<username>\Documents\PROJECTS\MyProject\My Toolbox
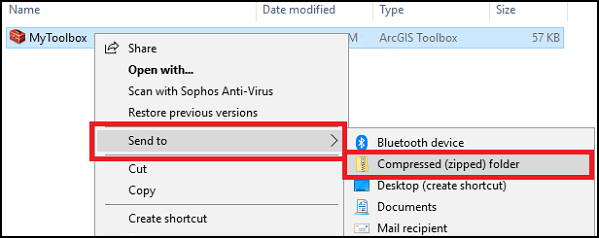
- Right-click the toolbox, hover over Send to, and select Compressed (zipped) folder.
- Type a name for the zipped folder, or accept the default name, and press Enter on the keyboard. The image below shows that a shareable zipped folder containing the toolbox is created.

- Share the folder via Google Drive, Dropbox, Microsoft Outlook, Microsoft Exchange, or other methods.
ID d’article:000026749
Obtenir de l’aide auprès des experts ArcGIS
Télécharger l’application Esri Support
Informations associées
En savoir plus sur ce sujet
Search for related information
Find training related to this topic
Explore ideas and give feedback