PROCÉDURE
ajouter une plage d’échelle personnalisée pour des classes de symboles dans ArcGIS Pro
Résumé
When authoring a multiscale map in ArcGIS Pro, refining the visible scale ranges for symbol classes is a crucial step to limit the amount of detailed data drawing at different scales without having to separate or duplicate data in multiple layers.
By default, a list of factory default scales is displayed, and it is not an option to set custom scale ranges for symbol classes in the Symbology pane. However, this can be done by adding a custom scale range in the map scale list.
This article describes how to add a custom scale range for symbol classes in ArcGIS Pro.
Procédure
- Open an ArcGIS Pro project.
- At the bottom of the map, click the drop-down arrow of the scale bar, and select Customize….
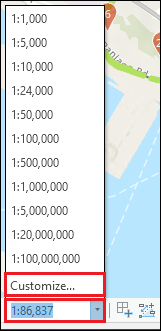
- In the Scale Properties window, on the Standard Scales tab, type the desired scale in the box above Scale.
- Click Add > OK. In this example, a new scale of 1:500 is added to the map scale list.

- In the Contents pane, browse to and right-click the layer, and select Symbology. The Symbology pane opens.
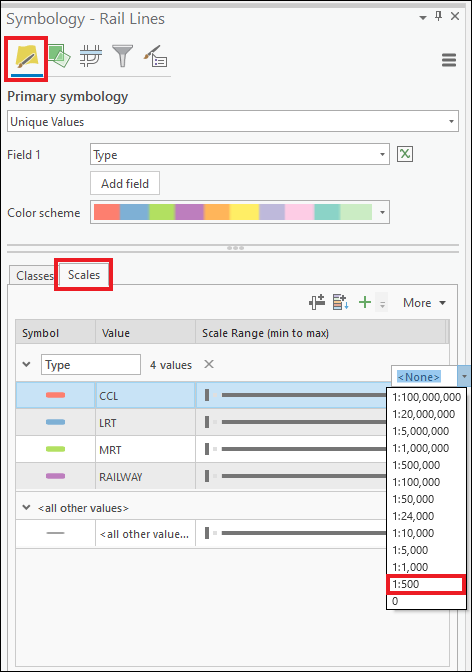
- In the Symbology - <Layer_name> pane, on the Primary symbology tab, click Scales.
- Click the stop of the slider, and click the drop-down arrow to select the custom scale range.
ID d’article: 000024950
Obtenez de l'aide avec l'IA
Résolvez rapidement votre problème avec le chatbot Esri Support AI.


Informations associées
En savoir plus sur ce sujet
Search for related information
Find training related to this topic
Explore ideas and give feedback
Obtenir de l’aide auprès des experts ArcGIS
Commencez à discuter maintenant