CÓMO
Aplicar la misma simbología a varios rásteres en ArcGIS Pro
Resumen
In ArcGIS Pro, the Apply Symbology From Layer tool is used to apply symbology from a layer or a layer file to a raster. To apply the same symbology to multiple rasters, run the tool in batch mode or apply the classified symbology from a layer file to multiple rasters.
Procedimiento
Use one of the following options to apply the same symbology to multiple rasters in ArcGIS Pro.
Run the Apply Symbology From Layer tool in Batch mode
Note:
Recommended if there is an existing raster with the desired symbology.
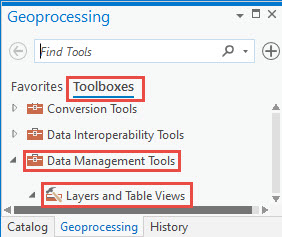
- In ArcGIS Pro, click View > Geoprocessing.

- In the Geoprocessing pane, under Toolboxes, click Data Management Tools > Layers and Table Views.
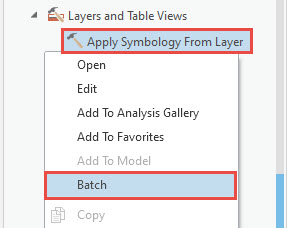
- Right-click Apply Symbology From Layer and select Batch.
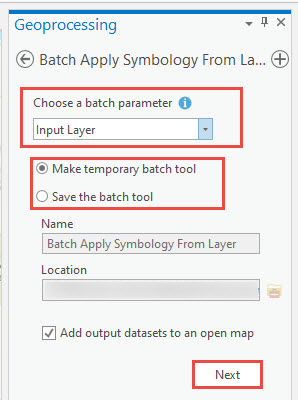
- In the Batch Apply Symbology From Layer pane, do the following:
- Click the Choose a batch parameter drop-down list, select Input Layer, and click Next.
Note:
Select either Make temporary batch tool or Save the batch tool to save the tool permanently.
- Click the Batch Input Layer drop-down list, and select the desired input rasters in which the symbology of the main raster is applied.
- Click the Symbology Layer drop-down list, and select the main raster with the highest maximum and the lowest minimum values to be applied to the input rasters.
- Click the Update Symbology Ranges by Data drop-down list, and select Maintain ranges.
- Click Run to execute the tool.
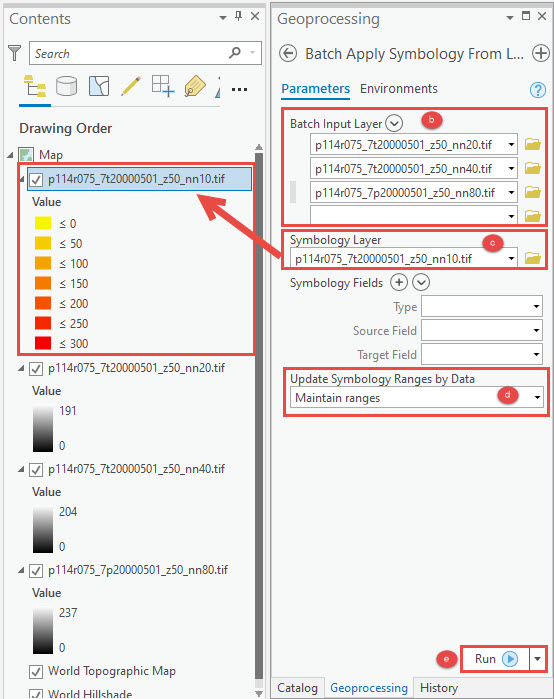
The image below shows all the rasters with the same symbology as the main raster.

Apply the classified symbology from a layer file to multiple rasters
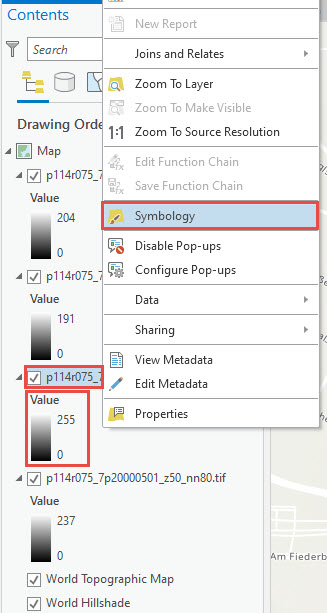
- In the Contents pane, select the raster with the highest maximum and lowest minimum values.
- Right-click the raster from Step 1, and select Symbology.
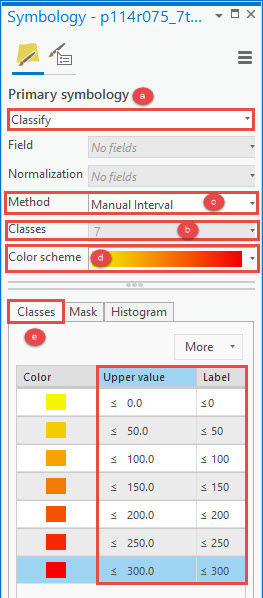
- In the Symbology pane, do the following:
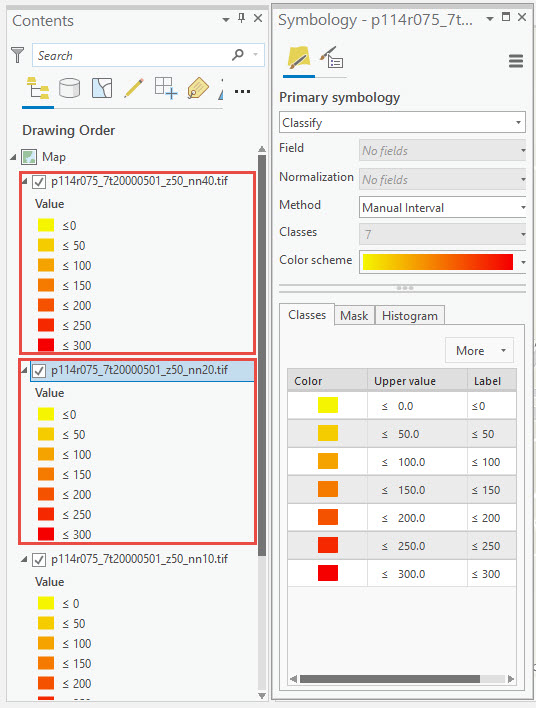
- For Primary symbology, select Classify.
- Click the Classes drop-down list, and set the number of classes.
- Click the Method drop-down list, and select Manual Interval.
- Click the Color Scheme drop-down list, and select the desired color range.
- On the Classes tab, change the values for Upper value and Label to the desired values, and exit the pane.
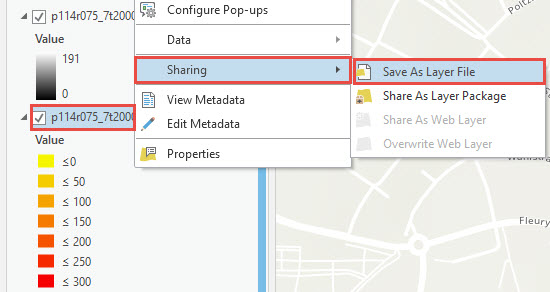
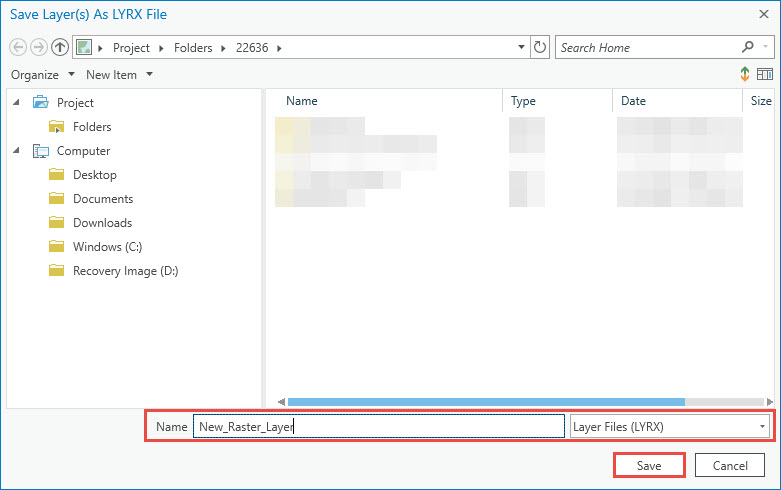
- Right click the raster again, click Sharing > Save As Layer File, and save the file in a desired file folder.
Note:
The file has a .lyr extension. Note the location of the layer file.
- For all the other rasters, right-click and select Symbology.
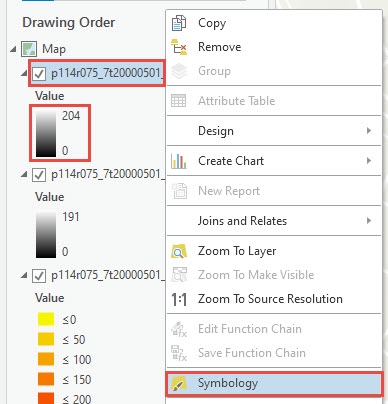
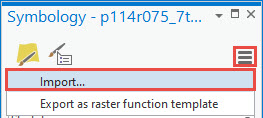
- In the Symbology pane, click the
 icon, and select Import.
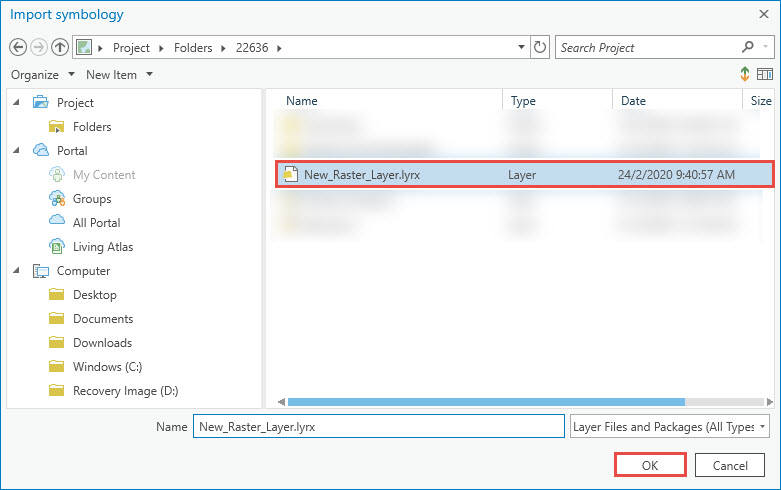
- In the Import symbology pane, locate the raster layer file from Step 4, and click OK.
The image below shows all the rasters with the same symbology as the main raster.
Id. de artículo:000022636
Obtener ayuda de expertos en ArcGIS
Descargar la aplicación de soporte de Esri
Información relacionada
Descubrir más sobre este tema
Search for related information
Find training related to this topic
Explore ideas and give feedback