Frequently asked question
Is it possible to export a sketch layer in ArcGIS Online?
No, there is no option to export a sketch layer in ArcGIS Online and this is a known limitation. However, there are two workarounds.
Create a new feature layer to trace over the sketch layer and export the feature layer
- In ArcGIS Online, navigate to Content > My Content > New item > Feature layer to create a new feature layer.
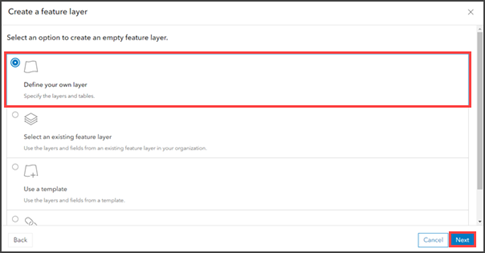
- In the Create a feature layer window, click Define your own layer > Next.
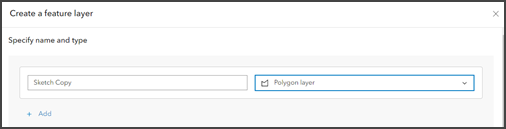
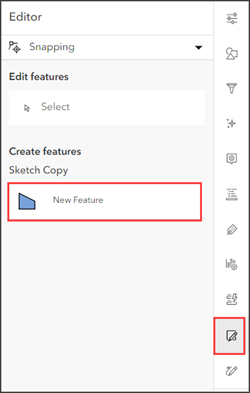
- Specify a name for the layer and select the type of feature. In this example, the feature layer is named ‘Sketch Copy’, and Polygon layer is selected.
- Click Next and provide additional information in the New item window, if necessary.
- Click Next. The new hosted feature layer opens to the Overview tab on the layer’s item page.

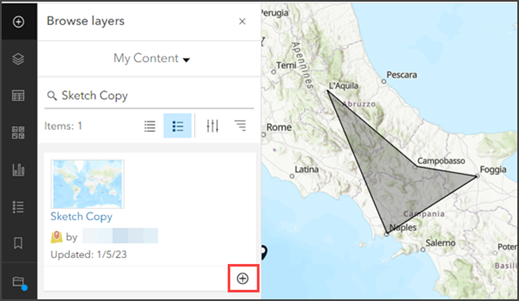
- Open the web map with the sketch layer and click Add > Browse layers.
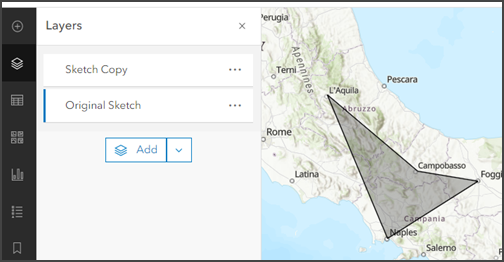
- Search for the newly created feature layer and click Add to add the layer to the map. In this example, the Sketch Copy layer is added to the map with the Original Sketch layer.
- On the Settings (light) toolbar, click Edit > New Feature.
- Click the map and trace over the sketch. In this example, the vertices of the sketch layer are traced to recreate the shape.
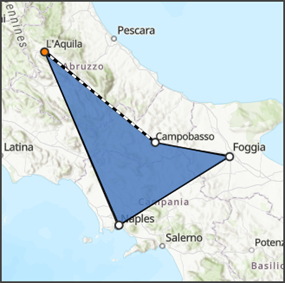
Note:
Enable snapping in Snapping Settings and select the initial sketch layer for a more precise drawing.
- Press Enter to finish drawing the feature.
- Click Create once the feature is drawn.
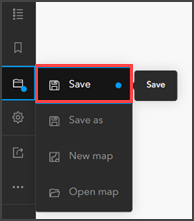
- Click Save on the Contents toolbar.
- Navigate to the ArcGIS Online My Content tab and open the new feature layer’s Overview tab on the layer’s item page.
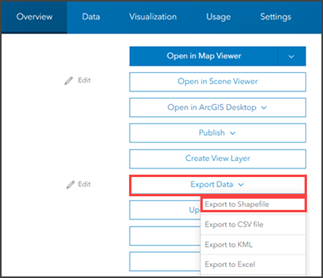
- Click Export Data and select the export file form. In this example, Export to Shapefile is selected.
- Specify any relevant information in the export pop-up window and click Export. ArcGIS Online creates the item file in the root folder of My Content.
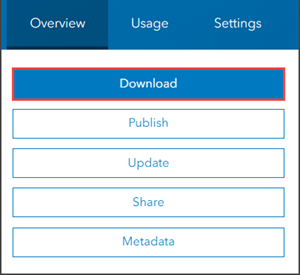
- Once the item is created, click Download to download the file.
Export the web map to ArcGIS Pro to convert the sketch layer using the Feature Class to Polygon tool and publish the layer to ArcGIS Online
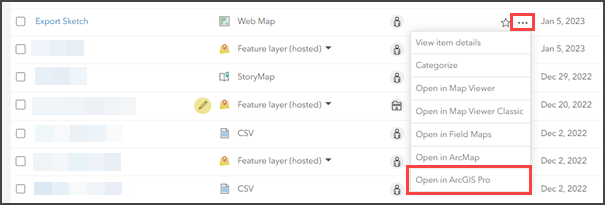
- In ArcGIS Online, navigate to the web map through the My Content tab. Click More options and click Open in ArcGIS Pro. The web map is downloaded to the desktop as an ArcGIS Pro Portal Item (item.pitemx) file.
- Double-click the item.pitemx file to open the file in ArcGIS Pro.
Note:
Refer to ArcGIS Pro: Add a web map or web scene for an alternative method to open the web map in ArcGIS Pro.
- On the ArcGIS Pro ribbon, click Analysis > Tools to open the Geoprocessing pane.
- In the Geoprocessing pane, search for and select the Feature to Polygon tool.
Note:
Depending on the sketch layer type, select the Feature to Point or Feature to Line tool. Refer to ArcGIS Pro: An overview of the Features toolset for more information on these feature transformation tools.
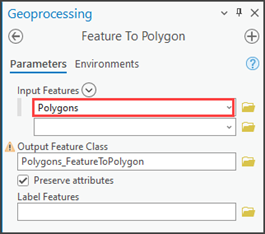
- On the Feature to Polygon Parameters tab, select the sketch layer for the Input Features parameter. In this example, Polygons is selected.
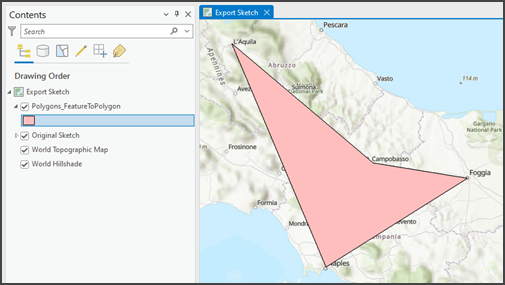
- Click Run. The generated output is a new polygon layer above the sketch layer. In this example, the Polygons_FeatureToPolygon layer is generated.
- Refer to ArcGIS Pro: Share a web feature layer to publish the newly created layer to ArcGIS Online as a hosted feature layer.
- In ArcGIS Online, navigate to the published feature layer in My Content and open the Overview tab on the layer’s item page.
- Click Export Data and select the export file form. In this example, Export to Shapefile is selected.

- Specify any relevant information in the export pop-up window and click Export. ArcGIS Online creates the item file in the root folder of My Content.
- Once the item is created, click Download to download the file.

Article ID: 000029177
Software:
- ArcGIS Online
- ArcGIS Pro 3 0
- ArcGIS Pro 2 8 x
- ArcGIS Pro 2 x
Get support with AI
Resolve your issue quickly with the Esri Support AI Chatbot.


Related Information
Discover more on this topic
Search for related information
Find training related to this topic
Explore ideas and give feedback
Get help from ArcGIS experts
Start chatting now