HOW TO
Add tile layers to an ArcGIS Pro project using ArcGIS API for Python
Summary
Adding tile layers to an ArcGIS Pro project is time-consuming if there are many tile layers, as the process requires multiple uses of the Add Data process in ArcGIS Pro. This article provides a workflow to add tile layers to an ArcGIS Pro project using ArcGIS API for Python.
Procedure
- Open the ArcGIS Pro project.
- On the Insert tab, in the Project group, click New Notebook.
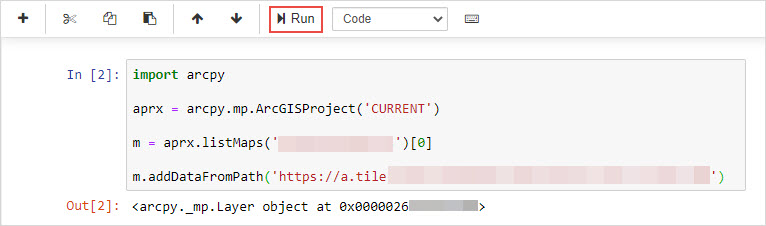
- On the New Notebook tab, copy and paste the following script into the cell.
- Import the necessary modules.
import arcpy
- Specify the project file to store the tile layer.
aprx=arcpy.mp.ArcGISProject('CURRENT')
- List the map layer from the project file. Replace LAYERNAME with the name of the map layer.
m=aprx.listMaps('LAYERNAME')[0]
- Add the tile layer to the map layer. Replace URL_1 with the URL for the tile layer.
m.addDataFromPath('URL_1')
- Click Run.
The code block below presents the full script used to add a tile layer to the map in ArcGIS Pro.
import arcpy
aprx = arcpy.mp.ArcGISProject('CURRENT')
m = aprx.listMaps('Layer_Name')[0]
m.addDataFromPath('https://a.tile.test123.org/cycle/{level}/{col}/{row}.png')
Note:
Repeat Steps 3d and 4 with subsequent tile layer URLs to add the additional layers to the project.
Article ID: 000029157
- ArcGIS API for Python
- ArcGIS Pro 3 0
- ArcGIS Pro 2 8 x
- ArcGIS Pro 2 7 x
- ArcGIS Pro 2 x
Get support with AI
Resolve your issue quickly with the Esri Support AI Chatbot.


Related Information
Discover more on this topic
Search for related information
Find training related to this topic
Explore ideas and give feedback
Get help from ArcGIS experts
Start chatting now