HOW TO
Export to GeoTIFF with ArcGIS Pro
Summary
A GeoTIFF consists of a TIFF image accompanied by a world file (.tfw) that contains georeferencing information to locate the raster in the appropriate position. The steps described in this article explain two methods to export a raster, map, or layout to a GeoTIFF format with ArcGIS Pro.
Procedure
Using the Export Tool
This method is valid when exporting an existing raster that can be already displayed on the map, and thus is currently georeferenced. Taking that into account, the output raster with a TFW will be automatically generated with the raster, which both compose the GeoTIFF file.
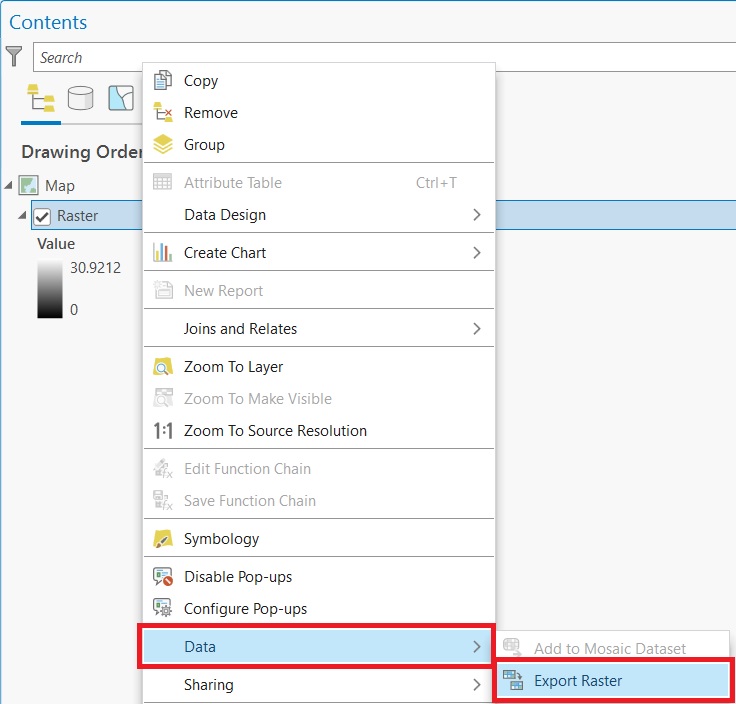
- Right-click the raster from the Contents pane.
- Point to Data > Export Raster.
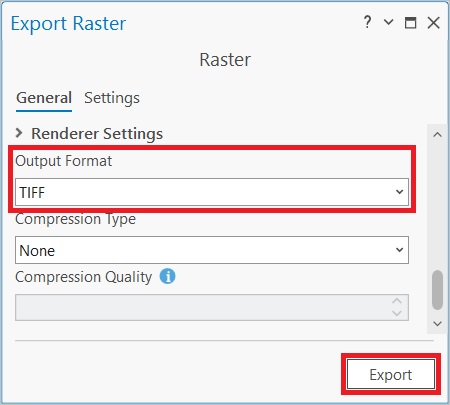
- In the Export Raster pane, populate the options with the parameters desired, ensure Output Format is set in TIFF.
- If needed, in the Coordinate System option, this can be changed and the raster is automatically re-projected.
- Click Export.
Using the Export Map/Layout tool
If it is necessary to share a map or layout as a GeoTIFF file, this method will be useful.
- From the ArcGIS Pro ribbon, click the Share tab.
- In the Output group, click Export Map or Export Layout, depending on the active view.

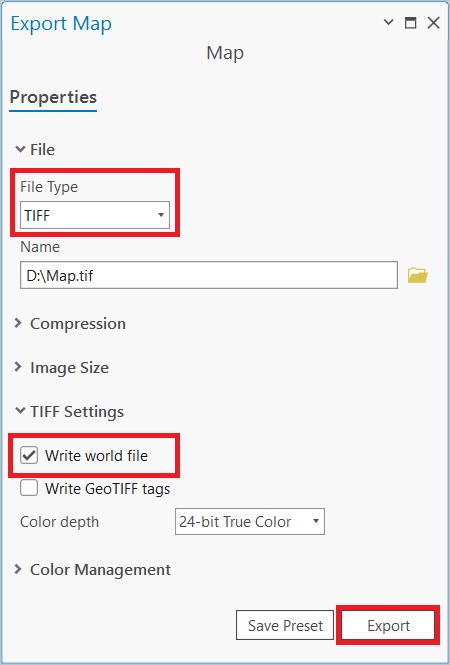
- In the opened pane, populate the options with the parameters desired, ensure File Type is set as TIFF.
- Expand TIFF Settings and ensure the Write world file option is checked.
- Click Export.
Article ID: 000028392
- ArcGIS Pro
Get support with AI
Resolve your issue quickly with the Esri Support AI Chatbot.


Related Information
Discover more on this topic
Search for related information
Find training related to this topic
Explore ideas and give feedback
Get help from ArcGIS experts
Start chatting now