HOW TO
Edit the description of custom geographic boundaries in ArcGIS Business Analyst using ArcGIS Online
Summary
In ArcGIS Business Analyst, geographic boundaries can be selected to create a site to represent areas of interest. The description of the geographic boundary can be viewed on the pop-up by clicking on the boundary.
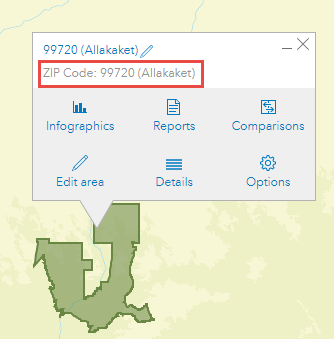
By default, once the geographic boundaries are selected and added to the map, the description of these boundaries are labelled according to the geographic boundary type from the list in the ‘Select From Map’ option. However, in ArcGIS Business Analyst, there is no option to edit the description of the geographic boundaries. In this example, the image below shows the ZIP Code is used by default as the description for the selected geographic boundary.
This article describes how to edit the description of custom geographic boundaries in ArcGIS Business Analyst using ArcGIS Online.
Procedure
- Open the ArcGIS Business Analyst project.
- Select the geographic boundary to create a site. Refer to ArcGIS Business Analyst: Create sites for instructions.
- Export the map layers to a new hosted feature layer to ArcGIS Online from ArcGIS Business Analyst. Refer to ArcGIS Business Analyst: Share web maps and layers for instructions.
Note:
The content is saved to ArcGIS Online as a web map and a hosted feature layer.
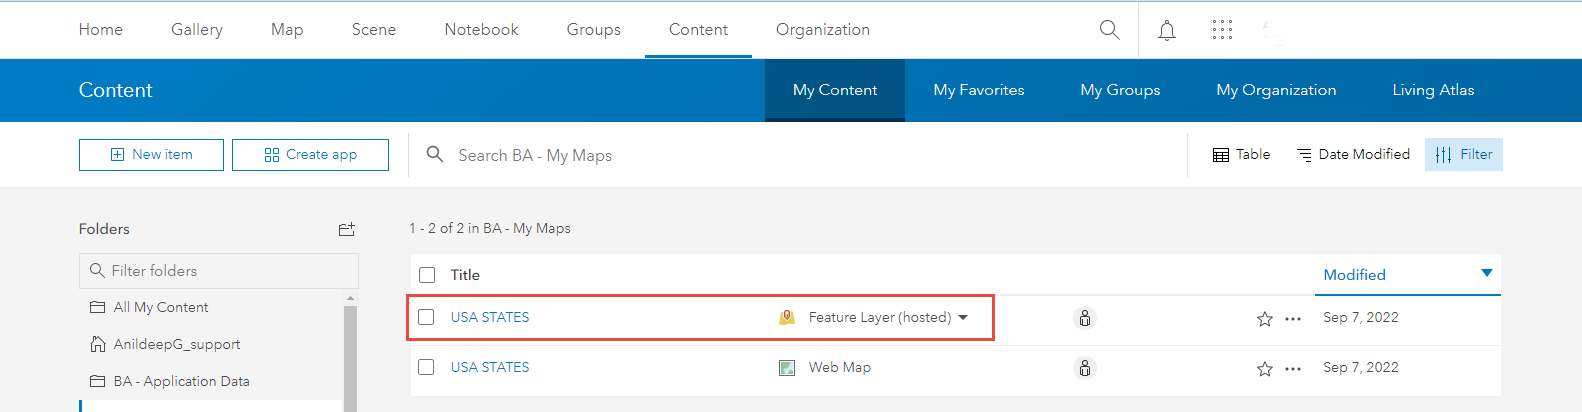
- Log in to ArcGIS Online and navigate to the Content tab.
- In My Content, click the newly exported hosted feature layer.
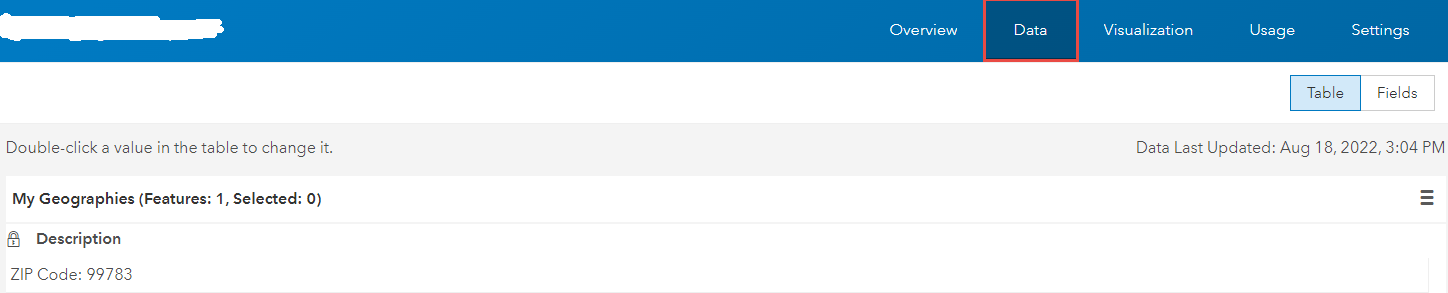
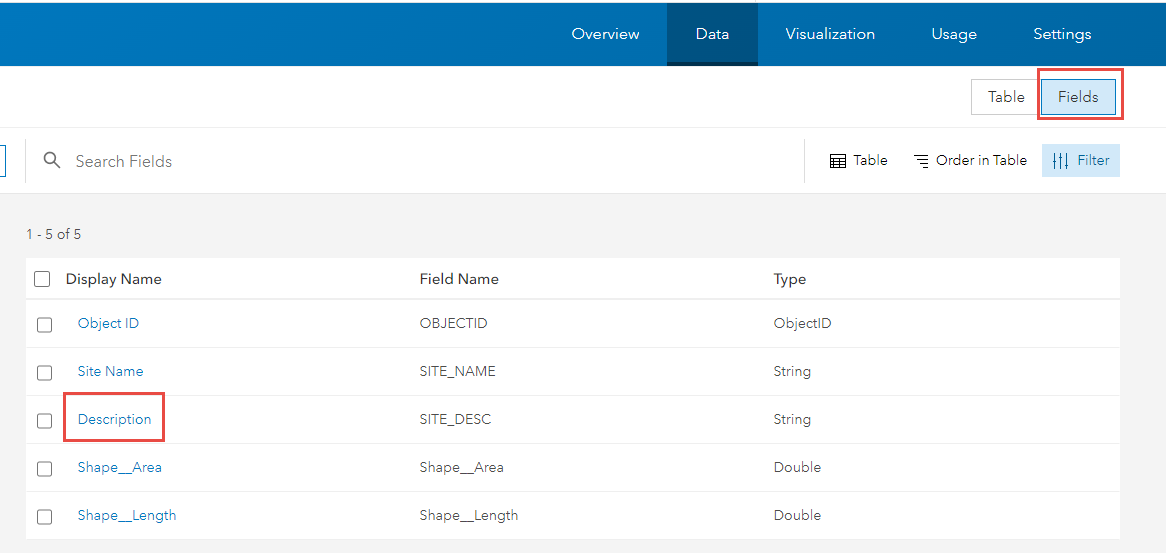
- Click the Data tab.
- Click Fields and click Description under the Display Name column.
- Under Settings, for the Editable parameter, click Edit
 .
. - Check the Allow attribute editing check box and click Save.
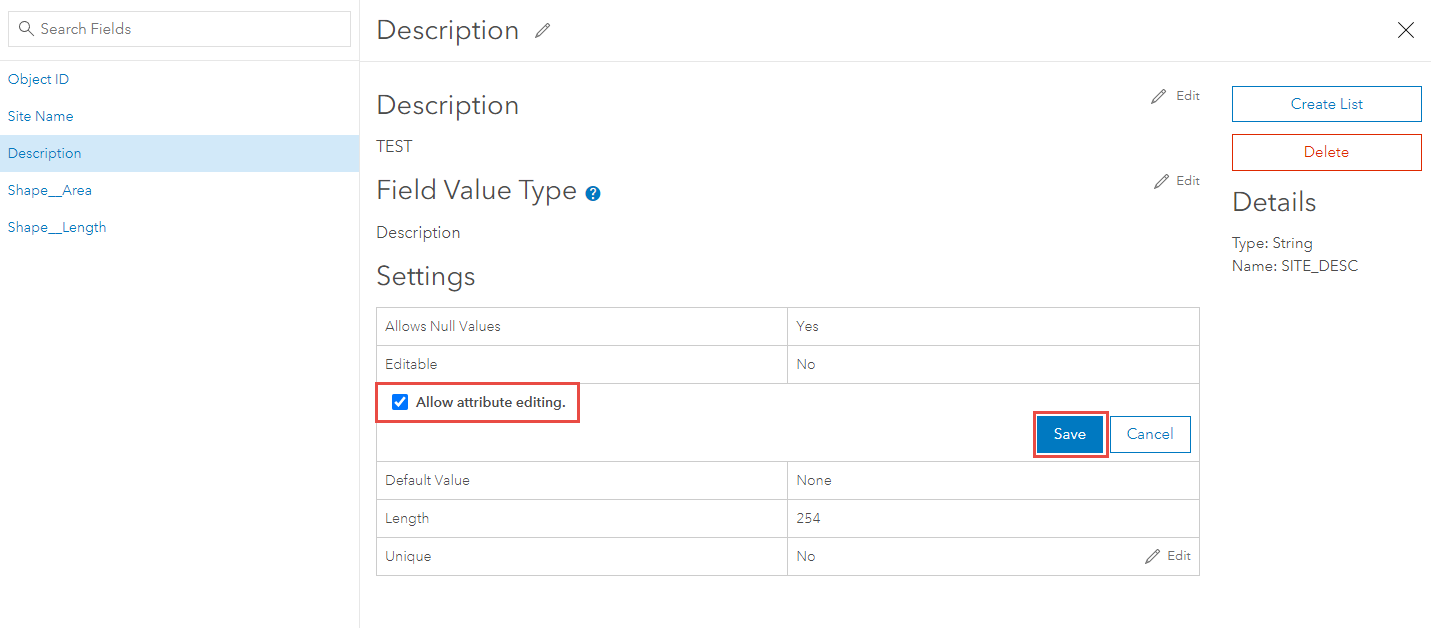
- Click Table and double-click the Description field value to edit it. The edits are saved automatically.

- In ArcGIS Business Analyst, add the web map to the project. Refer to ArcGIS Business Analyst: Add web maps and layers for instructions.
Note:
In the project pane, uncheck all unused layers to allow the new web map's pop-up to display in the map.
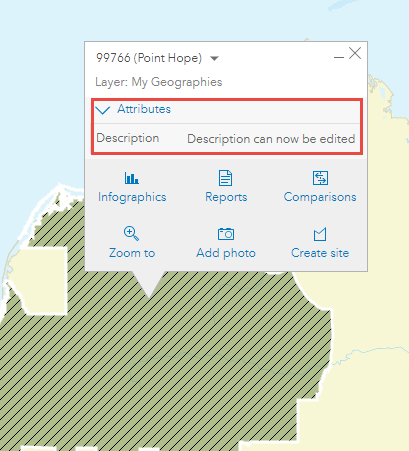
The edited description of the geographic boundary can be viewed on the pop-up under Attributes after clicking on the boundary as shown in the image below.
Article ID: 000028240
- ArcGIS Online
- ArcGIS Business Analyst Web App
Receive notifications and find solutions for new or common issues
Get summarized answers and video solutions from our new AI chatbot.


Related Information
Discover more on this topic
Search for related information
Find training related to this topic
Explore ideas and give feedback
Get help from ArcGIS experts
Download the Esri Support App