HOW TO
Create two ring symbologies surrounding point features in ArcGIS Pro
Summary
In ArcGIS Pro, buffer polygons can be created using the Buffer tool to generate an area of effect surrounding a point feature for analysis. However, the Buffer tool creates an additional polygon feature layer on the map. In a scenario where additional features are not required, the ring symbology can be used to create an area of effect surrounding a point feature. This article describes the workflow to symbolize point features with two rings. The symbology emulates the effect of the Buffer tool while maintaining a single point feature layer on the map.
Procedure
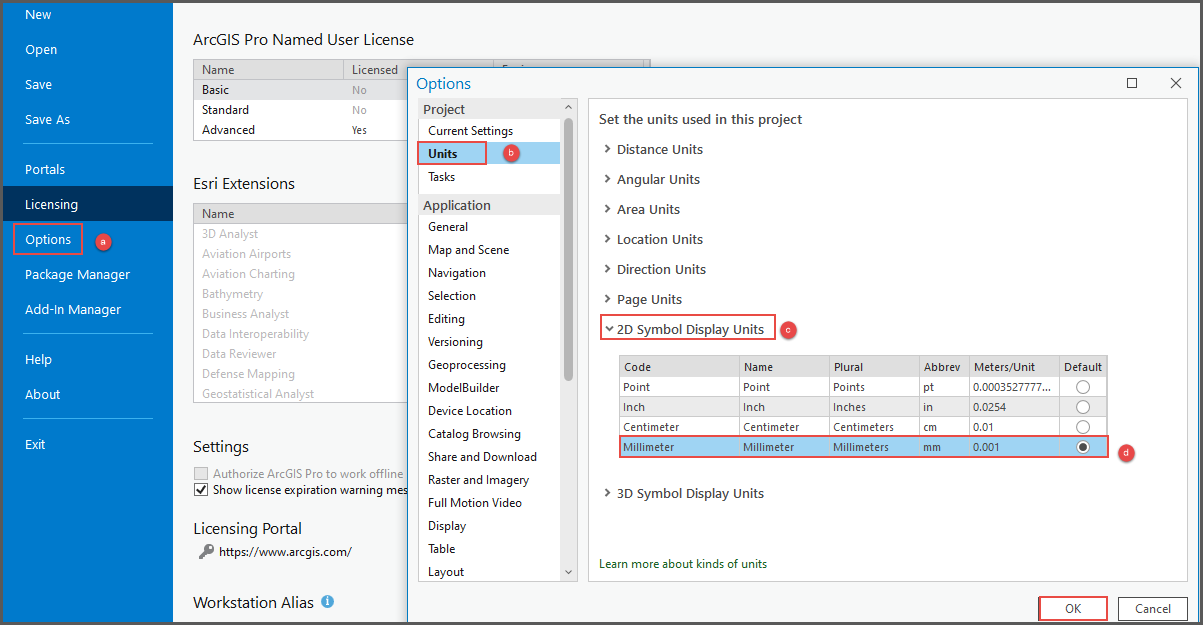
- Change the project’s units to millimeter in ArcGIS Pro.
- In ArcGIS Pro, navigate to Project and click Options.
- In the Options window, click Units.
- Select and expand 2D Symbol Display Units.
- Check the Millimeter option. Click OK.
- Create the first ring symbology surrounding the point features.
- In the Contents pane, double-click the symbol of the layer to expand the Symbology pane.
- In the Symbology pane, under Properties, click Layers
 .
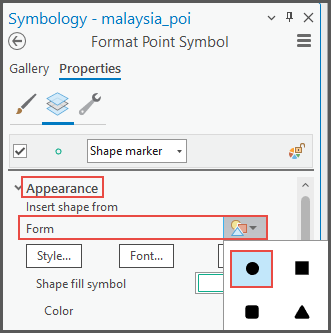
. - Under Layers, expand Appearance.
- Under Appearance, click Form
 and select the filled circle.
- Click the Shape fill symbol drop-down button, under Polygon symbols, select Outline only (0.1 pt).
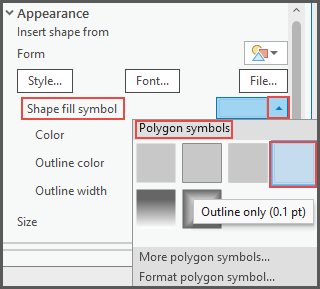
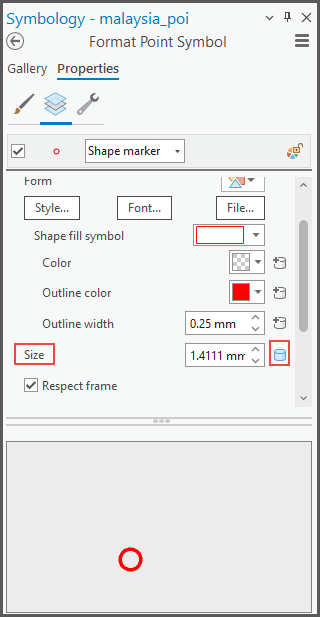
- Select an outline color and set an appropriate value for Outline width. This workflow uses 0.25mm as an example.
- In the Symbology pane, click the Menu icon
 and click Allow symbol property connections.
 - Under Appearance > Size, click the No attribute mapping defined icon
 .
.
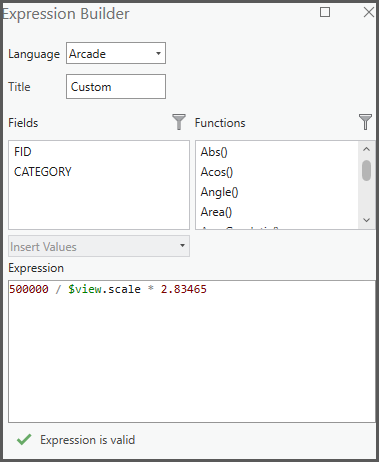
- In the Set Attribute Mapping window, click the Set an expression icon
 to expand the Expression Builder pane.
 - In the Expression Builder pane, in the Expression text box, enter the following expression. In this example, the circle size used is 500,000 mm. Click OK.
<circle size in mm> / $view.scale * 2.83465
- Create a duplicate of the ring symbology created in Step 2 and resize it.
- In the Symbology pane, under Properties, click the Structure icon
 .
. - Under Layers, click the Duplicate layer icon
 to duplicate the symbol layer.
 - In the Symbology pane, under Properties, click Layers.
- Change the duplicated layer’s size expression. Repeat steps 2(i) and 2(j).
- In the Expression Builder pane, in the Expression text box, enter the following expression. In this example, the circle size used is 1,000,000 mm. Click OK.
- In the Symbology pane, under Properties, click the Structure icon
1000000 / $view.scale * 2.83465
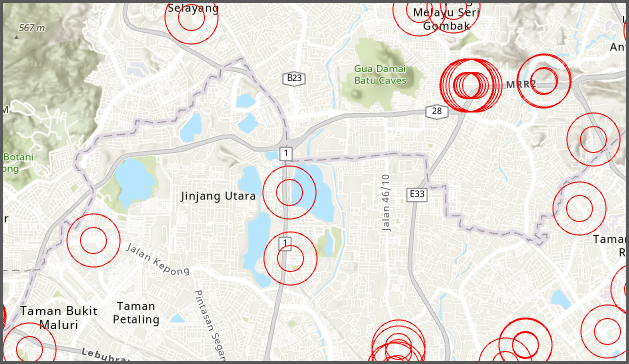
- In the Symbology pane, click Apply.
The following image shows the two rings created on each point feature.
Article ID: 000028118
- ArcGIS Pro 3 0
- ArcGIS Pro 2 8 x
- ArcGIS Pro 2 x
Get support with AI
Resolve your issue quickly with the Esri Support AI Chatbot.


Related Information
Discover more on this topic
Search for related information
Find training related to this topic
Explore ideas and give feedback
Get help from ArcGIS experts
Start chatting now